This error appears when users try to install an in-place upgrade or a complete reinstall of Windows 10 on their respective computers. The error usually appears somewhere in the middle of the installation and there are usually no clues as to what might have caused it.

There are generally no error codes to point out the cause but users have come up with different ways of resolving the problem on their own. Make sure you follow the methods we have prepared for you to try out in order to successfully resolve the problem.
What Causes Windows 10 Installation to Fail?
We have prepared several most common causes of this problem. Identifying the correct cause for the problem is one of the most important steps during the troubleshooting process. Check it out before proceeding below with the methods:
- Some files are sometimes copied twice during the installation because of a bug in Windows Media Creator. The problem can be resolved by removing ‘read-only’ and ‘system’ properties of a folder.
- A file might have an improper extension and you should try changing it in order to resolve the problem.
- Issues with Boot Manager may cause the problem so try resetting it.
- A service or a program may cause the problem to appear. Try booting in clean boot and running the installation
Solution 1: Clear Certain Attributes of the Installation Folder
In certain cases, the Windows 10 installer tries to overwrite (copy) the installation files in a folder named $WINDOWS.~BT in your local disk. Some users have said that it may occur because the installer tries to copy the files two times in succession but fails to do so and reports the error. Follow the steps below in order to try to resolve the problem.
- Start the Windows 10 installation as usual and navigate to the last screen, just before you are going to start the installation. The screen should say just what will be installed and what settings you have chosen to use.

- Minimize the installer and open File Explorer by opening a folder and navigating to Local Disk C. Try to locate a folder named $WINDOWS.~BT in the root folder of the Local Disk.
- If you are unable to see the $WINDOWS.~BT folder, you may need to turn on the option which enables you to view hidden files and folders. Click on the “View” tab on File Explorer’s menu and click on the “Hidden items” checkbox in the Show/hide section.

- Right-click on the problematic folder and click the Properties option from the context menu. Stay in the General tab and locate the Attributes section at the bottom. Clear the box next to the Read-only and System options and click on Apply before exiting. Check to see if the problem still appears when re-running the installation.
Solution 2: Rename an Installation File
It appears that there is a bug regarding the Windows Media Creation Tool which renamed the file different as to it should be named. The error appears when trying to install to a DVD because a file is named ‘install.esd’ as opposed to ‘install.wim’ which will cause the installation to go smoothly. Your job is to rename the file to ‘install.wim’ which should resolve the problem quite easily and prevent it from being copied twice.
- Start the Windows 10 installation as usual and navigate to the last screen, just before you are going to start the installation. The screen should say just what will be installed and what settings you have chosen to use.
- Minimize the installer and open File Explorer by opening a folder and navigating to the disk where you have inserted the installation media (USB or DVD). Double-click it and open the sources folder located inside.
- Locate the file named install.esd, right-click on it and choose Rename. Change its extension from ‘esd’ to ‘wim’.

- Try running the installation again and see if the problem still appears.
Solution 3: Repair the Boot Configuration Data
Going through the essential commands related to the boot manager is always a nice and easy way to do Windows installing troubleshooting. There are several methods you should run in a particular order in order to reset and reboot the Boot Manager service which is directly responsible with Windows update and Windows installation.
- If your computer’s system is down, you will have to use the installation media used to install windows for this process. Insert the installation drive you own or which you have just created and boot your computer.
- You will see a Choose your keyboard layout window so choose the one you want to use. The Choose an option screen will appear so navigate to Troubleshoot >> Advanced Options >> Command Prompt.

- If you are not having problems with the system, you can use the Windows UI to access this screen. If you are using Windows 10 on your PC, there is another way to access the Advanced Startup on your computer. Use the Windows Key + I key combination in order to open Settings or click the Start menu and click the gear key at the bottom left part.
- Click on Update & security >> Recovery and click the Restart Now option under the Advanced startup section. Your PC will proceed to restart and you will be prompted with the Advanced options screen.

- Click to open the Command Prompt from the Advanced options screen.
- Command Prompt should now open with administrator privileges. Type in the command displayed below and make sure you hit Enter afterwards.
bootrec /RebuildBcd
bootrec /fixMbr
bootrec /fixboot
- Close Command Prompt afterwards and choose the Restart option. Check to see if the problem is gone.
Solution 4: Run the Installation in Clean Boot
There are various other programs and services which can affect the installation of the Microsoft Windows 10 suite. In most cases, the cause is the antivirus you have installed and you can try disabling it while the installation runs. However, to make sure nothing can interfere with the installation, we recommend you clean boot which will disable all non-Microsoft programs and services from starting up. After you finish successfully, you can return back to normal mode.
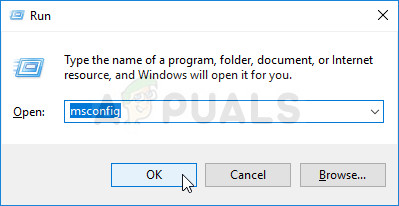
- Use the Windows + R key combination on your keyboard. In the Run dialog box type MSCONFIG and click OK.
- Click on the Boot tab and uncheck the Safe Boot option (if checked).
- Under the General tab in the same window, click to select the Selective startup option, and then click to clear the Load startup items check box to make sure it’s not checked.
- Under the Services tab, click to select the Hide all Microsoft services check box, and then click Disable all.

- On the Startup tab, click Open Task Manager. In the Task Manager window under the Startup tab, right click on each startup item which is enabled and select Disable.

- After this, you will need to perform some of the most boring processes and that is enabling the Startup items one by one and restarting your computer. After that, you need to check whether the problem appears again. You will need to repeat the same process even for the Services which you have disabled in Step 4.
- Once you locate the problematic startup item or service, you can undertake action in order to solve the problem. If it is a program, you can reinstall it or repair If it is a service, you can disable it, etc.
The post Fix: Windows 10 Installation has Failed appeared first on Appuals.com.