This is a device driver error message which appears in Device status when viewing the device driver’s properties in Device Manager. It indicates a serious problem with the driver which is currently installed and it often appears after making major changes to your computer or your device. The full message reads:
The software for this device has been blocked from starting because it is known to have problems with Windows. Contact the hardware vendor for a new driver. (Code 48)

Users who encountered the same error have been able to come up with various methods to fix this problem and we decided to include them in this article for you to check out!
What Causes the “The Software For This Device Has Been Blocked From Starting (Code 48)” Error on Windows?
There aren’t many known causes for this problem and all methods pretty much down to a faulty driver. Still, it’s possible to categorize the occurrence of this problem into two different categories and we highly recommend you check them out below to resolve the problem easier!
- Memory integrity and driver issues – Memory integrity present another layer of protection for drivers which help prevent malware tamper with Windows files. Disabling it during the installation of the new driver is the best way of resolving this problem.
- System files or memory issues – If certain system files have gone corrupt or if your system has reported memory issues, you will need to run an SFC scan and a Memory Diagnostic tool to resolve the problem
Solution 1: Disable Memory Integrity and Reinstall the Driver
The Memory Integrity feature is a part of the Core Isolation security package brings some virtualization-based security features to Windows 10. It creates a secure area of the system memory which can only be used by Windows processes and software, protecting the core services from being tampered with. The Memory Integrity feature is used to protect drivers from infection.
It’s still a work in progress but Intel HD 4000 graphics card users had issues regarding this feature as their graphics card couldn’t work with Windows 10. These steps are required to reinstall the driver. If you are having this problem with a different device, you can skip to the reinstalling driver part.
- Right-click on the shield icon on your taskbar and click on View security dashboard. If you don’t see the icon, you can open the Settings app by clicking the Start menu button and clicking the gear icon just above the Start menu button.
- Click to select the Update & Security section and navigate to the Windows Security From the top of the window, click the Open Windows Defender Security Center option.

- When Windows Defender Security Center opens, click the Device security laptop icon from the main screen.
- After the window switches to Device security, click on Core isolation details under the Core isolation section and you should see the Memory integrity

- There should be a slider you can use to switch it to Off. A message will appear below saying “This change requires you to restart your device”. Make sure you do so.
After disabling this feature successfully, it’s time to reinstall the driver. This set of steps applies to both users having issues with the Intel HD 4000 graphics adapter and users who experience this issue with a different device.
- Click Start and type Run. Select it and a Run dialog box will appear. You can also use the Windows Key + R key combination.
- Type “devmgmt.msc” in the Run dialog box and click the OK button. This opens Device Manager immediately.

- In Device Manager, expand the category where you found the driver or device that is causing the issue is located. There should be no doubt as you don’t want to end up uninstalling the wrong device. If the issue is connected to the Intel HD 4000 graphics adapter, locate it under the Display adapters
- When you locate the device, right-click on it and choose the Uninstall device option from the context menu.

- You may be required to confirm the uninstallation process. Check the box next to “Delete the driver software for this device” option and click the OK button.

- Restart your computer for the change to take effect. After restarting, Windows will attempt to reinstall the driver and replacing it with the manufacturer’s driver.
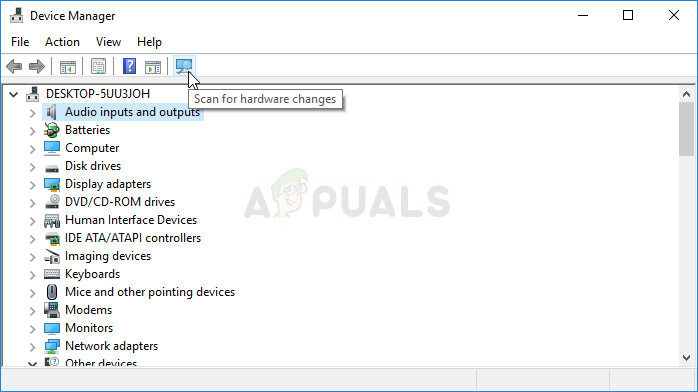
- If Windows doesn’t replace the driver automatically, open Device Manager again, selects the Action menu and click on the Scan for hardware changes. Check to see if the code 48 still appears for the device.
Note: You can now go back and re-enable Memory integrity in the Windows Defender Security Center!
Solution 2: Perform an SFC Scan and Run the Windows Memory Diagnostic Test
In other cases, the problem is related to faulty system files or memory management issues. This is often the case with data protections sensors or other less-known devices in Device Manager. Either way, performing these scans and tests can’t do any harm and it’s recommended you try it out to resolve your problem!
- Search for “Command Prompt” by typing it either right in the Start menu or by pressing the search button right next to it. Right-click the first entry which will pop up as a search result and select the “Run as administrator” context menu entry.
- Additionally, you can also use the Windows Logo Key + R key combination to bring up the Run dialog box. Type in “cmd” in the dialog box which appears and use the Ctrl + Shift + Enter key combination for admin Command Prompt.

- Type in the following commands in the window and make sure you press Enter after typing each one. Wait for the “Operation completed successfully” message or something similar to know that the method worked.
sfc /scannow

- Open Control Panel by locating it in the Start menu. You can also search for it using the Start menu’s search button. You can also use the Windows Key + R key combo where you should type “control.exe” and click Run which will also open Control Panel directly.

- After the Control Panel window opens, change the “View by” option at the top right part of the window to “Large Icons” and scroll down until you locate the Administrative Tools Click on it and locate the Windows Memory Diagnostic shortcut at the top. Click on it to open it as well.

- Follow the instructions which will appear on the screen and make sure you restart your computer to run the tool immediately. Check to see if the “The software for this device has been blocked from starting because it is known to have problems with Windows (Code 48)” error still appears in the Device status window.
Solution 3: Install the Driver in Safe Mode
Some users claim to have been able to install the driver properly after booting into safe mode. We have already provided steps for reinstalling the driver but this time, try doing it in Safe Mode!
- Use the Windows + R key combination on your keyboard to start the Run dialog box and type in “msconfig” before clicking OK.
- In the System Configuration window, navigate to the Boot tab to the right and check the box next to the Safe Boot Click OK and restart your computer to boot into Safe Mode.

- Try installing the driver now and see if the same message still appears.
The post How to Fix ‘The Software For This Device Has Been Blocked From Starting Because it is Known To Have Problems With Windows’ Error on Windows (Code 48)? appeared first on Appuals.com.