If you don’t know what Cortana is, then let me tell you it’s an intelligent personal assistant and knowledge navigator for Windows 10.
I am writing this guide because many of the users have failed to uninstall Cortana, in this guide i will provide step by step instructions to disable cortana. You can revert the instructions; should you wish to enable it at a later stage.
Let’s get started! Follow the steps below to disable cortana!
1. Hold Windows Key and Press R
2. Type taskmgr and Click OK.
3. Choose More Details in the Task Manager.
Once you see this type of window
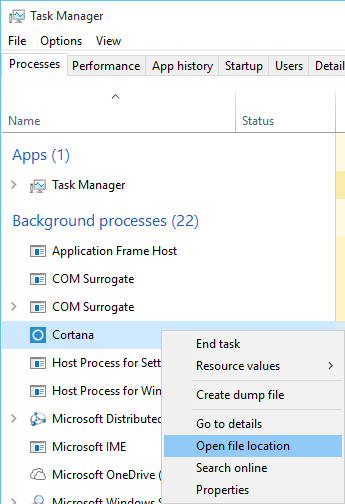
4. Right click on Cortana from the Processes tab and select Open File Location
This should take you to C:\windows\systemapps and you will see the list of folders.
Locate the folder which contains the word Cortana and has resemblance to the following:
Microsoft.Windows.Cortana_cw5n14920u
The key is to see the first three names with dots, Microsoft.Windows.Cortana
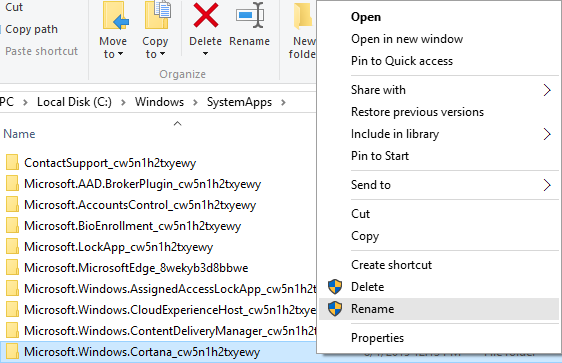
5. Right click on it and select Rename and add .bak at the end of it, eg: Microsoft.Windows.Cortana_cw5n1h2txyewy.bak
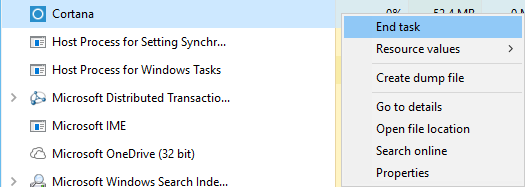
6. If it tells you that it’s in use; while keeping this window open (go back to Task Manager), right click Cortana and select End Task
7. Now go back to C:\Windows\Systemapps and right click Cortana, then add .bak at the end or Click Try Again on the pop-up.
What we’ve done is, renamed the program path, so now Windows will not be able to run it. If you decide to enable it then re-do the steps and remove the .bak from the end.
If you need any help with the instructions; feel free to post in the comments section below.
The post BEST GUIDE: Steps To Completely Disable Cortana appeared first on Appuals.com.