The error code 0x800F0950 appears on Windows 10 when trying to install the .NET 3.5 Framework using the conventional installer. The error message accompanying the error code is ‘The following feature couldn’t be installed’.

In most cases, affected users have managed to fix this problem by relying on Windows Feature to install the .NET Framework 3.5. If you’re on Windows 10, you have the installer already on your computer – You just need to force the installation from the Windows Features screen.
Another way that might help you force the installation of the .NET framework 3.5 is Windows Update. Keep in mind that Microsoft regularly pushes updates for the NET Framework, and one of the most common reasons that might trigger the 0x800F0950 error is an instance where a NET Framework update is already waiting to be installed via Windows Update.
In case you aren’t able to install via Windows Features or Windows Update, you can install the missing framework from a compatible installation media. If that also fails, you can create a custom script that will ignore parsing errors and install it forcibly via a CMD or Powershell terminal.
However, there are some documented circumstances where this error code appeared due to a systemic corruption issue that ended up affecting the operating system’s ability to install frameworks. In this case, repair installing or clean installing are the only viable methods that will fix this error.
Method 1: Installing .NET Framework 3.5 using Windows Features
If you’re seeing this error when trying to install the .NET Framework version 3.5 from an installer you’ve downloaded with your browser, you might be able to circumvent the problem entirely by installing it via the Windows Features menu.
Keep in mind that Windows 10 already includes an archive of .NET Framework version 3.5, you just have to prompt it to install. Several affected users that were previously encountering the error code 0x800F0950 when installing .NET Framework version 3.5 conventionally have confirmed that the installation went smoothly when they tried to do it via the Windows features screen.
To install the .NET Framework 3.5 via the Windows Features screen, follow the instructions below:
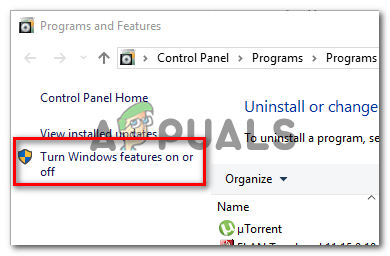
- Open up a Run dialog box by pressing Windows key + R. Next, type ‘appwiz.cpl’ inside the text box and press Enter to open up the Programs and Features menu.
![]()
Type appwiz.cpl and Press Enter to Open Installed Programs List - Once you’re inside the Programs and Features menu, use the menu on the right to click on Turn Windows features on or off.
![]()
Accessing the Windows features menu - When you’re inside the Windows features screen, start by checking the box associated with .NET Framework 3.5 (this package includes .NET 2.0 and 3.0), then click Ok to save the changes.
![]()
Enabling the .NET Framework 3.5 - At the confirmation prompt, click Yes to initiate the procedure, then wait for the package to be successfully installed.
- Once the operation is complete, reboot your computer and see if the problem is fixed once the next startup is complete.


In case this method was not applicable, you encountered a different error or you planning on installing the .NET Framework 3.5 package from an executable you previously downloaded, move down to the next potential fix.
Method 2: Install every Pending Windows Update
One reason that might trigger the 0x800F0950 error when you’re attempting to install the .NET Framework 3.5 update is the fact that Windows Update already has a scheduled update ready to do the same thing.
Some users encountering the same error code have reported that they finally managed to fix the issue after they updated their Windows 10 version to the latest build available. After doing this and restarting their computer, most have reported that .NET Framework 3.5 was already installed so there was no need to use the dedicated installer.
If this scenario is applicable, install every pending update for your Windows 10 computer and see if this takes care of the issue automatically:
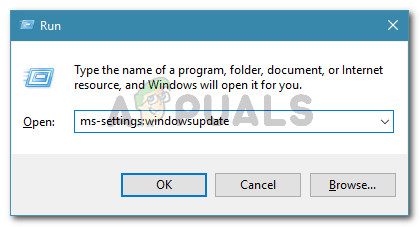
- Open up a Run dialog box by pressing Windows key + R. Next, type ‘ms-settings:windowsupdate’ inside the text box and press Enter to open up the Windows Update tab of the Settings app.
![]()
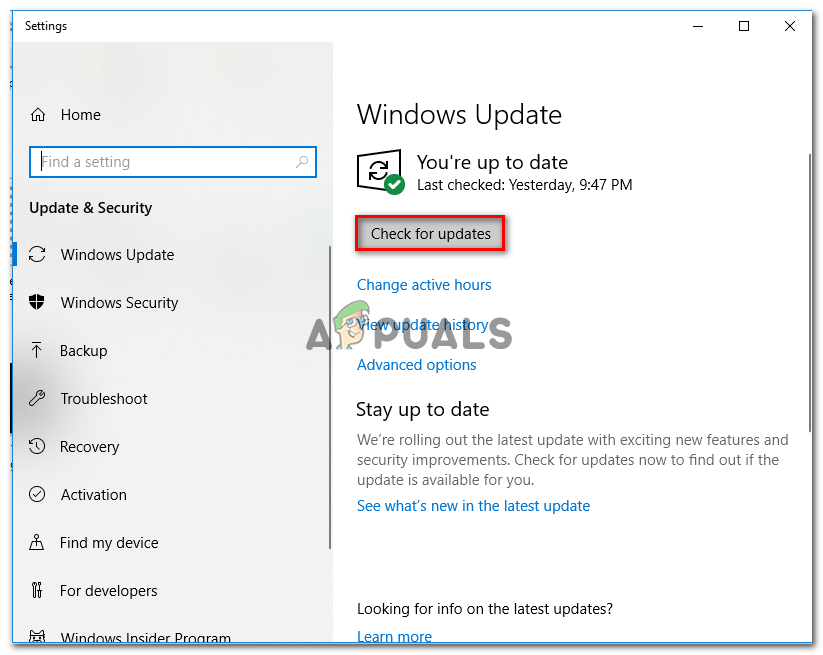
Run dialog: ms-settings:windowsupdate - Inside the Windows Update screen, move over to the right-hand section and click on Check for Updates.
![]()
Installing every pending Windows update - Next, follow the on-screen instructions to install each pending update until you bring your computer up to date.
Note: In case you are prompted to restart before you get the chance to install every pending update, restart as instructed. But once the next startup is complete, return to the same Windows Update screen to complete the installation of the remaining updates. - Once you finally manage to install every pending Windows update, you should find that the .NET Framework 3.5 was already installed by the Windows Update component.
If this didn’t happen or you are not prepared to install the Windows Updates that are currently pending, move down to the next potential fix below.
Method 3: Installing NET Framework via Installation Media
In case the first two fixes didn’t work for you, one viable fix that a lot of users have used successfully is to force a compatible installation media to install the NET Framework for you from an elevated Command Prompt or Powershell window.
This is the equivalent of the method below, but it’s way quicker if you already have a compatible installation media.
In case you want to give this method a try, follow the instructions below to install the .NET Framework 3.5 version directly from a compatible installation media:
- Insert the compatible installation media in your DVD drive, flash drive, or mount it in case you are using an ISO.
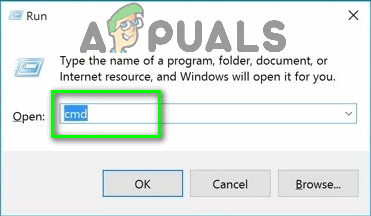
- Press Windows key + R to open up a Run dialog box. Next, type ‘cmd’ inside the text box and press Ctrl + Shift + Enter to open up an elevated Command Prompt. When you see the UAC (User Account Prompt), click Yes to grant administrative privileges.
![]()
Type “cmd” into the Run dialog Note: If you want to use Powershell, type ‘PowerShell‘ instead of ‘cmd‘.
- Once you’re inside the elevated CMD prompt, type the following command and change ‘XXX‘ with the letter that is currently holding the installation media:
Dism /online /enable-feature /featurename:NetFX3 /All /Source:XXX:\sources\sxs /LimitAccess
- Press Enter to initiate this process, then wait for the operation to complete. Once the installation is complete, restart your computer and see if the NET framework was installed successfully once the next startup is complete.
In case you still end up seeing the 0x800F0950 error or the installation failed with a different error code, move down to the next potential fix below.
Method 4: Creating a Custom Installation Script
If the method above didn’t work for you or you are looking for an alternative to using Windows Features, you should be able to bypass the 0x800F0950 error by creating a custom CMD installation script and run it with elevated privileges.
But keep in mind that in order to do this, you will need to create a compatible installation media for your Windows 10 computer.
If you already have a compatible installation media or you just created one using the guide above, follow the instructions below to force the installation of the .NET Framework 3.5 using a custom script:
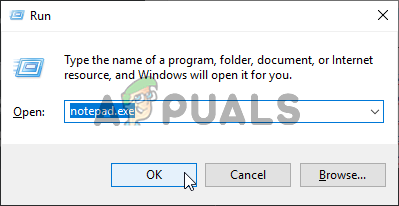
- Open up a Run dialog box by pressing Windows key + R. Next, type ”notepad.exe” and press Ctrl + Shift + Enter to open up an elevated Notepad window.
![]()
Opening an elevated Notepad window Note: When you’re prompted by the UAC (User Account Control), click Yes to grant administrative privileges.
- Once you’re inside the elevated Notepad window, paste the following code:
@echo off
Title .NET Framework 3.5 Offline Installer
for %%I in (D E F G H I J K L M N O P Q R S T U V W X Y Z) do if exist "%%I:\\sources\install.wim" set setupdrv=%%I
if defined setupdrv (
echo Found drive %setupdrv%
echo Installing .NET Framework 3.5...
Dism /online /enable-feature /featurename:NetFX3 /All /Source:PLACEHOLDER:\sources\sxs /LimitAccess
echo.
echo .NET Framework 3.5 should be installed
echo.
) else (
echo No installation media found!
echo Insert DVD or USB flash drive and run this file once again.
echo.
)
pause
Note: You will need to replace PLACEHOLDER with the letter of the drive that’s currently hosting the installation media.
- Once you successfully insert the code and you modify it accordingly, use the ribbon at the top to select File > Save As then select an appropriate location where you want to save the script you’ve just created.
- You can name it however you want, but it’s IMPORTANT to end the name with the ‘.cmd’ extension. After you add the correct extension, click on the Save button to create the fix.
![]()
Creating the CMD fix - Next, navigate to the location where you saved the .cmd script previously, then right-click on the file and click on Run as administrator from the newly appeared context menu. Next, click Yes at the confirmation prompt and wait for the operation to complete.
- At the end of this procedure, this custom script will install the .NET 3.5 Framework and use the Windows installation media to access any support files to get the job done. Once this operation is complete, restart your computer and see if the problem is now fixed.

If you’re still seeing the 0x800F0950 error code or you’re stuck with a different error code, move down the next potential fix below.
Method 5: Performing a Repair Install
If none of the potential fixes above have worked for you, it’s likely that you’re dealing with some type of corruption that will not go away conventionally. In this case, you should try to resolve the 0x800F0950 error code by resetting every Windows-related file.
You can do this with a clean install, but our recommendation is to go for a repair install (in-place repair) instead.
While clean install will not discriminate and delete everything on your OS drive (unless you back it up in advance), a repair install will only touch OS components, leaving personal files, apps and games intact.
The post [FIX] .NET Framework 3.5 Installation Error 0x800F0950 appeared first on Appuals.com.