Remember the nifty little snipping tool from way back in Windows 7? Now we are on Windows 10, but the snipping tool is very much here with us still. However, a direct upgrade from a previous Windows installation to Windows 10 may make the snipping tool “disappear”. If you are using Windows 10 and you cannot see the snipping tool anywhere, it does not mean that it is not there. The snipping tool most probably has been there all along unless it went missing after some unlikely bug.
In Windows 10, one of the ways to access the snipping tool is by clicking on Start and typing “snipping tool”. The icon for snipping tool appears and you just click on it to start using it. Another way launching the snipping tool is by scrolling the Windows Apps until you find it.
However, some Windows 10 users could not locate the snipping tool. The windows search does not yield any result, while the snipping tool cannot be found in the Windows App either. Quite weirdly, all other accessories such as MS Paint, calculator, on-screen keyboard, etc. are very much intact. So how do you get out of this?
Method 1: Rebuilding your index
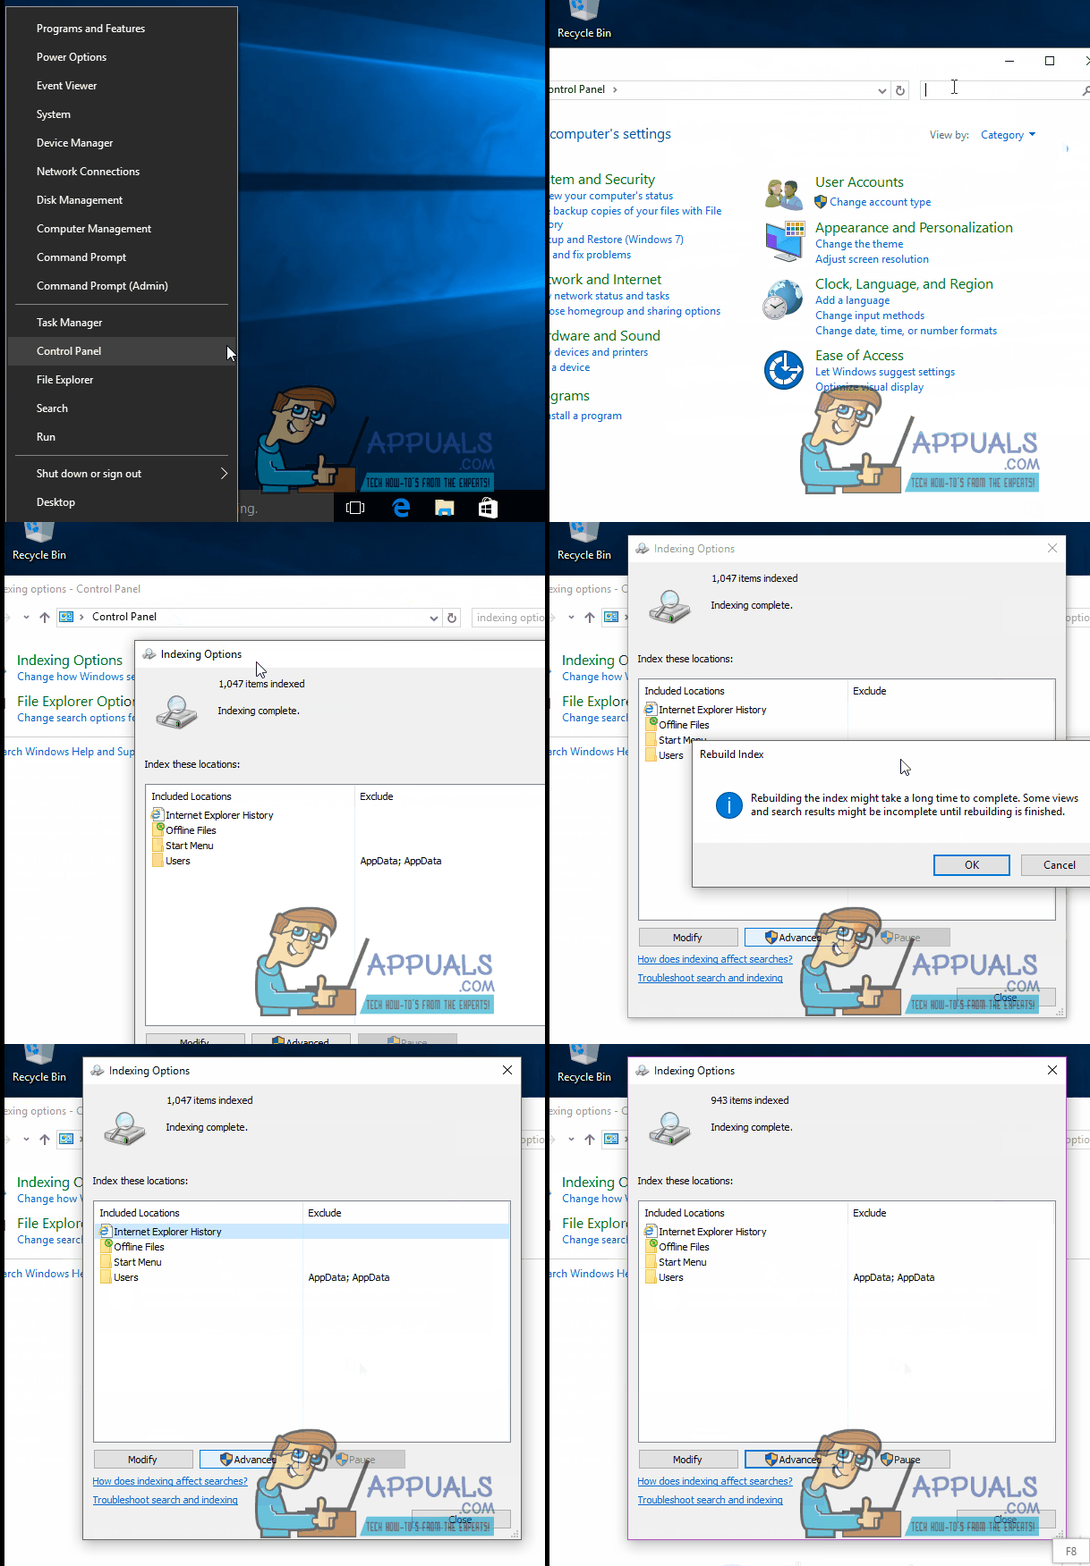
All along you may not be seeing the snipping tool because the Windows Indexing service is disabled. The search index is the key to your issue. Here is how to rebuild and enable it;
Go to Control Panel. Hold the Windows Key and Press X, then choose Control Panel.
In the search bar, type “Indexing Options”
Click on it. Another panel opens up; informing you of the number of items that have already been indexed. There are also all the locations from which the items were indexed as well as additional options/actions.
Click on the Advanced
Select the Index Settings tab on the resulting panel. You can leave the file settings options untouched and then click on the button ‘Rebuild’.
Click Ok, and let windows finish the indexing.
Close all windows and return to the desktop.
Click start and then type ‘snipping tool’.
The snipping tool icon will appear. Click to launch it.
Method 2: System 32 folder
When you cannot find the snipping tool after Windows 10 upgrade, this alternative locates it from the Windows folder.
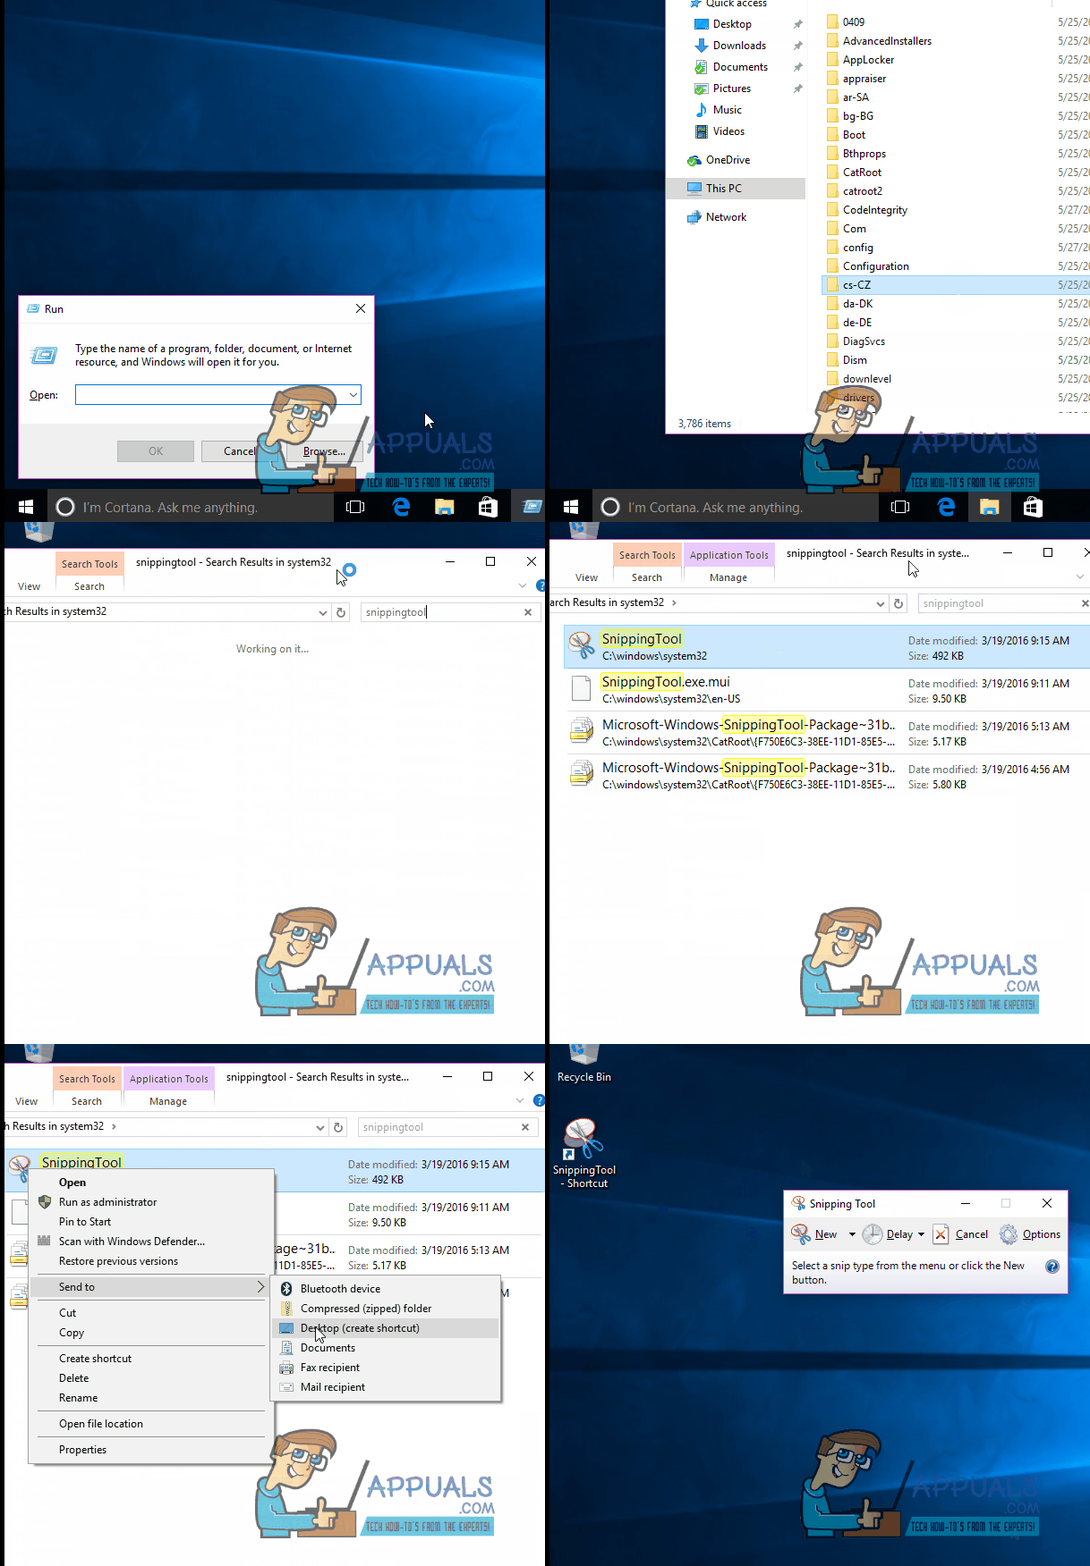
Open file explorer and browse to the following directory
C:\Windows\System32\
Locate SnippingTool.exe and create a short cut of it on the desktop.
Method 3: Snipping tool via ‘RUN’
Hold the Windows Key and Press R
In the resulting Run window, key in ‘snippingtool’ and hit ENTER.
The snipping tool pops up.
The post BEST GUIDE: Snipping Tool on Windows 10 appeared first on Appuals.com.


