Finding an easy to follow Galaxy S7 root guide can be difficult – rooting a Galaxy smartphone often takes more work than most other Android smartphones and a lot of the guides out there can miss out important information or fail to explain things clearly.
In this guide we’ll be sharing the steps you need to take to root your Galaxy S7, we’ll be going through each part with clear, concise steps to make it easier for anybody to understand.
Before you continue with the steps listed in this guide; you acknowledge and accept that any damage to your phone caused by your attempts to root your phone is your own responsibility. Appuals, the (author) and our affiliates will not be responsible for a bricked device, dead SD Card, or anything to do with your phone. If you don’t know what you’re doing; please research and If you do not feel comfortable with the steps, then DO NOT PROCEED.
NOTE: This guide is for the Galaxy S7. It is not for the Galaxy S7 Edge or any other device.
Step 1: Requirements
For the first step you’ll need to prepare some files for the rooting process. We’ve provided the links for everything you’ll need below. You should keep all of the files on your computer in one place. Go through the installation process for ODIN.
- ODIN 3.11.1 (Latest updated version)
- Samsung Drivers
- TWRP for Galaxy S7
- SuperSU
Next, make sure your Galaxy S7 is fully charged and visit the settings menu on your phone. Navigate to ‘About device’ and then tap ‘software info’ repeatedly until it says that developer access has been given.
Now navigate back to the settings menu and find ‘developer options.’ Within the developer options menu, tap to enable USB debugging.
You should now be ready to start step 2!
Step 2: Installing TWRP
The next step involves your Samsung device, your PC and the TWRP file and the ODIN software.
In this step you will be installing a custom recovery app (TWRP) onto your Samsung Galaxy S7. This will be used for rooting your S7 later. To install the custom recovery app, you must first follow the steps below.
- Turn off the Samsung S7 whilst it is connected to the PC
- Hold the Volume Down button, Power button and the Home Button at the same time
- Once the Android logo appears on your Galaxy S7 screen, let go of the buttons and press the Volume Up button
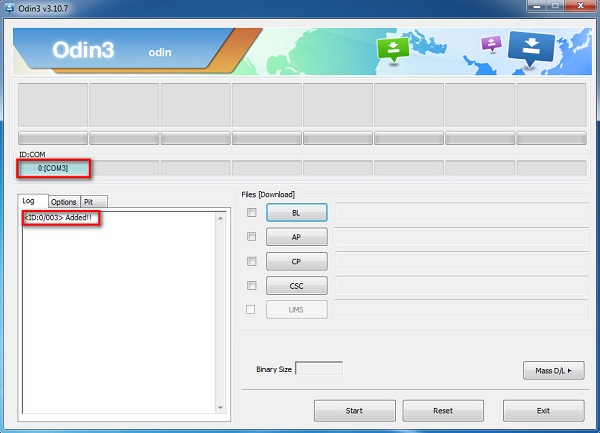
- Next, connect your phone to the PC and open the ODIN software
- Your phone should appear as ID:COM like shown in the image below.
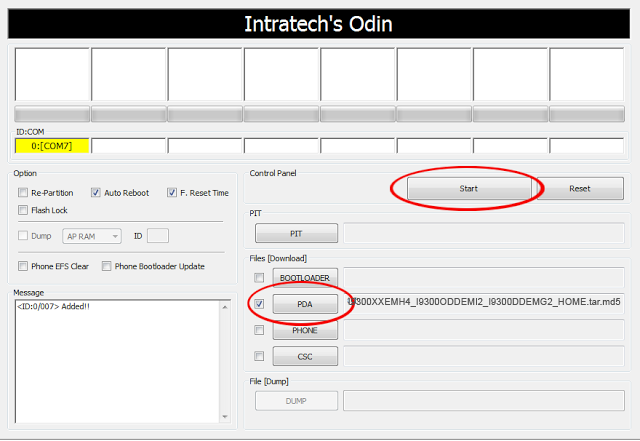
The next step will be to install the TWRP file. The menu can be a little confusing, so make sure to follow the steps we’ve listed below.
One the right-side pane of ODIN, click the second box down. It will either be named AP or PDA. By clicking that, a Windows Explorer window will open. Find the TWRP file you downloaded earlier and select it.
You can now click the ‘Start’ button on ODIN.
The ODIN software will now be installing TWRP onto your Galaxy S7. This process is also known as flashing. Once the process has been complete, your smartphone will reboot.
You’re now two thirds of the way through!
Step 3: Rooting with SuperSU
The next step will be to root your Galaxy S7 by using the custom TWRP recovery app to install the SuperSU file you downloaded earlier. Firstly, you must move the SuperSU file over to the internal memory of your Galaxy S7. Once you’ve done that, follow the steps below to enter the custom recovery app.
- Power off your Galaxy S7 and unplug it from your PC
- Hold the Volume Up button, Power button and Home button
- Eventually you’ll see the TWRP app boot up
- An image of TWRP has been shown below
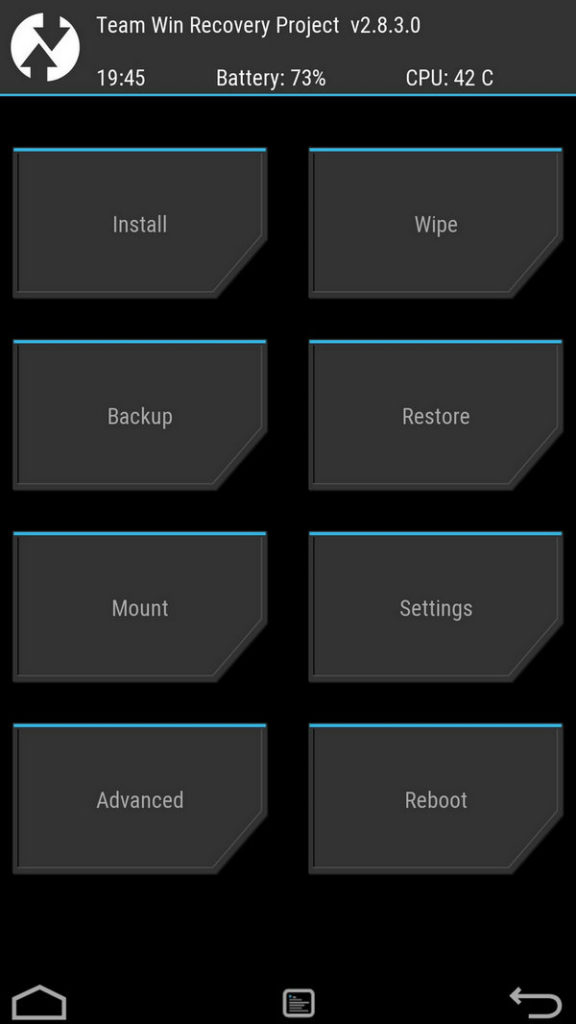
Next you’ll need to use TWRP to install the SuperSU file. To do this, follow the steps below.
Tap the ‘install’ button
Locate the SuperSU file and tap it to start the installation process
Return to the TWRP main menu and tap the reboot button
At this point your Galaxy S7 will reboot to the normal home screen. Your device should now be rooted!
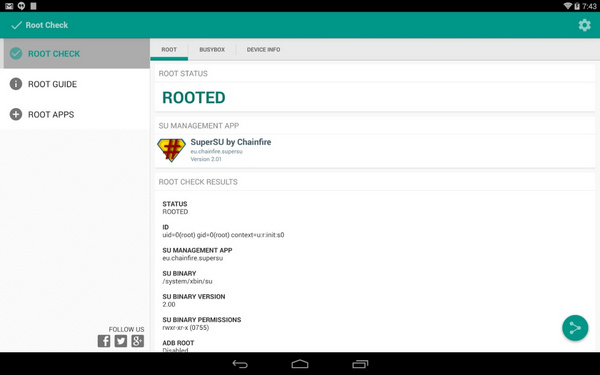
To confirm that your Galaxy S7 is rooted, visit the Google Play Store and search for the ‘Root Check’ app. Download the app and open it. Once you open it, Root Check will ask for SuperSU permissions. Grant it access and the app will confirm that your Galaxy S7 has been rooted.
Going forward you will need to grant permissions for all apps that require root access, in a similar fashion to granting permissions to standard apps.
The post BEST GUIDE: How to Root Galaxy S7 appeared first on Appuals.com.