Antimalware Service Executable is the name of the process MsMpEng (MsMpEng.exe) used by the Windows Defender program. The service associated with this program is the Windows Defender Service. The two most common reason for it to be consuming high cpu usage are the real-time feature which is constantly scanning files, connections and other related applications in real time, which is what it is supposed to be doing (Protect In Real Time).
The second is the Full Scan feature which may be scanning all files, when the computer either wakes up from sleep or when it is connected to a network, or if it is scheduled to run daily. The bit to understand here, is that when it is doing a complete scan, your system will experience frequent lagging, hanging and delayed access/response from your input/interactions with the system, because the CPU is Hijacked by Defender. Don’t be afraid or lose patience here, instead let it run and scan, wait a few minutes and if there are lots of files etc, then it may even take a few hours, so let it run and finish what it is doing for the sake of your protection, once it has completed, it will release the CPU and the USAGE will drop down to its normal.
However, Full SCAN should only be done once in a while and not everyday, what I’ve seen with most users is that they have scheduled the scan feature to run when the computer wakes up from sleep, or when it’s connected to network, or if scan is scheduled to run daily.
So to fix this issue follow the methods below.
Reschedule Windows Defender Properly
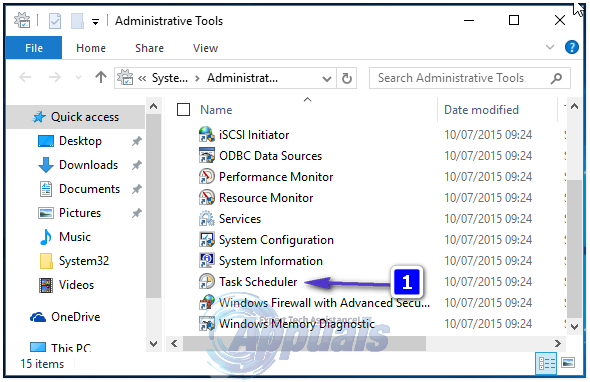
Click the Start Menu on the left side, and type Administrative Tools. Click on it to open it.

From the Administrative Tools, explorer Window, choose Task Scheduler. Double click on it to open it.
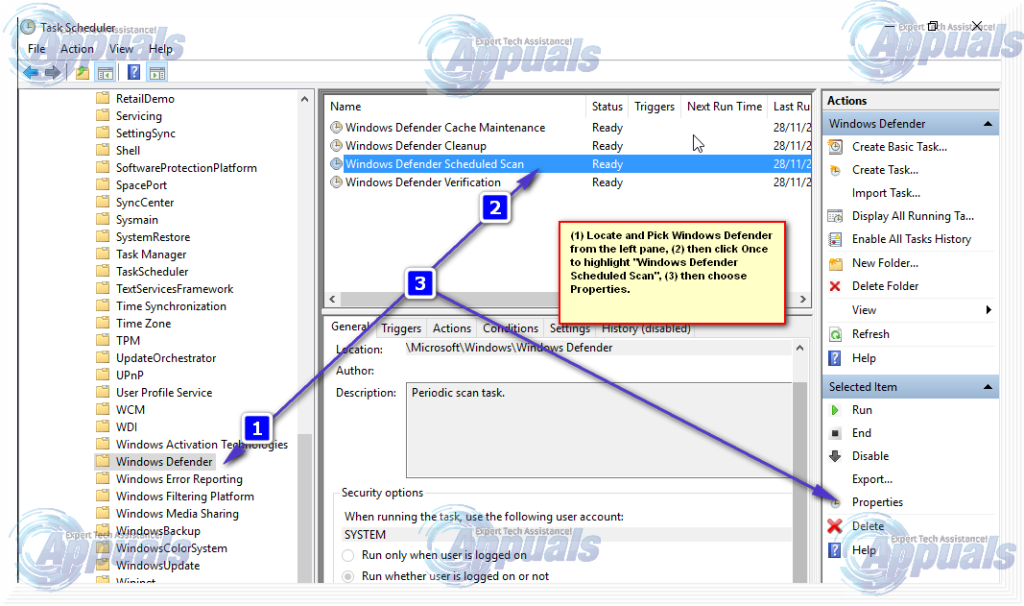
From the left pane of Task Scheduler browse to the following path:
Library/Microsoft/Windows/Windows defender
Once you’re in the Windows Defender Folder, locate the Name called “Windows Defender Scheduled Scan”, click on it once to highlight it and then choose Properties.
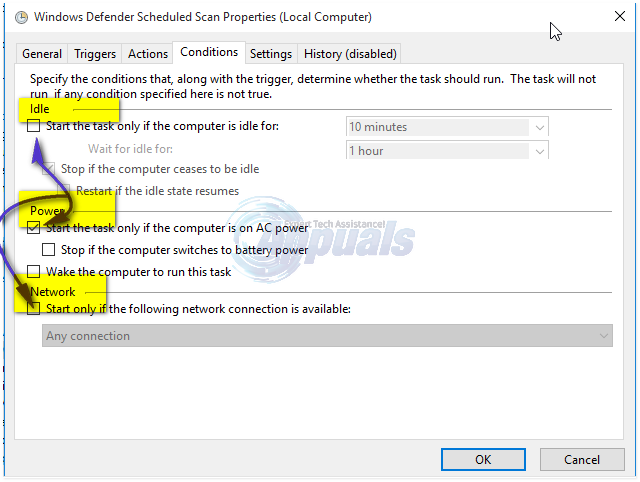
From the Properties Windows, Click on the Conditions Tab and Un-check the options under Idle, Power and Network and Click OK. Don’t Worry, we will schedule it properly in the steps to come.
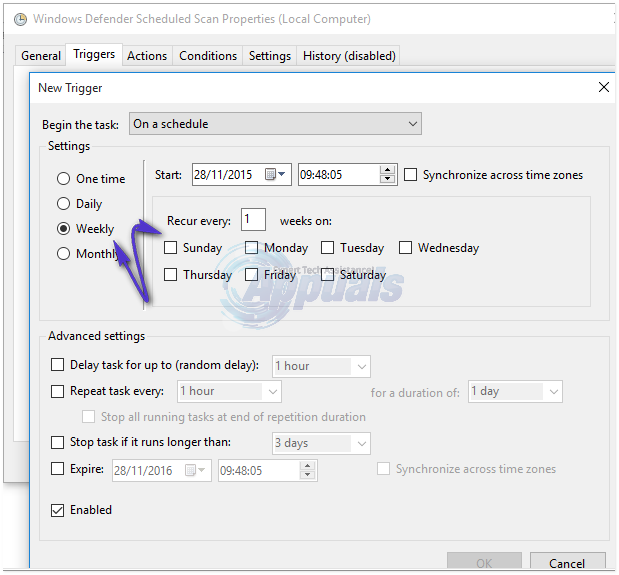
Once this is done, we will then reschedule it. Click the Properties from the right pane again, and this time choose the Triggers tab, and Click New. Here, choose the Weekly option or Monthly, as per your preference, and then choose the Day, Click OK and make sure it is enabled.
This will re-schedule the Defender to work as per your preference. Now, if the scan was previously running, wait for it to finish, you’ll see the results after the scan has finished, but when the scan does run as per your defined schedule, you will still get the High CPU Usage. Repeat the same for the three other schedules.
Windows Defender Cache Maintenance, Windows Defender Cleanup, Windows Defender Verification
Turn the conditions off, set the trigger to run once a week.
The post BEST FIX: High CPU Usage By Antimalware Service Executable (MsMpEng) appeared first on Appuals.com.