Certain PS4 users are encountering the ‘Cannot Communicate Using SSL‘ error when attempting to access the Store or certain online game features through a firewall. In most cases, affected users are saying they only see this problem when using a SonicWall model or a different manufacturer with similar functionality.

How to Fix the ‘Cannot Communicate Using SSL‘ error?
As it turns out, this issue can be caused by a local network glitch that prevents your console from connecting to PSN. In this case, you can fix it by resetting the console.
In case,f you’re using a Sonic Firewall device, the issue can only be resolved if you enable Consistent NAT in your SonicWall settings. In some circumstances, you’ll need either disable SSL Control or set the associated policy violation to log the event instead of blocking the connection.
If no dedicated firewall device is involved, you might want to investigate if UPnP (Universal Plug and Play) is enabled. If it isn’t you’ll need to enable it from your router settings in order to ensure that every relevant port used by your game console is forwarded.
In case you only see this issue while attempting to use the integrated web browser while connected to a public WiFi, you will need to switch from HTTPS to HTTP in order to get the pages to load.
However, in some rare circumstances, the problem can originate from a corrupted firmware (mostly caused by an unexpected shutdown during the installation of an update). In this case, you should try installing the new firmware via Safe mode and perform a power-cycling procedure.
Method 1: Restart or Reset router
One of the most common issues that will trigger this inconsistency is a network glitch that might prevent your console from connecting to Playstation Network. Most users that we’re struggling to get past the ‘Cannot Communicate Using SSL‘ error managed to do so by forcing their home network to reset or restart.
If this scenario is applicable, you should definitely start with a simple network refresh since it’s the less intrusive method and it will not make any changes to your network credentials and network settings.
To perform a simple network restart, simply push the power button on your router to turn it off. Then wait a full minute before turning the networking device back on. You can assure yourself that the process is completed successfully by removing the power cable from your power outlet and waiting for several seconds in order to drain the power capacitors.
If that doesn’t work, you should proceed by resetting your network. But keep in mind that this operation might also reset custom login credentials and custom network settings.
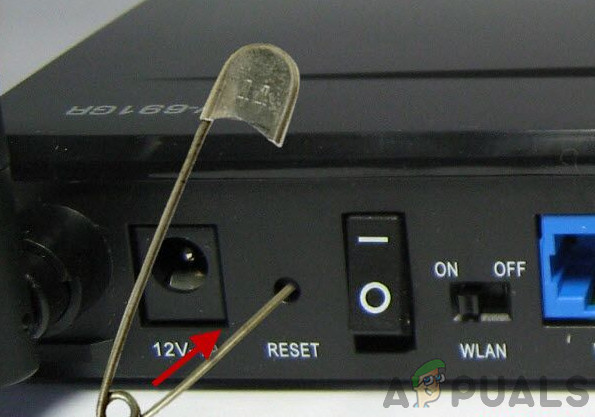
To perform this operation, you’ll need a sharp object since reset buttons are typically built inwards. Keep that button press for about 10 seconds until you notice that all LEDs start blinking at once.
If you already restarted or reset your router to no avail, move down to the next potential fix below for other methods of getting the ‘Cannot Communicate Using SSL‘ error issue resolved.
Method 2: Enable consistent NAT
As it turns out, one of the most pressing requirements that will trigger the ‘Cannot Communicate Using SSL‘ error if not enabled is Consistent NAT. This feature enables standard NAT policy in order to provide greater compatibility when it comes to peer-to-peer applications that need to work with consistent IP addresses that they need to connect to.
This is precisely the case with Playstation Network and the VoIP integration. By enabling Consistent NAT, the SonicFirewall (or a similar device) will be forced to consistently assigned the same mapped public IP address and UDP Port to each internal private IP address.
Important: Playstation Network is built on older security principles and because of this, it’s dependent on VOIP for communication.
A lot of affected users that have encountered ‘Cannot Communicate Using SSL‘ error have managed to fix the issue after they accessed their SonicFirewall settings menu, enabled consistent NAT and restarted the network security device.
Here’s a quick guide on enabling consistent NAT on SonicWall:
Note: In case you’re encountering the issue with a different firewall device, search online for specific steps on getting the issue resolved.
- Access your SonicFirewall settings by opening your default browser and pasting the following IP address inside the navigation bar:
https://192.168.168.168
Note: Keep in mind that the device where you’re accessing the router address needs to be connected through the SonicWall device.
- At the next step, you will be prompted to insert your user credentials. Unless you changed your login to custom values, you can find the default password and username inside the SonicWall user manual.
- Once you’re inside the SonicWall settings menu, select Manage at the very top from the list of available main menus.
![]()
Accessing the Managed menu of SonicWall - Once you’re inside the Managed menu, use the newly appeared menu in the left-hand side to select VOIP from under System Setup. Next, move over to the right-hand section and check the box associated with Enable consistent NAT.
![]()
- Once this modification has been enforced, restart your computer along with your networking device and see if the issue is now fixed.
- After your PlayStation 4 boots back up, attempt to connect it again and see if the issue is now resolved.
In case this method didn’t allow you to fix the issue or the steps weren’t applicable to your current situation, move down to the next potential fix below.
Method 3: Disable SSL Control
As it turns out, if you’re encountering this issue with a PS3 or with an older SonicWall model, you might also need to disable SSL Control on SonicWall settings (under Firewall Settings > SSL Control) – or at least set the option to Log instead of Block.
On PS4 you might be able to get by with this option enabled when it comes to certain games ports, but PS3 will refuse to connect to a PSN.
Several affected users have confirmed that this operation was about the only thing that allowed them to conned through to PlayStation Network with their game console.
Here’s a quick guide on disabling SSL Control on Sonic Firewall (or at least changing the SSL policy violation action to ‘Log the event‘ instead of ‘Block the connection and log the event‘:
- Ensure that the device you’re trying to access Sonic’s firewall settings from is connected to the same network.
- Next, proceed by accessing your Sonic Firewall device settings. You can do this by opening your default browser and pasting the following IP address inside the navigation bar:
https://192.168.168.168
- At the next step, you will be prompted to insert your user credentials. Unless you changed your login to custom values, you can find the default password and username inside the SonicWall user manual.
- Once you’re inside the SonicWall settings menu, select Manage at the very top from the list of available main menus.
![]()
Accessing the Managed menu of SonicWall - With the Manage menu selected, use the left-hand menu to click on Firewall Settings (under Security Configuration). Next, click on SSL Control from the list of sub-items belonging to Firewall Settings.
![]()
Accessing the Firewall settings menu in SonicWall Settings - Once you’re inside the SSL Control screen, either disable SSL Control (under General Settings) or change the default Action for policies violation from Block the connection and log the event to Log the event.
![]()
Disabling SSL control or changing the default policy violation action - After this modification has been enforced, restart your device and see if the issue is resolved at the next computer startup.
In case you’re still encountering the same ‘Cannot Communicate Using SSL‘ error, move down to the next potential fix below.
Method 4: Enabling UPnP
According to some affected users, this issue can also occur due to the fact that the Network Address Translation (NAT) is not actually opened on the network that your PS4 console is connected to. If this scenario is applicable, you can fix the ‘Cannot Communicate Using SSL‘ error by opening the status of your NAT.
This procedure will ultimately ensure that any type of connectivity issues caused by NAT inconsistency will no longer occur, which might end up fixing this issue.
Note: Here’s how to fix ‘NAT Type Failed’ error on PS4.
Although the steps of doing so ar different depending on your router/modem model, the core steps presented below are the same, regardless of the platform.
Here’s a quick step by step guide on enabling UPnP (Universal Plug and Play) on the router that you’re connected to in order to allow the networking device to forward every required port automatically in order to avoid issues like the ‘Cannot Communicate Using SSL‘ error:
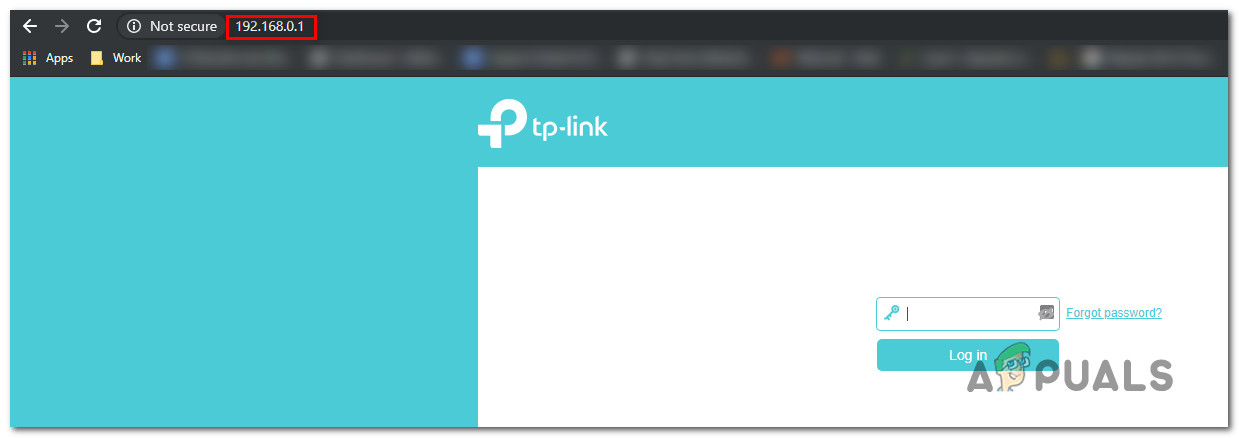
- First things first, ensure that your PS4 console is connected to the same router that is mediating the Internet connection. Once you’ve made sure of this, type 192.168.0.1 or 192.168.1.1 and press Enter to open up the Settings page of your router.
![]()
Accessing the Settings page of your router Note: One of these two default addresses should work, but just in case they don’t search online for specific steps on accessing your router settings.
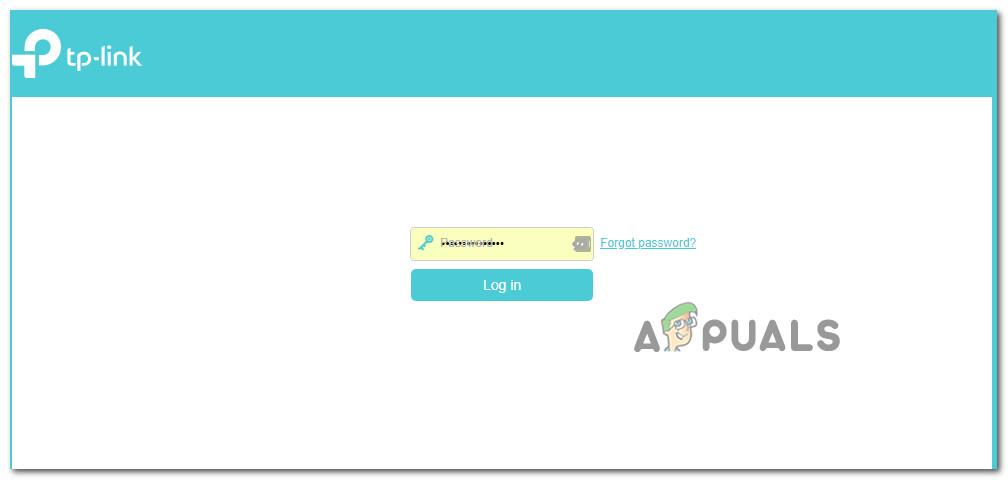
- Once you’re at the initial login page, insert the credentials for your router settings (these are different than your network credentials). Unless you changed your default username and passwords, the default values should either be ‘admin‘ or ‘1234‘.
![]()
Accessing your router settings Note: In case these credentials don’t work for you, search online for specific steps on resetting your router model back to the default values.
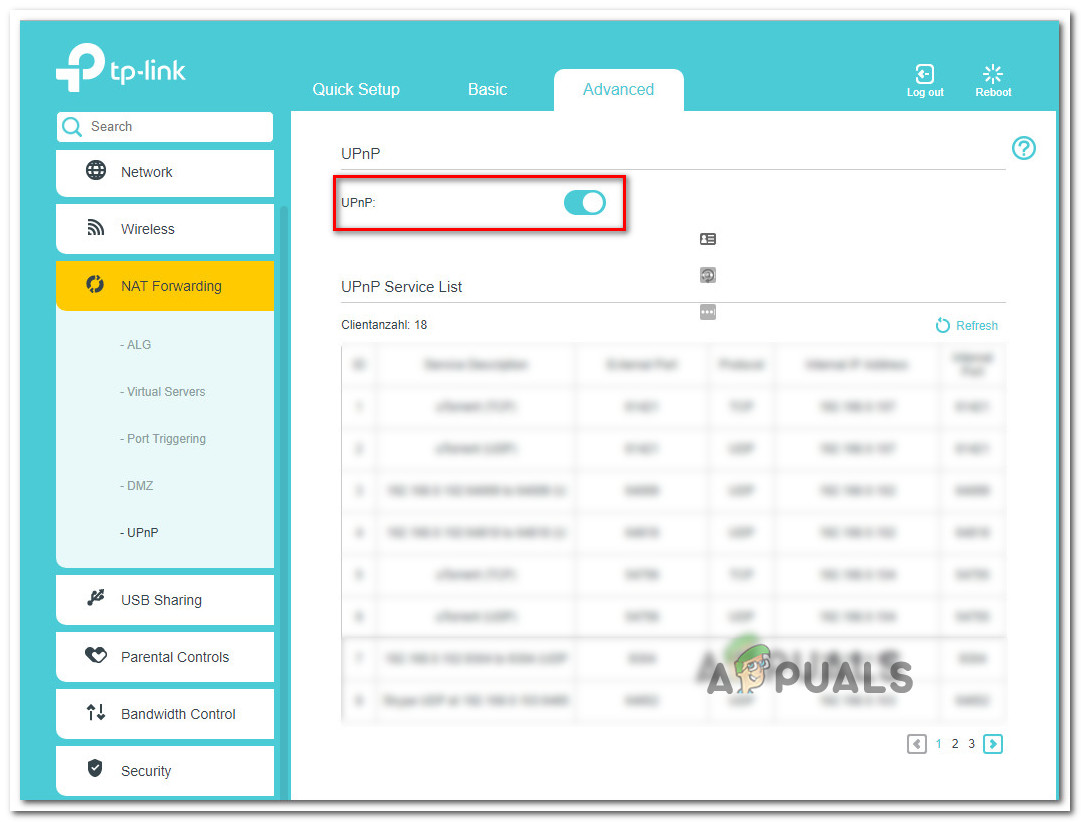
- Once you’re finally inside your router settings, start looking for the Advanced settings menu. After you manage to locate it, go to the NAT forwarding tab and look for the UPnP sub-menu.
![]()
Enabling UPnP from your Router settings Note: Of course, depending on your manufacturer, this menu might look way different and the UPnP settings might be located elsewhere. If you can’t find them, search online for specific steps on enabling UPnP according to your networking device model.
- Once you manage to enable UPnP, restart both your router/modem and your game console so that every necessary port is opened.
- After the next console startup is complete, attempt to connect your PS4 to the same network and see if the ‘Cannot Communicate Using SSL‘ error is resolved.
In case the same problem is still occurring, move down to the next potential fix below.
Method 5: Using HTTP instead of HTTPS
If you’re encountering the ‘Cannot Communicate Using SSL‘ error when attempting to use the built-in PS4 web browser to visit a web page when connected to a public network (Hotel WIFI, Schol Network, etc.) there is one quick fix that a lot of affected users have successfully used in order to get the issue resolved.
As it turns out, you might be able to manually adjust the web address to use the unsecured version of that page.
Some users encountering the same issue have discovered that the ‘Cannot Communicate Using SSL‘ error can be avoided by pressing up on the Dpad and just removing the s out of ‘http(s)’.

Once you removed the S from HTTPS, load the page again and see if the problem is now resolved.
Method 6: Updating firmware version in Safe Mode
If none of the methods above have allowed you to resolve the issue, you should start considering the fact that you might be dealing with some type of firmware issue that has compromised your PS4 console from establishing a secure network. This can be another reason why you’re seeing the ‘Cannot Communicate Using SSL‘ error when you’re trying to connect to a network.
In case this scenario is applicable, and you have some pending System Software updates that aren’t installing conventionally, here are some step by step instructions with what you can do to fix the issue:
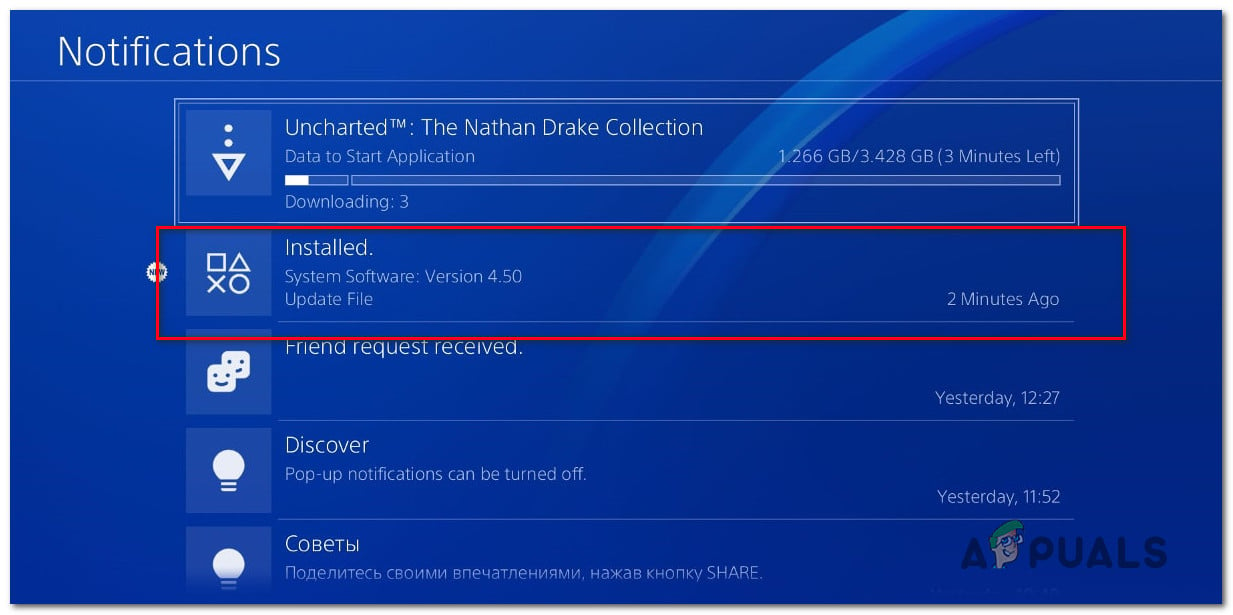
- First, start your PS4 and access the Notifications panel from the main dashboard. Once you do this, select the update notification and press the Options button to delete every pending update from the Notification panel.
![]()
Deleting the update notification - Once you manage to delete the notification, turn off your PS4 completely and wait until it’s fully turned off.
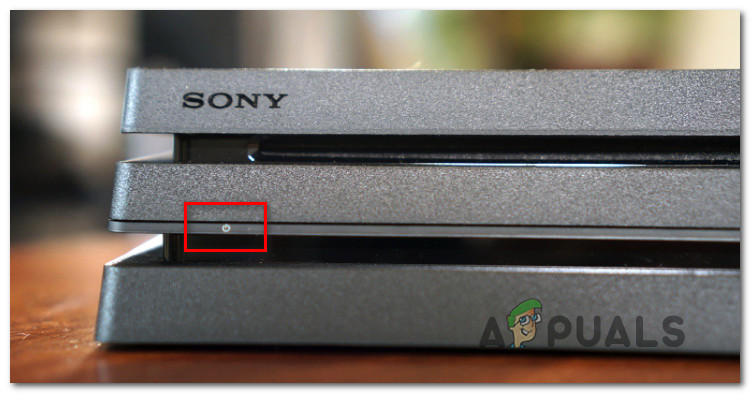
Note: Keep in mind that putting your PS4 in hibernation mode will break this procedure. - After your computer is completely turned off, press and hold the power button until you hear 2 beeps (for about 10 seconds). You should hear the first one immediately after you start holding the button and the second one about 7 seconds later.
![]()
Power cycling PS4 - After the second beep is heard, your computer will automatically enter Safe Mode. Once you see the next screen, connect your DualShock4 controller to your console via the USB cable and press the PS button on the controller.
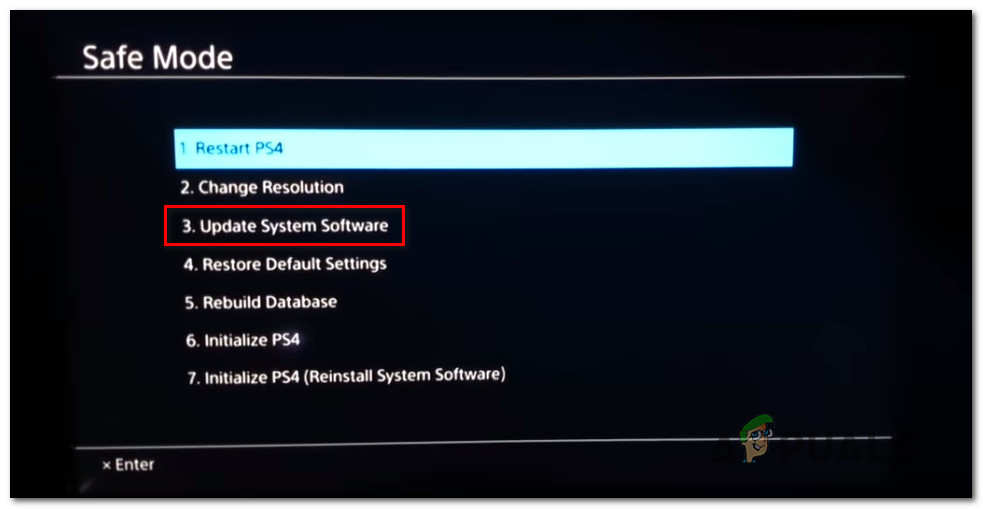
- Once your controller is connected to the Safe Mode interface, use it to select Option 3: Update System Software.
![]()
Update PS4 software via Safe Mode - Wait until the new software is downloaded and installed, then follow the on-screen instructions to install the newest version on your console.
- After the process is complete, your PS4 will restart and the new firmware version will be enforced.
In case you’re still encountering the same issue, move down to the next potential fix below.
Method 7: Changing the default DNS
As it turns out, several affected users that we’re also encountering the ‘Cannot Communicate Using SSL‘ error have managed to fix the problem by changing the default DNS addresses to Google’s equivalents or IPV6 defaults.
Several affected users have confirmed that after doing this and restarting their computer, the issue was finally resolved.
Here are the step-by-step instructions on changing the default DNS addresses on a PS4 console:
- Open your PS4 console and navigate to the main dashboard menu. Once you get there, go to Settings > Network > Set Up Internet Connection.
- After you do this, choose either Wi-Fi or LAN, depending on the type of network that you’re using.
- Next, choose Custom when prompted by the next menu and set the IP Address to Automatic.
- When asked to specify the DHCP Host Name, choose Do Not Specify.
- Next, set the DNS Settings to Manual, then set the Primary DNS to 8.8.8.8 and the Secondary DNS to 8.8.4.4. This is the default DNS address for Google.
Note: If you want, you can also consider using the IPV6 defaults:
Primary DNS – 208.67.222.222
Secondary DNS – 208.67.220.220 - Once the default DNS has been changed, repeat the action that was previously triggering the issue and see if the problem is now fixed.
![Google DNS settings in PS4 console]()
Google DNS settings – PS4 In case the same issue is still occurring, you can jump to the next potential fix below.
Method 8: Hard resetting PS4
If you’re still encountering the same ‘Cannot Communicate Using SSL‘ error and none of the potential fixes featured above have worked for you, it’s possible that you’re also dealing with some type of corrupted data that is being temporarily stored.
In case this scenario is applicable, you can get this issue resolved by performing a hard reset on your PS4 console.
Here’s a quick guide on how to do this:
- With your PS4 turned on, press and hold the PS button and bring up the Power options menu.
- Next, from the list of available Power Options, select the Turn off PS4 option and press the X button.
![]()
Turning OFF PS4 Note: It’s important that you don’t put in in rest mode.
- Once the lights go completely off, unplug the console power cable and wait for 10 seconds or more.
- Plug the power cable back into your console and press the power button again to start it up.
- Repeat the action that was previously causing the ‘Cannot Communicate Using SSL‘ error and see if the problem has been resolved.
The post [PS4 FIX] Cannot Communicate Using SSL appeared first on Appuals.com.


