Quantcast
Channel: How To's | Everything Tech - Appuals.com
Viewing all 4542 articles
Browse latest View live

Google Mail – Sign Up and Create Gmail Account

$
0
0

Gmail or Google Mail has been my all time favorite e-mail provider. The reason why; is because it’s free, fast and it has no down times. It is free from the ISP Restrictions; it offers the best security and protection. Not only this, but it also offers the largest storage of 15 GB. Included with it is it’s Cloud Storage for Google Docs and Photos. Which no one else can offer.  If you are worried about your old e-mails, with a different e-mail provider then Google has a feature which allows you to add your old email address to it from where you can import all your old e-mails and contacts and along with this it will also fetch any e-mails sent to your old address, thereby allowing you the opportunity to gradually shift from your old e-mail provider to Google Mail. What this means is if your old e-mail account is configured in Google and it is downloading/receiving e-mails from the older account, you will be able to respond to those e-mails from your Google Account; this way the contacts will know that you’ve changed your address and you can also include a signature to indicate this.

To create a Google E-mail Account Click Here and fill in the form.

googlemail

After you’ve filled in the form, click Next Step to finishing the sign up. While creating your account, make sure you input a valid and working number that is in your possession since this will be used to recover your password if it is lost or stolen. After you’ve signed in; you can begin using your account. If you wish to import e-mails and setup fetch to continuously receive any e-mails sent to your old address then click the Settings option by clicking the Settings wheel on the top right and choosing Settings.

googlemail-1

The Import Mail and Contacts option will import all your e-mails and contacts from your older address  and the Check mail from other accounts will add your e-mail account to G-mail so it can fetch any e-mails sent to it. You will not need to login to your older account again, and again after moving to Gmail to check your e-mails. The Send mail as feature can also be used, if you wish to send e-mails from your older address, however if you have decided to move, then this option is not recommended otherwise your contacts will not know that you’ve moved if you send them from this address.

googlemail-2

Once you click on the appropriate options the steps will be displayed on screen and they are pretty easy.

The post Google Mail – Sign Up and Create Gmail Account appeared first on Appuals.com.


BEST GUIDE: How to Take a Screenshot on a Mac

$
0
0

The Apple Mac does everything the average computer user could possibly want to use their computer to do, and that includes capturing screenshots.

However, most Mac users don’t know exactly how they can capture a screenshot on their Macs, and even if they do, they are not aware of the fact that the Mac is capable of capturing a wide variety of different kinds of screenshots.

The following are instructions to capturing an array of different kinds of screenshots on a Mac:

How to take a screenshot of your entire screen:

Make sure that your Mac’s screen displays exactly what you want it to, and then press Command + Shift + 3, all at the same time. Your Mac will make a camera shutter noise (provided that your Sound is turned on) and a screenshot of your entire screen will be created and saved to your desktop.

mac screen shot - 1

How to save a screenshot of your entire screen to the clipboard:

While your Mac’s screen displays exactly what you want it to, press Command + Control + Shift + 3. This will not save a screenshot of your entire screen to your desktop. Instead, the screenshot will be saved to the temporary storage area known as the clipboard, and you can call on the screenshot from the clipboard at any time by pressing Command + V in a window where you are allowed to paste pictures from the clipboard.

mac screen shot - 2

How to take a screenshot of a specific section of your screen:

Press Command + Shift + 4. The mouse pointer will turn into a crosshair pointer.

mac screen shot - 3

Click and drag the crosshair pointer to highlight the section of your screen that you want to capture.

Let go of the mouse button or track pad once you have highlighted your desired area. You’ll hear a camera shutter sound if your Sound is turned on, and the screenshot will be saved to your desktop.

How to save a screenshot of a specific section of your screen to the clipboard:

Press Command + Control + Shift + 4. The mouse pointer will turn into a crosshair pointer.

Click and drag the crosshair pointer to highlight the section of your screen that you want to capture.

Let go of the mouse button or track pad once you have highlighted your desired area. A screenshot of the highlighted section of your screen will be saved to the clipboard, and you can call on it by pressing Command + V in a window that allows you to paste pictures.

How to take a screenshot of a specific window on your screen:

Press Command + Shift + 4. The mouse pointer will turn into a crosshair pointer.

Press the Spacebar. The mouse pointer will now turn into a camera pointer.

mac screen shot - 4

Place the camera pointer anywhere over the window you want to screenshot to highlight it.

Click your mouse or track pad to capture the screenshot. If your computer’s Sound is on, you will hear a camera shutter sound indicating that a screenshot was successfully captured. The screenshot will be saved to your desktop.

Note: This works on all Finder windows and most – not all – application windows.

The post BEST GUIDE: How to Take a Screenshot on a Mac appeared first on Appuals.com.

BEST GUIDE: Steps to Dual Boot Windows 10 with 7 or 8

$
0
0

Windows 10 is the latest and greatest version of the Windows Operating System, and while most people are completely comfortable with letting go of the version of Windows they are currently using and switching to Windows 10, many individuals – especially those who don’t want to make an abrupt transition and actually like the iteration of Windows they are on – would like to go on a test run with Windows 10 before permanently switching to it. These people, and anyone else who wants to use Windows 10 while, at the same time, having the option to switch back to their older version of Windows whenever they want, can simply install Windows 10 alongside their current installation of Windows by dual booting.

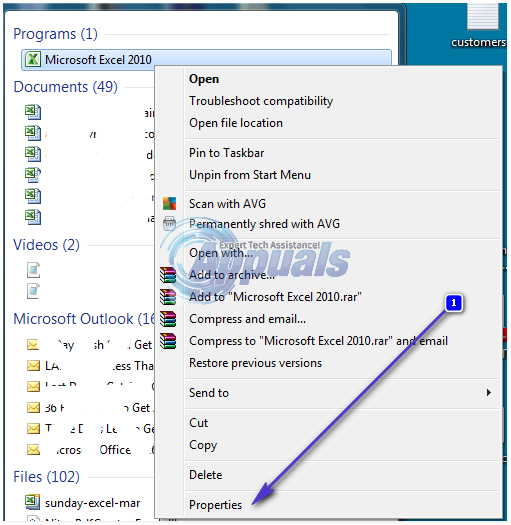
Dual booting is when you have not one but two Operating Systems on your computer. If you choose to dual boot, you can freely switch between the two Operating Systems that you have on your computer by restarting it and being faced with a boot menu where you can pick which Operating System you want your computer to boot. It is entirely possible, and even beneficial, for you to dual boot Windows 10 with whatever version of Windows your computer is currently running on, and the following is the entire process you need to go through in order to do so:

Phase 1: Shrink your Windows 7 or 8 partition to make space for Windows 10

Before you can actually install Windows 10 on your computer alongside the installation of Windows 7 or 8 that your computer already has, you need to free up enough space for Windows 10. To do so, you will need to shrink any one of the partitions on your hard drive, creating a fair bit of unallocated disk space that Windows 10 will, in turn, be installed in.

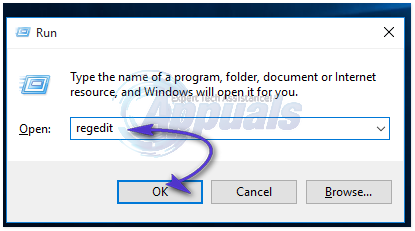
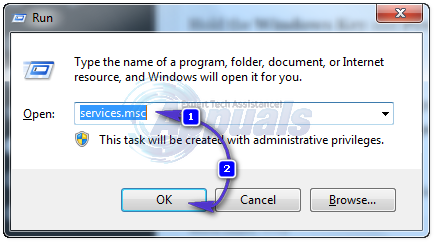
Press the Windows Logo key + R to open up a Run. Type diskmgmt.msc into the Run dialog and press Enter.

2015-11-30_202153

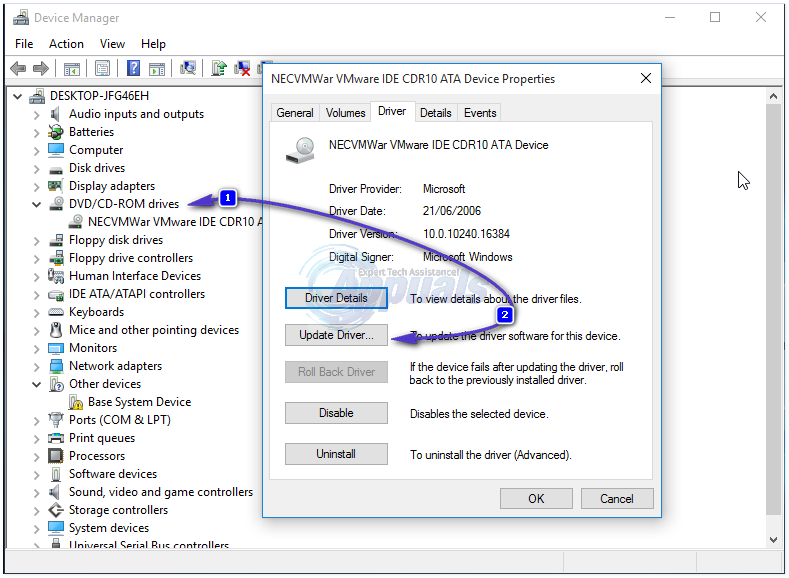
This will open a window named Disk Management that displays information pertaining to all of the partitions on your hard disk. In this window, locate the hard disk partition you want to shrink to create space for Windows 10, right-click on it and click on Shrink Volume.

2015-11-30_202323

Type in the amount of disk space you want to free up on your selected partition in the Enter the amount of space to shrink in MB You need a minimum of 16 Gigabytes of hard disk space for the 32-bit version of Windows 10 and a minimum of 20 Gigabytes for the 64-bit version. However, that is not all that you have to take into account when deciding how much disk space to free up – more factors include the disk space that the apps you download, the page file, drivers and the data that accumulates over time will take up. It is recommended that you free up at least 30-50 Gigabytes of disk space, even if you have the most basic of requirements. Once you have entered the amount of disk space you want to free up into the field, click on Shrink.

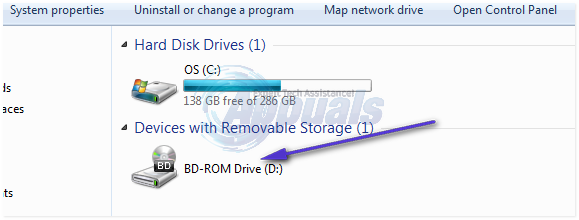
Once you do so, the amount of disk space you freed up will show up in the Disk Management window as unallocated disk space.

2015-11-30_202549

What to do if you get the Dynamic Volume Error Message during Phase 1

Some Windows users may receive the following error when trying to shrink a partition of their hard drive to make space for Windows 10:

“Windows cannot be installed to this hard disk space. This partition contains one or more dynamic volumes that are not supported for installation.”

The dynamic volume error message is almost always seen on computers that have a whole bunch of manufacturer-made partitions on their hard drives – partitions such as:

C: Local Disk
E: Recovery
F: Tools
H: System
G: Other partition

In such cases, the user will not be able to shrink any partition of their hard drive regardless of whether they try to do so using the Disk Management window or a third-party hard disk partitioning program. In fact, using a third-party hard disk partitioning program on a computer affected by this problem may cause issues that completely restrain the computer from starting up.

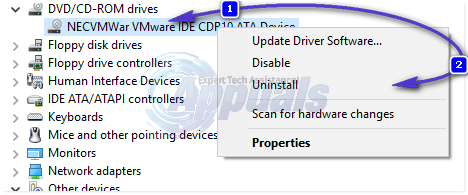
The only way to get rid of the dynamic volume error message and successfully shrink a partition of your hard drive to free up space for Windows 10 is to sacrifice one of the useless manufacturer-made partitions on your hard drive. Sacrificing any partition other than other than the ones named System, Recovery or Local Disk C – a partition such as Tools – will suffice. All you need to do is open the Disk Management window, right-click on the partition of your hard drive that you want to get rid of in order to be able to shrink a partition such as Local Disk C or D, and click on Delete Volume.

Performing the steps described above will lead to the disk space occupied by the partition you erased to turn into unallocated disk space. The next step will be to right-click on the partition you plan on shrinking to create enough disk space for Windows 10, clicking on Extend Volume and clicking on Yes in the warning that appears subsequently. A wizard will open, and go through this wizard and the onscreen instructions to merge the partition you will later be shrinking with the unallocated disk space. Once the merger has been completed, you can go ahead and carry out Phase 1, and you should be successful at shrinking whatever hard drive partition to have decided on shrinking to free up enough disk space for Windows 10.

Phase 2: Download a Windows 10 ISO file and fire up the Windows 10 setup file

Once you have successfully shrunken a partition on your hard drive to create enough unallocated hard disk space for Windows 10 and all the data that you will store on it, you can move onto actually downloading a Windows 10 ISO file and running the Windows 10 setup wizard.

Go here, scroll down and click on Download tool now to download the Windows 10 Media Creation Tool. Install and run the Windows 10 Media Creation Tool. Click on Create installation media for another PC. Select your preferred language and the version of Windows 10 you want to download in the form of an ISO file. When asked what media you want the tool to use, select ISO file and click on Next.

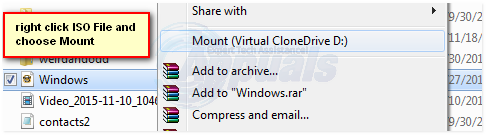
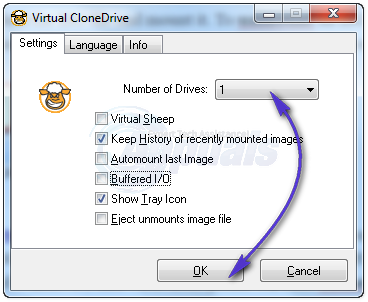
Download the ISO file for Windows 10 and, once downloaded, extract it using an extraction utility such as WinRAR or 7-zip or MagicISO (I Use MagicISO). From the contents of the extracted ISO file, double-click on the ources folder to open it.

Double-click on the exe file in the sources folder to run the Windows 10 setup wizard. There are quite a few different files that have the term setup in their names in the sources folder, so make sure that you double-click on the file that is exclusively named setup. Click on Yes if prompted by UAC.

Phase 3: Install Windows 10 alongside your previous installation of Windows

Once your computer starts running the Windows 10 setup wizard, the only phase of this process left is to actually install Windows 10 alongside your previous installation of Windows, and this can get a bit tricky as it differs significantly from what you would do to simply clean-install Windows 10 as your sole Operating System.

If your computer does not have all the latest Windows updates installed, you will be asked if you want to get important updates for Windows Setup. Just to make sure nothing goes wrong, click on Go online to install updates now (recommended) and wait for the latest updates to be downloaded and installed.

Click on Install now.

Configure your region and language settings and other preferences if prompted to do so.

Enter your product key or skip this step if you are only trying Windows 10 out or if you already own a legitimate and registered version of Windows 7 or 8. Also agree to the licensing terms and agreement.

When asked what kind of installation you want, select Custom: Install Windows only (Advanced). This option lets you install Windows 10 alongside your previous Windows installation, whereas the Upgrade option will overwrite your previous installation with Windows 10.

When asked where you want to install Windows, select the Unallocated space option that has the same amount of free space as the amount of disk space by which you shrank a partition of your hard disk during Phase 1.

When you select the unallocated space option, a Size box will open at the bottom of the dialog. Just click on Apply, and the unallocated space will be turned into an actual partition. Select this partition and click on Next.

The setup will now start installing Windows 10 on your computer. Let it do so and wait for it to finish.

Once the setup is done working its magic, you will have both Windows 10 and your previous installation of Windows on your computer as its Operating Systems and you will have succeeded at setting your computer up for dual-booting. Since that is the case, whenever you boot your computer up, you will be provided with the option to choose between booting Windows 10 and booting your previous Windows installation (Windows 7 or 8). To switch between your two Operating Systems, you will have to reboot your computer and then select your desired version of Windows.

If you click on the Change defaults or choose other options link in the boot menu, you will be taken to a menu where you can configure settings and preferences such as the default Operating System for your computer and the amount of time your computer stays at the boot menu before booting up the default version of Windows.

Windows 7, 8, 8.1 and 10 all use the NTFS file system, which means that you can access data stored on both of your Operating Systems regardless of which one you are logged on to. The partitions of your hard drive containing both of your installations of Windows will appear in the Windows Explorer separately with their own dedicated drive letters, and you can right-click on any of these drives and click on Rename to give them more fitting and easily recognizable names.

The post BEST GUIDE: Steps to Dual Boot Windows 10 with 7 or 8 appeared first on Appuals.com.

BEST FIX: Problem Sending the Command to the Program

$
0
0

Windows is full of surprises when you encounter error messages such as this one out of the blue. “There was a problem sending a command to the program”  usually indicates that a window has failed to connect with the MS Office Applications (such as Excel, Word or Access database etc.) in the process of sending DDE (Dynamic Data Exchange) commands to the MS Office applications. As a result, you are not able to run MS Office Applications.

Sometimes, this error can be corrected by itself, as the error message pops up only once and the applications run in the second or third attempt. BUT this does not mean it should be left untreated, hence it needs to be fixed manually, as it may come back.

Method 1: Disabling Run program as administrator

Select Properties by Right clicking on the shortcut of the applications showing the error message and select the Compatibility tab.

2015-11-30_204035

Uncheck the Run program as administrator box if its checked or enabled.

2015-11-30_204235

Method 2: Checking DDE Option (Excel)

Open MS Office EXCEL and open Excel Options box from the OFFICE Menu by clicking on the Office icon on the top left corner of the application and click on Advanced 

Locate the option called Ignore other applications that use Dynamic Data Exchange (DDE) under General Options and uncheck/disable it. Restart the office application after applying changes.

2015-11-30_204454

If the Ignore other applications that use Dynamic Data Exchange (DDE) option is unchecked or disabled, enable the option from the check box and restart the office application and then again uncheck the option and restart the office application.

Method 3: Uninstalling Additional Office Viewer:

This error message may also occur, if you have installed Office Viewer next in conjunction to Microsoft Office. If this is the case, uninstall it and re-test.

The post BEST FIX: Problem Sending the Command to the Program appeared first on Appuals.com.

BEST FIX: DWM.exe has stopped working

$
0
0

Many Windows 7 users have reported experiencing an issue where they receive an error message stating “DWM.exe has stopped working and has been closed”, along with a few other details, either after every few minutes or whenever they switch to their desktop or open a Windows Explorer window. On the computers affected by this issue, the problem even carried over to Windows 10 when users upgraded to the latest and greatest version of the Windows Operating System.

While DWM is a legitimate Windows program, this error message is almost always caused by a virus that, in most cases, creates a phony DWM.exe file somewhere in the C:\Users\<your user name>\AppData\Local\Temp directory, and this leads to the user receiving the “DWM.exe has stopped working” error message every now and then. Fortunately, you can fix this problem and no longer receive the “DWM.exe has stopped working” error message. The following are the two most effective solutions that you can use to fix this issue:

Solution 1: Remove the virus using Baidu Antivirus

Antivirus programs – especially Baidu Antivirus – are designed to be able to do a lot more than simply prevent computers from being contracting viruses and safeguard them from other security threats. One of the most amazing capabilities that most antivirus programs have is the ability to scan a computer for viruses and security threats and then eliminate any and all security risks that they discover.

All you need to do is go here, download Baidu Antivirus, run the antivirus program, scan your computer for viruses and allow Baidu Antivirus to get rid of all the viruses that it finds, including the virus responsible for the “DWM.exe has stopped working” error message. In the event that this solution doesn’t fix the problem, you should move on and try the next one.

Solution 2: Eliminate all traces of the virus using various programs

This solution is a much more aggressive and comprehensive solution to the “DWM.exe has stopped working” error message.

  1. Go here and download, install and run Malwarebytes – an anti-malware program that is capable of finding every virus, Trojan and piece of malware on your computer.
  2. Use Malwarebytes to eliminate every virus, Trojan and piece of malware on your computer.
  3. Go here and download, install and run Bitdefender Antivirus Plus 2016.
  4. Use Bitdefender to search for and delete all quarantined files on your computer.
  5. Go here and download, install and run Temp File Cleaner (TFC).
  6. Use Temp File Cleaner to clean out all of the unnecessary temporary files on your computer.

The post BEST FIX: DWM.exe has stopped working appeared first on Appuals.com.

BEST GUIDE: How to Completely Uninstall Norton

$
0
0

Like most other antivirus and anti-malware programs, Norton is not as easy to get rid of as it should be. Completely uninstalling Norton can be quite a pain in the you-know-what, especially if you don’t have a lot of experience with the uninstallation of antivirus, anti-malware and other computer security programs. If you’ve been wondering how to completely and successfully uninstall any and all Norton products from your computer, the following are all of the steps you need to follow in order to do so:

Click here to download the Norton Removal Tool – a utility designed specifically to uninstall all Norton products on your computer and get rid of all of the files and configurations pertaining to them.

Install the Norton Removal Tool and then run it. Follow the onscreen instructions, and the Norton Removal Tool should scan your computer to find all of the Norton security programs installed on it.

norton removal tool

Once the utility has found all of the Norton programs on your computer, you can choose to uninstall all (or a select few) of them.

During the uninstallation process, the Norton Removal Tool will inform you that you need to restart your computer in order to go through the final steps of the uninstallation process. Restart your computer, and the utility will complete the uninstallation process when your computer boots up.

2015-12-01_055627

If the Norton Removal Tool asks you if you want to reinstall the Norton products that you uninstalled, decline the offer.

To make sure that the Norton Removal Tool was successful at completely uninstalling the Norton products that you wanted it to uninstall, go to Start > Control Panel > Add or Remove Programs (Windows XP, Vista or 7), Control Panel > Programs and features (Windows 8 and 8.1) or Control Panel > Programs > Programs and features (Windows 10) and check to make sure that you no longer see the Norton programs you uninstalled in the list of installed programs. Once you have uninstalled the Norton products you wanted to, you can go ahead and uninstall the Norton Removal Tool as well.

The post BEST GUIDE: How to Completely Uninstall Norton appeared first on Appuals.com.

BEST GUIDE: How to Uninstall AVG using AVG Removal Tool

$
0
0

AVG is among the top brass when it comes to antivirus and anti-malware programs. Not only is AVG one of the most competent antivirus and anti-malware programs out there but has also proven update after update that it will continue to evolve into an irresistibly amazing product. However, while all is well and good when AVG is installed onto a computer and is made responsible for its security, things take a turn for the worst when a user, for whatever reason, tries to uninstall AVG from their computer.

While AVG can most certainly be uninstalled from the Control Panel, in most cases, doing so leaves quite a few of the antivirus and anti-malware program’s components behind, resulting in an incomplete uninstallation. In addition, for users who have more than one AVG security product on their computer, uninstalling all of the AVG programs can be a nightmare as they need to be uninstalled in a specific order. Fortunately, you can completely uninstall AVG and remove all traces of the program(s) from your computer, and the following is what you need to do in order to do so:

Go here and download AVG Remover 2015. If you have the 32-bit version of Windows, download the 32-bit version of the utility, and if you have the 64-bit version of Windows, download the 64-bit version of the utility.

Install and then run AVG Remover 2015Agree to AVG’s licensing terms and agreement and privacy policy.

Allow the utility to scan for and detect all of the AVG programs on your computer. When you are provided with a list of AVG products installed on your computer, select and uninstall all of them.

The utility will inform you that your computer needs to be restarted. Restart your computer, and the utility will complete the uninstallation of all the AVG programs on your computer and all of their files and configurations once your computer boots up.

2015-12-01_070251

To make sure that all of the AVG programs on your computer have been successfully uninstalled, go to Start > Control Panel > Add or Remove Programs (Windows XP, Vista or 7), Control Panel > Programs and features (Windows 8 and 8.1) or Control Panel > Programs > Programs and features (Windows 10) and check to see if there are any AVG products in the list of installed programs. If you do find any AVG programs in the list, which is quite unlikely, simply uninstall them, and they and all of their files and configurations will be uninstalled completely and successfully.

The post BEST GUIDE: How to Uninstall AVG using AVG Removal Tool appeared first on Appuals.com.

BEST GUIDE: How to Uninstall Avast using Avast Removal Tool

$
0
0

Avast is a pretty big name in the computer security program scene, but completely removing all traces of an Avast program from a computer is as hard as Avast is effective. However, even though completely removing all traces of Avast from a computer is not easy, it is most certainly doable, and the following are the two methods that you can use to uninstall all traces of Avast from your computer:

Method 1: Use Avast Clear

Avastclear is an intuitive tool from the creators of Avast itself that is designed specifically to uninstall any and all Avast products installed on a computer.

Click here to download Avastclear. It will automatically prompt you to run the tool in Safe Mode. Run the executable Avastclear.

2015-12-01_064314

Follow the onscreen instructions and browse to the folder in which you have installed the Avast product you want to uninstall. (If you’ve not used a custom folder, then  leave it to defaults). Click on RemoveRestart your computer, and Avastclear will finalize the uninstallation when your computer boots up.

2015-12-01_065729

Once you have no more use for Avastclear, you can uninstall it from your computer.

Method 2: Use the ESET Antivirus Remover tool

If Avastclear fails to successfully uninstall Avast from your computer (which is quite unlikely) or if you simply don’t want to use Avastclear, you can use the ESET Antivirus Remover tool instead. The ESET Antivirus Remover tool is designed to be able to uninstall almost every single antivirus or anti-malware program out there, and that includes all Avast programs.

Go here and download an appropriate version (32-bit or 64-bit) of the ESET Antivirus Remover

Install and run the utility. Click on Continue and allow the ESET Antivirus Remover tool to scan your computer for all previously installed security programs. When provided with the results of the scan, select all of the Avast applications that you want removed from your computer and click on Remove.

Confirm the action by clicking on Remove in the warning window that pops up. Wait until the tool displays a message stating “Applications successfully removed”. At this point, the applications you selected will have been removed and you can close down the utility.

Once you have uninstalled Avast from your computer, you can go ahead and uninstall the ESET Antivirus Remover

Note: You may need to restart your computer during or after the uninstallation process.

To make sure that whatever method you used actually managed to completely uninstall Avast from your computer, simply go to Start > Control Panel > Add or Remove Programs (Windows XP, Vista or 7), Control Panel > Programs and features (Windows 8 and 8.1) or Control Panel > Programs > Programs and features (Windows 10) and make sure that there aren’t any Avast programs left in the list.

The post BEST GUIDE: How to Uninstall Avast using Avast Removal Tool appeared first on Appuals.com.


BEST GUIDE: How to change your Gmail Password

$
0
0

Google Mail – also known as Gmail, a free (15GB) e-mail provider rated as number one with best security and additional layer of password protection. Gmail uses three types of passwords, a normal password that lets you access e-mail over the web and any other device unless you’re using an app password or a 2-step password. As the name suggests, app passwords are custom passwords for your applications such as Microsoft Outlook, Thunderbird, etc. If access for less secure apps in the “Sign In & Security” is turned off, then you’re going to use a Normal Password. If it is turned on, then you use the app password on the applications and normal password when access Gmail over the web. If 2-step verification is turned on, then you will need to sign in two-steps after confirmation authentication from Google.

All of this is done from My Account and you must be signed in to your Google Account concerned to make the changes. The link is Change Gmail Password

Changing the Normal Password

Once you’re in the My Account section, choose “Sign In and Security

gmail password

Once you do that, you will be immediately prompted to chose from two options. (1) Password and (2) 2-Step Verification. When you click Password, it will further prompt you to re-enter your current password in order to verify that it is you changing the password and then a box to enter new password. This should get the password changed. If you wish to enable 2-step verification, click the 2-step verification option,

2015-12-01_205806

2-Step Verification doesn’t needs changing passwords, if it is turned on, you will be asked for verification codes sent over text, voice call, or our mobile app to confirm. This will also lock the option to change password unless you key in the code. If you lose your number, then you will not be able to change the password.

Changing the App Password

An App password is a 16-digit code that permits an app or device to access your Google account. App password is very useful while encountering password incorrect error in 2-Step password verification. An app password is generated from the App passwords page by selecting your device and application. You don’t need to memorize this password as an app password is only entered once per application or device but you can reset the settings anytime.

App Passwords works only when 2-step verification is enabled. After is has been enabled, go to the app passwords page, chose the app and the type of device and click Generate Password.

2015-12-01_211549

Once done, a window will pop-up showing the password. Copy this password, and key in or paste into the application. This password, will work only on this app, and it will not change your normal/default password which you’ve used to sign in, two-step verification will work the same way as it was. Many users are confused with this.

2015-12-01_211848

Please know that app passwords cannot be changed, they can only be revoked and you can issue a new one. The key is, as long as you have access to your normal password + the 2-step verification phone to receive (text, call) with a code you’re good. If you lose your normal password, you can use 2-step to reset it, and if you lose the phone, then you cannot use 2-step or normal password, instead you will need to contact Google and fill in their questionnaire so they can do it for you.

The post BEST GUIDE: How to change your Gmail Password appeared first on Appuals.com.

BEST FIX: hl2.exe has stopped working

$
0
0

Hl2.exe (short for half-life 2.executable) is a core file to launch the source engine based games such as Half-life, Half-Life 2, and counter strike etc. Therefore, it becomes a nightmare for the gamers, if they see “hl2.exe has stopped working”. This error pops up when you attempt to launch the GAME, changing the maps in a game, and joining a server in a game. There can be many different causes for this game error depending on the condition of your system which makes it a little frustrating at times to encounter the real cause of the error. Sometimes, this problem can be fixed by simply rebooting your game or computer but this does not mean it should be left untreated. Following are the most effective methods to fix this problem:

Method 1:  Checking Systems Requirements

Some of the Source engine based games come along with a long list of systems requirement. It is very important to cross check your systems compatibility such as RAM, ROM, DirectX,  and VGA card etc. in order to determine whether your system can launch the game or not. This is unusually stated on the order page and on the retail cover. If you don’t know what your system specs are then you can easily check this by performing the steps below.

Hold the Windows Key and Press R. In the run dialog, type dxdiag and click OK.

2015-12-02_081616

There are four tabs on the top which provides the information to compare system requirements.

2015-12-02_081920

Method 2: Temporarily Disable AntiVirus/Firewall

Click Start Button and select Control Panel. Select Review your computer status under System and Security Tab. Click down arrow button Picture to expand the section.

2015-12-02_082304

Your antivirus software will be listed under Virus protection if detected. Disable your anti-virus, usually done by right clicking the anti-virus icon from the system tray and choosing disable.

If disabling your anti-virus or anti spyware software does not help, you may have to uninstall them completely in order to resolve this compatibility issue until an update is released by the software developers. If disabling anti-virus allows the game to be launched, then reset/reinstall your antivirus software.

Method 3: Data Execution Prevention

Go to Start > Control Panel > System > Advanced System settings> Performance settings > Data Execution Prevention.

Select “Turn on DEP for all programs and services except those I select:”

Click on “Add” and navigate to your default steam directory such as C:\Program Files\Steam and add Steam.exe to the exception list. Moreover, you may need to add the executable files such as hl2.exe for any game with this issue. These files will either be in Steam\steamapps\common\<Game Title> or in \Steam\steamapps\<Your Steam Account Name>\<Game Title>\

2015-12-02_083206

Method 4: Disabling Background Applications

Source engine based games require a large amount of system’s resources to run. If you are running background applications while playing, it can often result a crash because game engine has to compete with other applications for the possession of enough system resources free to be utilized for the game.

Hold the Windows Key and Press R. Type msconfig and Click OK. From the Start-up tab, choose disable all, click Apply/OK. Reboot your Computer and test.

2015-12-02_082818

In Windows 8/8.1 and 10, the start-up part opens up in Task Manager. You can right click on the processes listed in the Start-up tab and choose Disable.

If this doesn’t helps, then go back to msconfig and this time, choose the Services tab. Put a check on Hide All Microsoft Services, and select Disable All. Click Apply/OK. Reboot and TEST.

2015-12-02_083004

Method 5: Uninstall & Reinstall

Download RevoUninstaller’s Trial from www.revouninstall.com, locate the game and uninstall it. Whilst still in the Revo Uninstaller’s console, you will be prompted with a option to choose from to uninstall left overs, and clear registry traces, choose “Advanced” and delete it’s registry traces, and left over files. Then, re-download/install the Game and test.

The post BEST FIX: hl2.exe has stopped working appeared first on Appuals.com.

BEST FIX: iw3mp.exe has stopped working

$
0
0

Call of Duty 4: Modern Warfare is a popular first-person shooter video game based on the events occurred during the World War ll. This game can be played both in a single player or a multi-player mode. However, it runs well on a single player mode but there are some issues when you switch to multi-player mode. Many gamers have reported, experiencing a crash where they receive an error message stating “iw3mp.exe has Stopped Working” while playing or joining a server in this game.

Following are some suggested solutions to fix this error, depending on your system configurations:

Method 1: Re-Installing the Game

The first step would be to re-install the game. You can do this via your installation media supplied with the disk. There is no need to uninstall the game, just overrun the setup so it can re-write files and repair the corrupt files. If this doesn’t help, then use Revo Uninstaller to completely Uninstall the game, and using the Revo’s Advanced Feature, uninstall left overs and traces. Once this is all done, proceed with the re-install.

Method 2: Enabling Stereo Mix

Click Start and type Sound in the search box. Then choose Sound from the search results displayed. Go to the Recording Tab, Select the Recording tab. Right Click within this pane and choose Show Disabled Devices.

2015-12-02_095323

From here, Enable Stereo Mix. Click OK and exit.

Method 3: Sound card Driver Issues

Sometimes, the issue is caused by corrupted sound/audio drivers. If the above two methods did not help, then uninstall the driver, re-boot the system. The driver will automatically be detected and installed. If not, visit the manufacturer’s site and download the latest driers for your OS. Hold the Windows Key and Press R. In the run dialog, type hdwwiz.cpl. Scroll down, to sounds, video and game controllers, right click your Sound Card Driver and choose Uninstall. Then, reboot the PC.

2015-12-02_095822

Method 4: Renaming mssmp3.asi File

Go to

C:\Program files > Activision > Call of Duty 4 – Modern Warfare > Miles folder

If you cannot find it in C:\Program Files\, then look in C:\Program Files (x86)\

Locate mssmp3.asi file, and rename it to mssmp3.bak

The post BEST FIX: iw3mp.exe has stopped working appeared first on Appuals.com.

BEST GUIDE: SM Bus Controller and It’s Drivers

$
0
0

The System Management Bus (often shortened to SM Bus, SMBus or SMB) controller is single-ended, two-wire bus that is fairly simple and is designed for the purpose of lightweight communication. The SM Bus Controller is a component that enables efficient and seamless communication between a computer and some of its most integral hardware components such as its Power Supply Unit (PSU) and its cooling fans. The SM Bus Controller basically allows a computer to successfully handle and execute commands such as turning its Power Supply Unit on or off and controlling its cooling fans.

However, the functionality of the SM Bus Controller does not end at simply allowing an Operating System to communicate with and control hardware components such as PSUs and cooling fans. The SM Bus Controller can also be used by a computer for monitoring purposes as many laptop computers use their SM Bus Controllers to keep their battery and temperature levels in check. In addition, the SM Bus Controller also has a lot of potential to be adapted to a number of other purposes, as evidenced by the fact that some developers have managed to use it to load and install firmware onto devices more easily.

How to update your SM Bus Controller drivers

If the drivers for a computer’s SM Bus Controller are installed properly and the component is working as it should, it is almost entirely unnoticeable. However, if that is not the case, the SM Bus Controller shows up in the Device Manager of the computer in question, along with an exclamation mark that basically indicates that the SM Bus Controller itself or its drivers are not installed appropriately. While this is not a particularly major issue on most computers, constantly being reminded of the fact that their SM Bus Controller or its drivers are not installed correctly can be quite irritating for the average computer user.

Thankfully, fixing this issue and getting your SM Bus Controller to go back to the way it previous was (being unnoticeable by taking on the label and appearance of the monitored devices it is connecting to) is quite easy. All you need to do is update your SM Bus Controller’s drivers to the latest version, and the following are the two methods that you can use to do so:

Method 1: Download the latest chipset drivers from the manufacturer’s official website

Find out the model of your computer’s motherboard and who manufactured it. If it was not a custom build, then you can easily get the driver’s by going to the manufacturer’s website, and keying in the model # of your system. The model number is usually located at the front or the back.

Capture

Go to the Support, Products or Downloads page of the official website of your motherboard’s manufacturer.

Look up your motherboard’s model number, and you should see a list of all the latest available drivers for your motherboard. For example, this is a web page that lists all of the latest available drivers for the Gigabyte GA-H81M-DS2V

Download and install all the latest Chipset drivers for your motherboard.

Once you have installed the latest Chipset drivers, the SM Bus Controller (and the exclamation mark on it) should disappear from the Device Manager and you should no longer receive any reminders or warning messages.

The post BEST GUIDE: SM Bus Controller and It’s Drivers appeared first on Appuals.com.

BEST GUIDE: How to Mount an ISO File

$
0
0

An ISO file (a file with the .iso extension) is basically a disc image – a complete and virtual copy of an actual CD or DVD. An ISO file is basically all of the contents of a CD or DVD copied and compressed into one single file, and this file is not executable, at least not regularly. In order for you to be able to access the data stored in an ISO file, you need to “mount” it. Mounting an ISO file basically refers to tricking your computer into thinking of it as an actual, physical CD or DVD, causing it to start reading it, and once it has been read by your computer, you can access the information stored on it.

Mounting an ISO file is not exactly a straightforward operation – at least not on older versions of the Windows Operating System – and can be a bit puzzling for novice Windows users who have never dealt with an ISO file before. However, all you need to know is that it is entirely possible for you to trick your computer into thinking that a virtual file is actually a physical CD or DVD with all of its 1s and 0s.

On Windows 7 and Vista:

Windows 7 and Vista, unlike their successors (more on that later!) do not have a built-in means of mounting ISO files that users can exploit and use. Since that is the case, Windows 7 and Vista users need to use a third-party program to mount ISO files – a program such as Virtual CloneDrive. Virtual CloneDrive is a program that basically creates a couple of virtual CD/DVD drives on your Windows 7 or Vista computer, and allows you to then mount ISO files (or CCD, DVD, IMG, UDF or BIN files, for that matter) onto these virtual drives. To mount an ISO file using Virtual CloneDrive, you need to:

Go here and download Virtual CloneDrive. Open the setup file for the utility. Select a Full install, click on Next and follow the onscreen instructions to install the utility. If presented with a hardware / security prompt, click on OK.

2015-12-02_104018

If asked to restart your computer, restart. Once Virtual CloneDrive has been installed, you will be able to see to virtual CD/DVD drives along with your actual one in Windows Explorer.

2015-12-02_104119

To mount an ISO file after installing Virtual CloneDrive, simply double-click on the ISO file of right-click on one of the virtual CD/DVD drives created by the utility, hover over Virtual CloneDrive, click on Mount…, browse to the directory where the ISO file is stored, select the ISO file and mount it. To unmount an ISO file, right-click on the virtual CD/DVD drive on which it is mounted, hover over Virtual CloneDrive and click on Unmount.

2015-12-02_104244

Windows 7 and Vista users can also use Virtual CD-ROM Control Panel – a piece of freeware created and distributed by Microsoft itself – to mount ISO files. However, it should be noted that Microsoft’s ISO mounting utility is fairly old and that most experienced Windows 7 and Vista users prefer Virtual CloneDrive over Microsoft’s Virtual CD-ROM Control Panel.

If you want to mount additional ISO’s. Open the Virtual CloneDrive pane, and change the number of drives.

2015-12-02_104552

Mount ISO on Windows 8 and 10:

Fortunately for users of Windows 8 and 10 – the latest and greatest in the Windows Operating System scene, Microsoft decided to add built-in ISO mounting capabilities to the latest iterations of their massively popular Operating System.

Windows 8 and 10 are both able to mount ISO files by default without any help from third-party programs. All you have to do in order to mount an ISO file on a Windows 8 or Windows 10 computer is double-click on the ISO file or right-click on it and click on Mount. The ISO file will then show up as a CD/DVD in Windows Explorer. To unmount a mounted ISO file, all you need to do is right-click on it in Windows Explorer and click on Eject, which is exactly what you would do to signal your computer to eject a physical CD/DVD once you are done using it.

2015-12-02_105247

You can also mount an ISO file in Windows 8 and Windows 10 by opening a Windows PowerShell window, typing the following command into it and pressing Enter:

Mount-DiskImage -ImagePath “Full path of ISO file”

Make sure that you replace Full path of ISO file with the actual path of the ISO file you want to mount. Also, do not remove the quotation marks; they are a part of the command.

2015-12-02_105549

You can also unmount an ISO file in Windows 8 and Windows 10 by right-clicking on the Start Menu button to open the WinX Menu, clicking on Command Prompt (Admin) to open an elevated Command Prompt, typing the following command into the Command Prompt and pressing Enter:

mountvol DriveLetter: /d

Replace DriveLetter with the CD/DVD drive letter assigned to the mounted ISO file (F: – for example). The final command will look something like:

mountvol F: /d

The post BEST GUIDE: How to Mount an ISO File appeared first on Appuals.com.

BEST FIX: Default Gateway Is Not Available

$
0
0

Windows 8/10, along with a complete User Interface overhaul and improvements and features by the boatload, brought with it a slew of network and connectivity issues. One of these issues was the “Default gateway is not available” issue. Users who suffered from this problem would either have their internet connection dropped every now and then (only to be fixed following a reset of their wireless router) or have no access to the internet at all and a Limited or no connectivity status symbol on the network icon in their system tray.

When affected users would run Windows diagnostic tools on their network connection, they would be informed that the culprit is their default gateway not being available. The “Default gateway is not available” issue can be caused by anything from a McAfee product or the Windows 8 auto logon feature to outdated and obsolete network adapter drivers. Since this problem messes with your internet connection, you can probably imagine just how severe an issue it actually is.

Before you go ahead, it is worth power-cycling your router. To do this, turn off your router, and the modem if router is hooked up to ISP’s modem (both off) for a 5 minutes and then turn them back on. If the results, are same then go ahead with the methods below.

Fortunately, the “Default gateway is not available” problem is fixable in almost all cases, and the following are some of the most effective solutions that you can use to try and fix it:

Solution 1: Remove any and all McAfee programs that you have

In many cases, the culprit behind the “Default gateway is not available” issue was a McAfee security program. If you have any McAfee security programs whatsoever, go to Control Panel > Programs > Programs and Features and completely uninstall them. OR go directly to the Add & Remove Programs by Holding Windows Key and Pressing R, simultaneously, and typing appwiz.cpl in the run dialog.

2015-12-02_121908

If this solution works, you can go ahead and install alternatives to the McAfee programs that you deleted, but remember to steer clear of any and all McAfee products. If this solution doesn’t work, however, simply try the next one. Once the issue is resolved, you can re-install your anti-virus product.

Solution 2: Disable the Auto Logon feature

Many Windows 10 users reported the “Default gateway is not available” issue having a connection with, for reasons only the Big Guy in the sky knows, the auto logon feature that Microsoft introduced with Windows 8. The auto logon feature, as soon as their computer starts, logs the user onto the user account that was being used when the computer was shut down. There is no clear and straightforward set of instructions that you can use to disable the auto logon feature, but simply assigning a password to all of the accounts on your computer will keep the auto logon feature at bay and prevent it from being activated. If you’re scared of forgetting your password(s), simply make sure that the passwords you create are extremely simple and easy to remember, and you can even opt to create hints for your passwords. It should even be easier if you switch to a Microsoft Account instead of a Local Account because that will allow you to reset password easily using your e-mail address if it’s forgotten.

Solution 3: Update your network adapter’s drivers

Search for and open the Device Manager. Expand the Network adapters. Right-click on the network adapter that you are currently using (Broadcom 802.11a Network Adapter – for example). Click on Update Driver Software… in the contextual menu.

2015-12-02_122221

Click on Search automatically for updated driver software and allow Windows to search for and download any available software updates for your network adapter’s drivers.

If the search for a more recent version of your network adapter’s drivers yields no results, there is quite a significant chance that the results are a false negative and that more recent versions of your network adapter’s drivers actually do exist. For some reason, Windows Update fails to find more recent versions of network adapter drivers in MANY cases. To make sure that you actually do have the latest version of your network adapter’s drivers, simply download, install and run a driver update utility such as the TweakBit Driver Updater, and it will inform you whether or not the network adapter drivers you have are obsolete and outdated.

Even if the driver update utility says that your network adapter’s drivers are up to date, be sure to visit the official website of your computer’s or your network adapter’s manufacturer, go to their Downloads page and determine whether or not a newer version of your network adapter’s drivers is available. If a newer version of the drivers is available, download and install it on the affected computer.

If the affected computer has trouble maintaining a stable internet connection for the amount of time required for you to update its network adapter’s drivers, search for troubleshooting and open the Windows Troubleshooter, click on Network and Internet > Internet connections > Next > Troubleshoot my internet connection and follow the onscreen instructions, and your internet connection should be restored at the end of the process, at least for a large enough period of time for you to update the network adapter drivers of the affected computer. If that doesn’t work, you can simply download the latest drivers for the affected computer’s network adapter from the manufacturer’s website on a different computer, transfer them to the affected computer via DVD or USB and then install them.

Solution 4: Uninstall your network adapter’s drivers

Uninstalling your network adapter’s drivers is yet another solution that you can use to try and fix the “Default gateway is not available” problem on Windows 8. Don’t fret about uninstalling your network adapter’s drivers as Windows will detect your network adapter once it reboots and then reinstall its drivers.

Search for and open the Device Manager. Expand the Network adapters. Right-click on the network adapter that you are currently using (Broadcom 802.11a Network Adapter – for example). Click on Uninstall. Confirm the action. Restart your computer, and your network adapter will be detected and its drivers reinstalled once your computer boots up.

2015-12-02_122528

Solution 5: Change your network adapter’s drivers

Switching your network adapter’s drivers with a different set of drivers that you already have on your computer is a notoriously popular fix for the infamous “Default gateway is not available” issue on Windows 8. For example, if you have a Broadcom 802.11a Network Adapter, you will need to change it to a Broadcom 802.11n Network Adapter, and vice versa. To fix the “Default gateway is not available” problem using this solution, you need to:

Search for and open the Device Manager. Expand the Network adapters. Right-click on the network adapter that you are currently using (Broadcom 802.11a Network Adapter – for example). Click on Update Driver Software… in the contextual menu.

2015-12-02_122221

Click on Browse my computer for driver software. Click on Let me pick from a list of device drivers on my computer. Uncheck the Show compatible hardware.

2015-12-02_122800

If your network adapter was listed as a Broadcom 802.11a Network Adapter in the Device Manager before, select the Broadcom 802.11n Network Adapter from the list. If your network adapter was listed as a Broadcom 802.11n Network Adapter in the Device Manager before, select the Broadcom 802.11a Network Adapter from the list. Click on Next and follow the onscreen instructions to change your network adapter’s drivers.

2015-12-02_122911

If this does not work or if you have a network adapter other than a Broadcom one, simply keep changing your network adapter’s driver to a different one from the list, and you should be able to find at least one driver that is not affected by the “Default gateway is not available” problem and is capable of sustaining a stable internet connection as a network adapter normally should.

The post BEST FIX: Default Gateway Is Not Available appeared first on Appuals.com.

How To Compress / ZIP a File in Windows 10

$
0
0

People often use third-party softwares to Compress or Zip the files. These third-party softwares do quite well but are not recommended as security is an ultimate necessity now days. A majority of Windows users don’t use the built-in feature to Compress/ ZIP files and folders that is the most secure and the best way of achieving the desired output. Windows 10 is pretty advanced and the compression tool integrated works quite well. So, you can definitely, Compress / ZIP a file in Windows 10 instead of using the third-party paid tools. You can compress a single file/ folder or you can also compress multiple files/ folders using the compression tool inside Windows 10.

A ZIPPED or Compressed file is the most convenient way of transferring huge sized files and folders over the Internet. Files take less space when they are compressed and can be transferred without consuming a large amount of bandwidth.

Ways of Compressing /Zipping a Single File or Folder in Windows 10:

Method # 1: Using the “Send to” Option to Compress /ZIP a Single File or Folder

You can compress/ ZIP a single file or folder using the “Send to” option inside Windows 10. Follow the instructions below.

To compress a file/ folder using the “Send to” option, right click on the target, navigate to Send to and click on Compressed (zipped) folder from the menu appearing after. You can refer to the below image for illustration.

compress-1

After the file is compressed, you would see a new file with a conventional folder icon. By default, the zipped file will be renamed according to the original file /folder but you can also rename this file. You will notice a big difference between the Zipped file and the Original version of that file.

compress-2

Method # 2: Using the “Top Ribbon Menu” to Compress /ZIP a Single File or Folder

There is another way to compress/ Zip a file in Windows 10 i.e. using the Ribbon Menu located at the top of the Windows Explorer.

Select the file or folder you want to compress and move your cursor to the top of the Windows Explorer inside the Ribbon Menu area. Click on the Share tab to open the relevant settings.

compress-3

Inside the Share tab, you will see an option called Zip. Click on that option and the selected file will be zipped/ compressed.

compress-4

Ways of Compressing /Zipping Multiple Files or Folders in Windows 10:

Method # 1: Using the “Send to” Option to Compress /ZIP Multiple Files or Folders

You can also compress multiple files and folders using the Send to option inside Windows 10.

To compress multiple files or folders, press and hold the CTRL button on your keyboard and select the files using the left mouse button.

Right click on the any of the selected file or folder and select the Send to option followed by Compressed (zipped) folder.

compress-5

It will create a new compressed folder inside the same directory. You can rename and share the folder accordingly.

Method # 2: Using the “Top Ribbon Menu” to Compress /ZIP Multiple Files or Folders

Multiple files and folders can also be compressed/ zipped using the Ribbon Menu.

Select the desired files and folders by holding the CTRL key and navigate to the Ribbon menu at the top of the Windows Explorer.

Navigate to the Share tab and click on Zip to create a compressed folder.

compress-6

The post How To Compress / ZIP a File in Windows 10 appeared first on Appuals.com.


BEST GUIDE: View PSD Files Without Photoshop

$
0
0

A PSD file is actually an image file format with a massive amount of details like Layers, alpha channels, transparency and other complex stuff. These details are not present in the usual image file extensions like .JPEG, .PNG or .BMP. These file extensions are common and can easily be viewed in any photo viewer but a PSD file cannot be opened without some specific PSD file viewer softwares.

The word PSD is a derived form of Photoshop Document. Photoshop is a professional image editing tool used for various operations. It is used to design websites, edit images and much more. The output of this software is in the form of a complex file format called PSD. Photoshop is a paid tool and a majority of people assume that it is not possible to view PSD files without installing Photoshop. It is not the fact as there are various methods to view this image file format without purchasing expensive software. So, I will be guiding you through the methods to view the PSD files without Photoshop.

Best Tools for Viewing PSD Files:

Paint.NET

Paint.NET is a pretty neat tool for viewing PSD files and the best of all, it is completely free. Despite being freely available over the internet, it has some of the amazing features that a paid photo editing tool has. So, you can edit photos, apply filters, work with layers and do a bunch of advanced stuff.

Paint.NET doesn’t have built-in support for PSD files but you can download official PSD Plugin (Free) in order to have the support. So, it also depicts the fact that Paint.NET also has a support for the plug-ins created by its users. Follow the links below to download the Paint.NET software and PSD Plug-in.

Paint.NET Download Link:   http://www.dotpdn.com/downloads/pdn.html

Paint.NET PSD Plugin:   https://psdplugin.codeplex.com/downloads/get/872317

After you have installed the software and plug-in, you can open any PSD file inside Paint.NET by clicking on File > Open. Select the PSD file you want to view and click on Open to view it.

View the PSD File Online:

If you don’t want the hassle of downloading and installing the softwares to view a PSD file, then using this online web application is one of the most suitable options.  This amazing web application converts the user uploaded PSD file to a general image format (.jpg, .png, .gif etc) selected by the user. Afterwards, you can download the file to your PC in order to have a glance.

Go to the following link mentioned below.

Link:    http://psdviewer.org/ConvertPsdToJpg.aspx

After navigating to this link, click on Browse and select the PSD file from your PC.

psd viewer1

After selecting the file, the next step is to convert the PSD file to your relevant file format. In my case, I have selected the .jpg file format. Click on the Convert button at the end to let this online engine convert your PSD file to a viewable format.

psd viewer2

It would take some time to convert the PSD file depending on the file size as well as your internet connection. After the process is finished, you can download the converted file to your PC in order to view it using the default Photo viewer.

GIMP (For Windows, Linux and OSX):

The closest alternative to Adobe Photoshop is a free tool called GIMP. GIMP stands for GNU Image Manipulation Program and it is available for all the prominent Desktop Operating Systems out there i.e. Windows, Linux and OSX.

GIMP is not just a PSD viewer instead it is more advanced as compared to Paint.NET. It has numerous features including Photo editing, Image rendering and image format conversion etc. It also doesn’t require any plug-in for PSD support but it does support third-party plug-ins like Paint.NET and Photoshop. The greatest advantage of using GIMP is that it keeps the same structure of a PSD file including the layers and layer styles etc. So, you create re-position different objects in a certain way that is not available in Paint.NET.

You can download GIMP for free from the link below.

Link:    https://www.gimp.org/downloads/

After it is installed, navigate to File > Open and select the PSD file from your hard drive. With just a single click, your PSD file will be available for further edits or you can also save the file to different image formats.

psd viewer3

The post BEST GUIDE: View PSD Files Without Photoshop appeared first on Appuals.com.

BEST FIX: COM Surrogate has stopped working (dllhost.exe)

$
0
0

Many Windows (7 and 8) users have reported experiencing as issue where they receive an error message stating “COM Surrogate has stopped working“, while browsing folders containing video or media files. Some users have also reportedly received this error while trying to print. COM Surrogate is the executable host process (dllhost.exe) which runs  in the background, while you are navigating through files and folders. Due to this process you are able to view thumbnails and when this process crashes, the error pop-ups up on the screen. This may also be caused by corrupt codecs required to view the media. In this guide, we’ve listed some steps for you that will hopefully fix the issue.

Method 1: Rollback to The Previous Display Adapter Driver

To do this, Hold the Windows Key and Press R. In the run dialog, type hdwwiz.cpl and Click OK. Scroll to the Display Adapters section in the Device Manager. Right Click on it and select Properties. Click Roll Back Driver and proceed with the instructions on screen. In some cases, this option is grayed out, if that is the case then attempt the Method’s below.

2015-12-03_012736

Method 1: Add dllhost.exe to the DEP Exception

Go to Start > Control Panel > System > Advanced System settingsPerformance settings > Data Execution Prevention.

Select “Turn on DEP for all programs and services except those I select:”

Click on “Add and navigate to C:\Windows\System32\dllhost.exe

After Adding dllhost.exe to the exception list, Apply changes or click OK 

2015-12-02_083212

Method 2:  Re-register the DLLs

Run the following commands in an escalated command prompt. Click Start, type cmd ; right Click on the “cmd” program from the search results and select Run as Administrator.

cmd-run-as-administrator

In the Command Prompt window, type the following Commands and press Enter key one by one:

regsvr32 vbscript.dll

regsvr32 jscript.dll

2015-12-03_002655

Method 3: Check Disk For Errors

If this error occurs when opening files saved in a particular DRIVE other then C:\ then that drive should be checked for errors, other wise if no additional drives, then the C:\ should be checked.

Hold the Windows Key and Press  E. On Windows 7/Vista – You will see the drives listed. On Windows 8, chose This PC from the left pane to view the drives. Right-click on the Selected Hard disk drive that you want to check and then select “Properties”.

2015-12-03_003530

Click the Tools tab from the top and then click Check Now under Error-Checking.

2015-12-03_004636

Check both the Options and the Click Start.

Method 4: Update Codecs

Another manual method to solve this error is to update all the Codecs of the Windows (7, 8 or 10) to their latest updated versions. You can download and install your latest Windows Codec Pack from here:

Windows 7 Codec Pack: http://www.windows7codecs.com/

Windows 8 Codec Pack: http://www.windows8codecs.com/

Method 5: Reset Internet Explorer

The issue can also be caused by due to cached files, that were corrupt. In this instance, it would be best to Reset IE. To do this, hold the Windows Key and Press R. In the run dialog, type inetcpl.cpl and Click OK. Go to the Advanced Tab and choose Reset. Put a check on Delete Personal Settings and hit the reset button again. Once done, reboot the PC and test.

The post BEST FIX: COM Surrogate has stopped working (dllhost.exe) appeared first on Appuals.com.

BEST FIX: csrss.exe Using High CPU and Memory

$
0
0

The Client/Server Runtime Subsystem process (csrss.exe) is a Windows process that is absolutely essential for system operation. The csrss.exe process is, in the most recent versions of the Windows Operating System, responsible for the handling of the Win32 console and GUI shutdown. In the case of some Windows users, the csrss.exe process has been known to abruptly start taking up almost all available CPU and memory completely out of the blue, causing system to either fail and crash entirely or become so sluggish that it becomes inoperable.

This issue can be caused by one of two things – a corrupt user profile or a virus or malware that has the same name (csrss.exe) as the legitimate Windows system process. Regardless of which of these two is the cause of the problem in your case, rest assured as there definitely is something you can do on your end to try and fix the issue.

However, before you can do something to try and fix the issue, you need to first determine exactly what is causing it. If you simply press Ctrl + Alt + Delete, open your Task Manager and navigate to the Processes tab, you will be able to see just how many csrss.exe processes are running on your computer at the same time. If there are two (or more) csrss.exe processes running on your computer and one of them has absolutely nothing or something fishy in the User name and or Description fields, you can be almost entirely certain that the cause of this problem in your case is a virus or malware.

If the culprit is a virus or malware:

Click here and, depending on the version of Windows that you are using, download the 32-bit or 64-bit version of the Farbar Recovery Scan Tool. Move the downloaded file to your Desktop. Execute the downloaded file.

Click on Yes in the disclaimer. Click on Scan.

2015-12-03_080943

Wait for the utility to scan your computer for viruses, malware and other security threats. Once the utility has worked its magic, peruse its results and the log file that it created on your Desktop (or wherever the utility’s executable file that you downloaded was when you ran it) to find out whether or not a virus, malware, Trojan or other security breach actually is to blame for a csrss.exe process on your computer that takes up almost all of its CPU and memory.

If you do find a virus, malware or other security threat to be responsible for this problem, you should then download an antivirus and anti-malware program such as Malwarebytes and use it to get rid of all the malicious and potentially harmful elements on your computer.

If the culprit is a corrupt user profile:

If the culprit wasn’t a virus, malware or other malicious file or if the method described above didn’t work, it is possible that the problem was actually being caused by a corrupted user profile. If that is the case, simply creating a new user profile and deleting your old one should fix the issue and get your computer’s csrss.exe process back to using only a minimal amount of CPU and memory. Before you delete your user profile, be sure to back up all the data in your Documents folder and Desktop.

Open the Start Menu. Click on your user account’s display picture.

2015-12-03_081123

Click on Manage another account. Click on Create a new account. Name the new account and be sure to select Administrator, and then click on Create account. Double-click on your primary account. Click on Delete the account. Click on Delete files and then on Delete account to confirm the action.

Log into your new account, and once you do, the corrupt user profile will be replaced with a fresh, new and complete one.

If you do not want to delete the old account because it has your important files, then before proceed within deletion make sure you back non-executables (My Documents, My Pictures, WORD Files etc) to an external disk drive and after the creation of new profile/deletion of old profile, copy them over to the new profile.

The post BEST FIX: csrss.exe Using High CPU and Memory appeared first on Appuals.com.

BEST FIX: DVD/CD Drive Error 19 on Windows 10

$
0
0

Many Windows 10 users are complaining of their DVD/CD drives not working and the Device status section of the General tab of their DVD/CD-ROM’s properties in Device Manager displaying Error 19. Some users start experiencing this issue completely out of the blue, whereas others experience it following a system upgrade. This problem is either caused by an issue with your DVD/CD drive’s drivers or some kinks in your computer’s registry. The following are the most effective solutions that you can use to try and fix this issue on your own:

Solution 1: Update your DVD/CD drive’s drivers

Press the Windows Logo key + R.

Type hdwwiz.cpl into the Run dialog and press Enter to open the Device Manager. In the Device Manager, expand the DVD/CD-ROM Drives. Double-click on your DVD/CD drive. Navigate to the Driver. Click on Update Driver.

2015-12-03_084546

Choose the “Search for update driver automatically“, wait for your computer to check to see if any updates for your CD/DVD drive’s drivers are available. If any updates are available, download and install them.

Solution 2: Uninstall your DVD/CD drive

Press the Windows Logo key + R. Type hdwwiz.cpl into the Run dialog and press Enter to open the Device Manager.In the Device Manager, expand the DVD/CD-ROM Drives. Right-click on your DVD/CD drive and click on Uninstall. If asked to, confirm the action.

2015-12-03_085443

Click on Action in the toolbar at the top of the window and click on Scan for hardware changes.

2015-12-03_085722

Wait for Windows to detect and reinstall your DVD/CD drive and its drivers. Once the DVD/CD drive and its drivers have been reinstalled, it should reappear in the DVD/CD-ROM Drives section of the Device Manager. At this point, restart your computer and check to see if the issue has been resolved.

Solution 3: Fix this issue by editing the registry

By far, the most popular fix for error 19 on a DVD/CD drive – or any other computer hardware, for that matter – is to delete a specific couple of values from your registry. Press the Windows Logo key + R. Type regedit into the Run dialog and press Enter to open the Registry Editor.

regedit - 1

While this is one of the most effective solutions that you can use to try and fix this problem, it should be noted that the registry is one of the most sensitive parts of a computer and deleting the wrong keys or values can is quite likely to cause system failure. Since that is the case, it is recommended that, before you proceed any further, you create a backup of an unaltered version of your registry. To do so, you need to click on File in the top left corner of the Registry Editor window, click on Export, name the backup aptly (RegistryBackup – for example) and save it to your Desktop. If anything goes wrong, you can overwrite the altered version of your registry and restore the unaltered one.

In the left pane of the Registry Editor, navigate to the following directory:

HKEY_LOCAL_MACHINE\SYSTEM\CurrentControlSet\Control\Class\{4D36E965-E325-11CE-BFC1-08002BE10318}

Click on the {4D36E965-E325-11CE-BFC1-08002BE10318} key in the left pane to display its contents in the right pane.

In the contents of the {4D36E965-E325-11CE-BFC1-08002BE10318}, look for values named UpperFilters and LowerFilters.

If one or both of these values exist, delete them. Close the Registry Editor and restart your computer. When your computer boots up, check to see whether or not the issue has been resolved.

The post BEST FIX: DVD/CD Drive Error 19 on Windows 10 appeared first on Appuals.com.

BEST FIX: High CPU Usage by svchost.exe (netsvcs)

$
0
0

Many Windows users experience a bizarre and highly menacing problem where a specific process named svchost.exe (netsvcs) starts requisitioning and using more and more RAM after an affected computer boots up and fails to let go of the RAM regardless of how much it accumulates. The svchost.exe (netsvcs) process is among a group of quite a few different svchost.exe processes – all of which are system process that, in almost all instances, work for the benefit of the system. However, in such cases, the svchost.exe (netsvcs) process becomes the exact opposite of good for affected computers.

This issue is so severe that the total amount of RAM used by the svchost.exe (netsvcs) process goes even beyond 50% with the passage of a small amount of time and gets to the point where the affected computer becomes so sluggish that it just can’t be used and needs to be rebooted in order to become functional for a short period of time. The number of Windows users who have suffered from this issue in the past is, quite frankly, disappointingly large. While this problem is mostly seen in computers running on the Windows 7 Operating System Windows 8 and 10 aren’t at all immune to it.

In most cases, the culprit behind this issue is either a virus or malware or a service that starts automatically when an affected computer boots up. Thankfully, there is quite a lot you can do to try and fix this issue and recover the excessive amount of RAM the svchost.exe (netsvcs) process typically takes over. The following are some of the most effective solutions for this issue:

Solution 1: Download and install all available Windows updates

The svchost.exe (netsvcs) process using a boatload of RAM problem has been reported countless times to Microsoft, which is the reason why Windows has released a multitude of different patches for this problem bundled with quite a few of its Windows updates. Regardless of what version of Windows your computer is running on, there should be at least a few updates for your system, updates that include patches or fixes for this issue, and if that is the case, simply downloading and installing these updates should fix this issue for you.

Open Windows Update. Click on Check for updates.

2015-12-03_091616

Allow your computer to check for and then list all available updates.

2015-12-03_091502

Download and install all available updates. There should be at least one update that contains a patch or fix for this problem among the many Windows updates that you download and install. You certainly can choose to not download some updates, but just be sure that you do not neglect any updates that might contain a patch or fix for this problem – updates such as Windows stability updates and cumulative Windows updates.

Solution 2: Scan your computer for viruses and malware

The svchost.exe process may be using tons of RAM because of a virus or malware infection. Specific viruses and malware may certain processes on your computer – such as svchost.exe – to start using excruciatingly large amounts of RAM without letting go of any of the RAM that they are no longer using. Since that is the case, another effective method that you can use to try and fix this issue is to download and install an antivirus or anti-malware program such as Malwarebytes and then use it to scan your computer for viruses, malware and any other security threats.

Solution 3: Disable the BITS service

The BITS (Background Intelligent Transfer Service) is a component of the Microsoft Windows Operating System that makes use of idle network bandwidth to download data crucial to the system (such as Windows updates) in the background. However, in some cases, the BITS service can malfunction, causing it to siphon off excessively large amounts of bandwidth from the user and also cause the svchost.exe process to start using up an unacceptably significant percentage of the affected computer’s Random Access Memory. If your computer is affected by the svchost.exe process taking up a lot of your RAM problem and BITS is also using a lot of bandwidth, it may be causing the issue in the first place, and if that is so, disabling the BITS service altogether should fix the problem.


Hold the Windows Key and Press R. Type services.msc and Click OK. 

2015-12-03_092457

Locate the service named Background Intelligent Transfer Service and double-click on it. Open the dropdown menu in front of the Startup type. Click on Disabled. Click on Apply. Click on OK. Doing so will disable the BITS service.

2015-12-03_092937

You should not be afraid to disable the BITS service as it will not, in any way, affect the way your computer runs on an everyday basis. If this solution does not get the job done for you, simply move onto the next one.

Solution 4: Disable the wuauserv service

The wuauserv service is the name of the Windows Update service. The Windows Update service is infamous for being responsible for the svchost.exe process taking up more than 50% of the total RAM a computer affected by this problem has. If the Windows Update service is causing this issue on your computer, disabling it will do the trick.

Hold the Windows Key and Press R. Type services.msc and Click OK. 

2015-12-03_092457

Scroll down to the Windows Update. Double-click on the Windows Update Open the dropdown menu located in front of the Startup type. Click on Disabled. Click on Apply. Click on OK. This will successfully disable the wuauserv

While disabling the wuauserv service is one of the most effective solutions that you can use to try and get the svchost.exe process to not use a preposterously large amount of RAM, disabling this service will mean that Windows Update will no longer start and stop of its own accord. This means that available updates for your computer will not automatically be downloaded and installed. While this is not something that will hinder everyday operations, keeping your computer and all of its devices and drivers up to date is most certainly important.

Since that is the case, if you choose to disable the wuauserv service and if doing so fixes this issue in your case, be sure to, at least once a month, set the wuauserv service’s Startup type to Manual, right-click on the service and click on Start, open Windows Update, check for available updates and download and install all available updates. This will ensure that your computer and all of its devices and software stay up to date. Once you have downloaded and installed all available updates, you can turn the Windows Update service’s Startup type back to Disabled to make sure that you do not fall prey to the svchost.exe process using LOTS of RAM issue again.

The post BEST FIX: High CPU Usage by svchost.exe (netsvcs) appeared first on Appuals.com.

Viewing all 4542 articles
Browse latest View live