Some Windows 10 users report that they can no longer enable Windows Hello on their computer. Most of the time, the message that comes up is “Windows Hello is preventing some options from being shown”. This issue is most often reported by users who have recently upgraded to the Anniversary Edition or did a clean install to the equivalent build.
Image may be NSFW. Clik here to view.Windows Hello is preventing some options from being shown
What is Windows Hello?
Windows Hello is a high-end way of signing into your Windows 10 devices. The technology facilitates enterprise-grade security without the use of traditional passwords. Depending on the Windows 10 device, you can use Windows hello to log-in with your face, fingerprint or iris.
What is causing the Windows Hello is preventing some options from being shown error?
We investigated this particular issue by looking at various user reports and the steps that they took to resolve the issue. From what we gathered, there are several reasons why this particular issue might occur:
Windows Hello is managed differently starting with the Anniversary update – If you’re encountering the issue on a domain-joined computer, you should know that there have been some changes starting with the Anniversary update. Follow Method 2 for steps on resolving the issue for domain-joined computers.
PIN Login is not authorized for the Domain user – A recent update forces the PIN Login feature to be authorized in order for Windows Hello to function properly. Follow Method 1 for steps on how to do so.
If you’re struggling to resolve this particular issue, this article will provide you with a list of troubleshooting steps. Below you have a list of verified methods that other users in a similar situation have used to fix or circumvent the issue. For the best results, follow the methods below in order until you stumble upon a fix that is effective in your particular situation.
Method 1: Authorising PIN Login via Registry Editor
Based on various user reports, it seems like starting with the Anniversary update, Microsoft has reverted the procedures behind using a PIN Logon for a Domain user back to how it was with Windows 8.
This means that PIN Logon for a Domain User needs to be authorized before Windows Hello can use it. Luckily, you can enable it quite easily by inserting a certain key in your Registry via Registry Editor.
Here’s a quick guide on what you need to do:
Press Windows key + R to open up a Run dialog box. Then, type “regedit” and press Enter to open up the Registry Editor utility.
Image may be NSFW. Clik here to view.Run dialog: regedit
Inside the Registry Editor, use the left-hand pane to navigate to the following location:
Select the System key, then move over to the right-hand pane and create a new Dword value by right-clicking in a new space and choosing New > Dword (32-bit) value. Image may be NSFW. Clik here to view.Creating a new Dword value
Name the newly created AllowDomainPINLogon. Then, double-click on and set the Base to Hexadecimal and the Value data to 1.
Image may be NSFW. Clik here to view.Name the newly created Dword to AllowDomainPINLogon and set it’s value to 1
Close Registry Editor and restart your computer. At the next startup, see if the issue has been resolved.
If you are still seeing the “Windows Hello is preventing some options from being shown” error when trying to enable Windows Hello, move down to the next method below.
Method 2: Enabling Convenience Pin sign-in via the Local Group Policy Editor
Several users have managed to resolve the issue by using the Local Group Policy Editor to enable convenience PIN sign-in. This is theoretically the equivalent of using Method 1, but it can also be applied for enterprise use cases where you need to approach things with a domain mindset.
Here’s a quick guide on resolving the “Windows Hello is preventing some options from being shown” error by enabling the Turn on convenience PIN sign-in policy via the Local Group Policy Editor:
Note: Keep in mind that not all Windows version include the Local Group Policy editor by default. If your computer doesn’t, stick to Method 1 or follow this guide (here) to install it on your system.
Press Windows key + R to open up a Run dialog box. Next, type “gpedit.msc” and hit Enter to open the Local Group Policy Editor.
Image may be NSFW. Clik here to view.Type gpedit.msc into the Run dialog and press Enter
Inside the Local Group Policy editor, navigate to the following location:
Once you get there, double-click on Turn on convenience PIN sign-in policy and set it to Enabled.
Image may be NSFW. Clik here to view.Set the Turn on convenience PIN sign-in policy to enabled
Click Apply, then close the local group policy editor and restart your computer. The issue should be resolved at the next startup.
iTunes is an official software from Apple and it is used for device management of iPhones, iPads and the rest of the iOS devices. With this software, you can add pictures, music, videos, ringtones and everything you desire on your iOS device. Also, you can update, restore, make a backup of your desired data and many more. But sometimes with iTunes errors may occur and one of them is “iTunes Sync Session Failed to Start”.
There can be several reasons why this error can happen and sync session cannot start but the most common ones are: some running applications stop the sync process, the required iTunes opponents are missing, outdated iTunes and component software, corrupt iTunes software or iTunes library, faulty or incomplete iTunes installation and iTunes related component installation and etc. If you are facing this error don’t worry, in this article, we will show how to get rid of and solve “iTunes Sync Session Failed to Start” error.
Before you start with our solutions in order to fix the synchronization session that failed to start, we must suggest you make sure to get operational USB cable or get USB cable that is working fine and then reboot your iPhone and computer or quit iTunes and then re-launch it. And we must note that these methods helped many users in solving this problem.
Method #1. Force Closing Applications.
As we said before running apps can cause to stop the synchronization process and can be the reason to start sync session failed to start problems. Forcing closure of the apps can be the best and easiest thing that you can try in order to fix the problems of the sync session failed to start. To force close apps, do the following steps.
Unlock your iPhone.
Go to Home Screen.
Press the Home button twice. All the apps that are running in behind will be shown on your screen. Scroll up and you will be able to close the running applications.
Image may be NSFW. Clik here to view.Force Close Apps
Note: On iPhone X and the newer models there is no Home button so the only way to close running apps on iPhone X, iPhone XS, iPhone XS Max, and iPhone XR are different.
Swipe up from the bottom of the screen.
Then pause with your finger in the middle of the screen for a second until all of the app cards appear.
Method #2. Updating iTunes.
The problem may occur because you are using an old version of the iTunes and the simplest solution is just to check for updates and if there is a newer version download and install it.
Open iTunes on your PC or Mac.
Open the Help tab from the top menu.
Click on Check for Updates. When you click on this option iTunes will begin with checking for updates and install them if there is a newer update available.
Image may be NSFW. Clik here to view.Check For Updates
This method will solve the problem with iTunes if the software is outdated. If your iTunes is up to date try out our second method.
Method #3. Fixing Synchronization Session Failed to Start by Deleting Previous Backups.
While finishing the process of syncing, iTunes does not create a new backup file, but instead, it would overwrite or just attach old backups. Sometimes iTunes backup can be corrupt, that can lead to the problems of sync session failed to start. And maybe the best thing to do in order to fix this problem is just to delete the previous backups.
Open iTunes.
Click on Edit menu.
Click on Preferences.
Choose the correct device.
Delete the previous. Image may be NSFW. Clik here to view.Delete Backups
Also, if the Reset Sync History button is enabled click on it.
Several users are encountering the “the current input timing is not supported by the monitor display” error when opening certain applications or at the very start of the booting procedure. The issue is mostly reported to occur with Dell monitors.
Image may be NSFW. Clik here to view.The current input timing is not supported by the monitor display
What is causing the current input timing is not supported by the monitor display?
We investigated the issue by looking at various user reports and the solutions that they followed to take care of the issue. Based on their reports, there are several different scenarios that can lead to the apparition of this particular issue:
The monitor is set outside it’s allowed resolution or refresh rate – This is one of the most common reasons why this error occurs. Several users encountering the same problem have managed to get it fixed by booting into Safe Mode and changing the Display Settings to the correct values.
The connection cable has defected – The cable connecting our PC to the monitor might start to defect. You might notice intermittent cable bandwidth before the screen remains like this indefinitely.
If you’re currently struggling to resolve this particular issue, this article will provide you with a set of basic troubleshooting guides. Below you have a collection of methods that other users in a similar situation have used to get the issue resolved.
We encourage you to follow the methods below in order until you encounter a fix that is effective in resolving the issue in your particular situation.
Method 1: Booting in Safe Mode and changing the resolution & refresh rate to allowed values
The most common reason why the “the current input timing is not supported by the monitor display” error occurs is if the monitor’s resolution or refresh rate (or both) is/are set outside the supported rate. Most of the time, this occurs due to manual user intervention, but there are certain 3rd party applications that might do this.
Some affected users have managed to resolve the issue by booting their computer into Safe mode and lowering down the resolution or refresh values. Here’s a quick guide on how to do this:
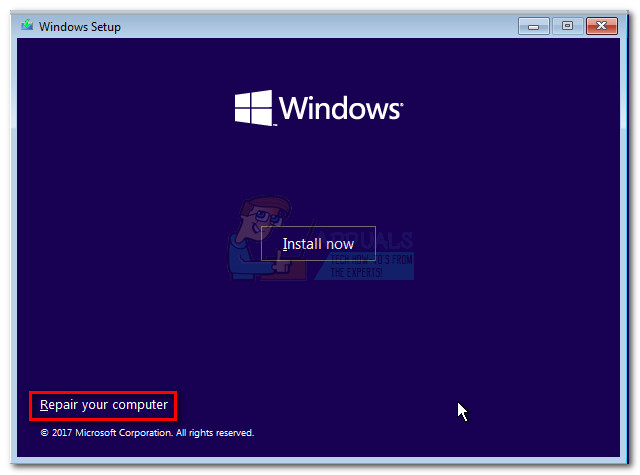
Insert Windows the installation media and press any key when prompted to boot from it. At the initial screen, click on Repair your computer in the bottom-left corner to open the Windows Recovery Environment screen.
Image may be NSFW. Clik here to view.Click on Repair your Computer
Note: If you don’t have the installation media, you can force your computer to boot into the Windows Recovery screen by forcing two or three consecutive hard shutdowns. You can do this by holding the Power button when you see the Windows logo coming on the screen.
Once you get to the Recovery menu, go to Troubleshoot > Advanced Options > Startup Settings, then click on Restart.
Image may be NSFW. Clik here to view.Access the Startup Settings menu
Your computer will restart and you will see a whole new set of recovery options under Startup Settings. Once you arrive at this menu, press 4 to boot up in Safe mode and wait for the procedure to complete.
Image may be NSFW. Clik here to view.Press 4 to boot into Safe Mode
When the startup is complete, press Windows key + R to open up a Run dialog box. Then, type “desk.cpl” and press Enter to open up the Screen Resolution window.
Image may be NSFW. Clik here to view.Run dialog: desk.cpl
Once you’re inside the Display screen, change the Resolution and refresh rate to the recommended values. Keep in mind that the refresh rate can’t be modified from here unless your monitor supports multiple refresh frequencies.
Image may be NSFW. Clik here to view.Setting the recommended resolution
Note: This menu will look different depending on which Windows version you’re using.
Restart your computer and see if your computer is able to boot normally without triggering the “the current input timing is not supported by the monitor display” error.
If you’re still encountering this issue after following the steps above, move down to the next method below.
Method 2: Use a different cable
If Method 1 was not successful, you might want to start considering the possibility of a hardware issue. Some affected users have discovered that in their case, the culprit was identified to be the connection cable between the PC and the monitor.
If you have one lying around in your house, connect it and see if the “the current input timing is not supported by the monitor display” prompt is still appearing. A good indication that the cable has gone bad is if you have previously noticed any sudden screen flickering or interruptions.
In the event that you decide to buy cable, look for a shorter but higher quality cable instead of looking at the length.
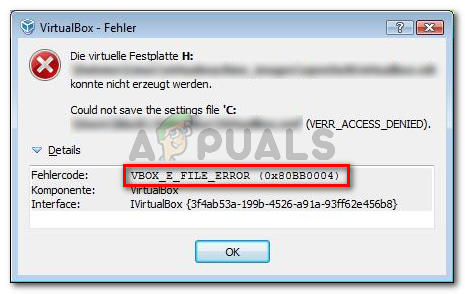
Several users report getting the vbox_e_file_error (0x80bb0004) error when trying to attach a virtual disk to the virtual machine using VirtualBox. Other users report that for them the issue occurs when they try to export a previously created appliance into VM VirtualBox Manager.
Image may be NSFW. Clik here to view.vbox_e_file_error (0x80bb0004) error
What is causing the vbox_e_file_error (0x80bb0004) error
We investigated this particular issue by looking at various users and the method that they reportedly used to resolve the error message. Based on what we were able to gather, there are several fairly common scenarios that will trigger this particular error message:
The .vmdk or .vdi file is corrupt – This particular error is often reported to occur when the user tries to import a virtual appliance downloaded over the internet. This can occur due to an incomplete download or a network issue.
vbomxmanage.exe doesn’t have administrative privileges – Another common reason that will trigger this issue is when a component involved in the importing or exporting process is missing admin rights. This is mostly reported to occur when the user tries to attach a virtual disk hosted on a USB drive.
The machine configuration needs to be updated – The error might also occur because some manual intervention has corrupted your current virtual machine configuration. Some users in a similar situation have managed to get the issue resolved by recreating the virtual machine from scratch in VirtualBox.
The .vdi or .vmdk file contains bad sectors – Several users have reported that the issue was fixed after they used the CHKDSK utility to scan the file for bad sectors. This suggests that the error can also occur due to file corruption.
Corrupted VM VirtualBox installation – A corrupted Windows VirtualBox installation can also trigger this error message. Some users have managed to resolve the issue by uninstalling the whole VM VirtualBox client along with all associated components.
If you’re currently struggling to resolve this particular issue, this article will provide you with a list of verified troubleshooting steps. Below you have a list of methods that other users in a similar situation have used to get the issue resolved.
For the best results, follow the potential fixes below in order until you encounter one that is effective for your particular situation.
Let’s begin!
Method 1: Re-downloading the .vmdk or .vdi file
If you’re getting this particular error when trying to import a Virtual Appliance into the Oracle VM VirtualBox Manager, it’s very likely that you’re dealing with some kind of corruption.
Most affected users reported that they managed to resolve the issue after they re-downloaded the Virtual Appliance or after they performed a thorough CHKDSK.
If your situation is similar to the one described above, start by re-downloading the .vmdk file (if you got it over the internet). You might e dealing with an interrupted or partially downloaded update.
Once the download is complete, try to import the Virtual Appliance again into your VM VirtualBox Manager. If the vbox_e_file_error (0x80bb0004) error returns, you’ve just confirmed that the error is not occurring due to a corrupted download.
If you’re still seeing the error or you haven’t downloaded the .vmdk file from the Internet, move down to the next method below
Method 2: Opening vboxmanage.exe with administrative privileges
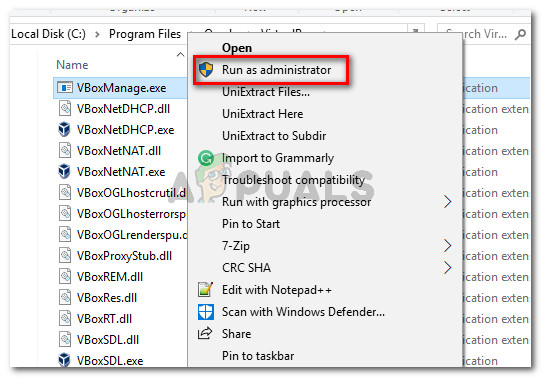
If the error code is wrapped up in an Access Denied error, it’s very likely that you are encountering the issue because you’re not opening the vboxmanage executable with administrative privileges. Some affected users have reported that the issue was resolved after they opened both VirtualBox and vboxmanage.exe as Administrator.
This is quite a common occurrence when trying to attach a virtual disk (hosted on a USB drive) to a virtual machine. As it turns out, RAW access to the USB device will require Admin rights, which is what might end up producing the error.
So, before trying anything else, make sure that you’re using Admin rights when doing the managing part by right-clicking on vboxmanage.exe and choosing Run as Administrator.
Image may be NSFW. Clik here to view.Running vboxmanage.exe as Admin
If this method didn’t allow you to resolve the issue, move down to the next method below.
Method 3: Creating a new Virtual Machine
Several users that encountered the VBOX_E_FILE_ERROR (0x80BB0004) error when trying to import the Appliance OVA file into VirtualBox reported that they managed to resolve the issue by creating a new virtual machine from scratch.
Here’s a quick guide on how to do this:
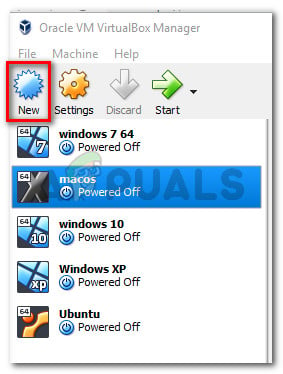
Open Oracle VM VirtualBox and press New to create a new virtual machine.
Image may be NSFW. Clik here to view.Creating a new Virtual Machine
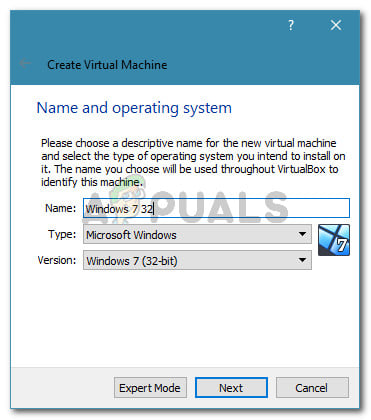
Name your new virtual machine, then select the Type and Version of the emulated operating system.
Image may be NSFW. Clik here to view.Creating a new virtual machine
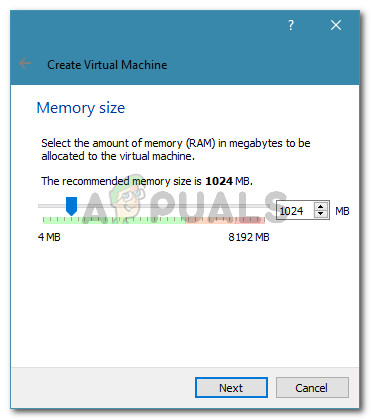
Select the allocated memory size using the toggle and click Next once again.
Image may be NSFW. Clik here to view.Allocating memory
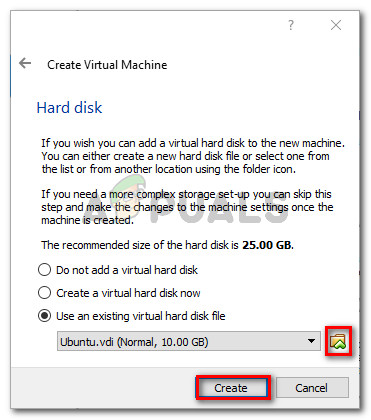
In the next screen, choose to Use an existing virtual hard disk file, click the folder icon and browse to the location of the .vdi file.
Image may be NSFW. Clik here to view.Browsing to the location of the VDI file before creating the new machine
Once the new virtual machine is recreated, repeat the steps that were previously triggering the vbox_e_file_error (0x80bb0004) error and see if the issue has been resolved.
If you’re still seeing the same error message, move down to the next method below.
Method 4: Running CHKDSK
Several users have reported that the issue was corrected after they ran a CHKDSK scan on their computer. Apparently, the CHKDSK utility is perfectly capable of finding and correcting errors in the .vdi file.
If the error is occurring due to some bad sectors in the .vdi file, the following procedure should resolve the issue entirely. Here’s what you need to do:
Note: If you’re encountering this issue on Linux, you can use the FSCK (File System Check) utility instead.
Press Windows key + R to open up a Run dialog box. Then, type “cmd” and press Ctrl + Shift + Enter to open up an elevated Command Prompt window.
Image may be NSFW. Clik here to view.Run dialog: cmd , then press Ctrl + Shift + Enter
Inside the elevated Command Prompt, simply run the following command and press Enter to initiate a scan.
chkdsk X: /f /r /x
Note: Keep in mind that X is merely a placeholder for the volume letter of the drive holding the .vmdk or .vmi file. Replace it accordingly so it looks like this: chkdsk c: /f /r /x
The command that you’ve just run will scan the volume and attempt to fix any found errors on top of trying to recover any information from bad sectors. Once the procedure is complete, close the elevated Command Prompt and restart your computer.
At the next startup, see if the issue has been resolved by repeating the same procedure that was previously showing the vbox_e_file_error (0x80bb0004) error.
If you’re still encountering the same error message, move down to the final method below.
Method 5: Reinstall Oracle Virtual box
Some users encountering the same vbox_e_file_error (0x80bb0004) error have reported that the issue was only fixed after they reinstalled the whole Oracle Virtual box installation. This seems to suggest that a corrupted installation might also be responsible for this particular error.
Here’s a quick guide on reinstalling Oracle VirtualBox:
Press Windows key + R to open up a Run dialog box. Then, type “appwiz.cpl” and press Enter to open up Programs and Features.
Image may be NSFW. Clik here to view.Run dialog: appwiz.cpl
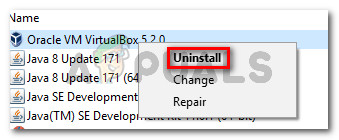
Inside Programs and Features, scroll down through the list of applications and locate Oracle VM VirtualBox. Once you see the entry, right-click on it and choose Uninstall.
Image may be NSFW. Clik here to view.Uninstalling Oracle VM VirtualBox
Click Yes at the confirmation prompt to uninstall the Oracle VM VirtualBox.
Image may be NSFW. Clik here to view.Confirming the installation of Oracle VM VirtualBox
Once the uninstallation process is complete, restart your computer.
At the next startup, visit this link (here) and click on Windows hosts to download the latest version of VirtualBox for windows.
Open the installation executable and follow the on-screen prompts to reinstall the software to your system.
Try to attach the Virtual Disk to the virtual machine again and see if the error is still occurring.
Microsoft Store serves as a platform for the distribution of Windows apps. It started off as an app store for Windows 8 and now, has over 669,000 apps available for users, including ‘side-loaded’ apps from similar platforms like Google Play. The Store is consistently increasing its available app categories and general app quantity; but along with all the improvements, users have reported a long list bugs. The Microsoft Store Error 0x80072efd “Check your connection” is an infamous member of the said list.
Image may be NSFW. Clik here to view.Microsoft Store Error 0x80072efd “Check your Connection”
As evident from the name, this error constitutes a problem with the detection and connection of your wireless or Ethernet network with the application in question. More often than not, the problem is user-generated, caused by lack of updating or unintentional malware downloading. However, sometimes bugs within the application, proxy servers etc also become factors which can cause the app to malfunction. Network issues with any app are usually caused by:
What causes the Microsoft Store Check Connection Error?
A Bug in the Application: While Microsoft releases regular updates for its apps, there’s always a kink or two in the code. In this case, it’s an issue with the app’s networking ability.
An External Disruption: Sometimes other apps or PC settings can affect the Microsoft Store’s ability to detect your network. Your computer’s firewall settings or local network can also interfere with your app’s connection specific features.
Router Settings: The Maximum Transmission Unit (MTU) setting on your router is either too high or too low, this can also cause the app to give the aforementioned error.
Proxy Server Settings: These settings can disrupt your app’s connection to the Windows Update site, which in turn can become a reason for your app malfunctioning.
Not to worry though, because if you follow the steps listed ahead, you’ll be back to downloading apps from your Microsoft Store in no time.
Method 1: Shut down and Restart Windows Store
Sometimes a traditional fix is the best fix. This method will show you how to shut down all Microsoft Store related activity and its components so that the app can reboot itself and remove any errors before it is run again.
Click on the Search icon, type Task Manager and click on it.
Expand the Store tab
Image may be NSFW. Clik here to view.Task Manager/Store
Right-click on both Runtime Broker and select End Task.
Image may be NSFW. Clik here to view.Task Manager/Store/Runtime broker/End task
Now, do the same for Store.Image may be NSFW. Clik here to view.Task Manager/Store/End task
Now, close the Task Manager, click the Store icon to restart the app and check if the error has been resolved.
Method 2: Run the Windows apps troubleshooter
In most cases, the Microsoft Store will automatically inform users of any problems with apps and suggests solutions to fix the problem. However, if you continue to face errors with an app, in this case, the Microsoft Store, this built-in tool can automatically identify and guide you through the steps to fixing any problems that it detected in your app. This Method will show you how to use the Troubleshooter tool.
Select the Windows Start icon.
Click on the Settings icon.Image may be NSFW. Clik here to view.Settings
Now click on Update & Security option.Image may be NSFW. Clik here to view.Settings/Updates and Security
Click the Troubleshoot tab.Image may be NSFW. Clik here to view.Settings/Update and Security/Troubleshoot
Select the Windows Store Apps option. Image may be NSFW. Clik here to view.Troubleshoot/Windows Apps Store
The Troubleshooter will find the cause(s) of the error and will display instructions to fix the error. Follow all the instructions, then close the Troubleshooter and open the Microsoft Store app to check if the problem has been resolved.
Method 3: Disable proxy settings
If your Internet connection is through proxy settings, it can make Windows Apps incapable of properly connecting to the Internet and hence, they do not work suitably, according to the user’s expectation. This method will show you how to check your proxy settings and disable them to get your Store working.
Press Windows key + R keys on the keyboard.
On the dialogue box that pops up, type inetcpl.cpl and press Enter.Image may be NSFW. Clik here to view.Run/inetcpl.cpl
On the pop-up window, click the Connections tab.
Image may be NSFW. Clik here to view.Internet Properties/Connections
Now, click on LAN setting.Image may be NSFW. Clik here to view.Internet Properties/Connections/LAN
Uncheck the Use a proxy server for your LAN option and click Apply.
Image may be NSFW. Clik here to view.LAN Settings
Close the window.
Now, open the Store app and check if the error is resolved.
Not everybody knows this but Netflix contains a different library of movies and TV shows for every different country/region that it is active in. In theory, you can get access to Netflix by using any traditional geographical VPN and accessing the site from there.
Image may be NSFW. Clik here to view.Streaming Netflix using VPN
To counter this technique used by viewers, Netflix has placed a huge VPN detection system in place. It automatically detects if a user is using a VPN and bans that IP. That IP, since it is associated with the VPN, automatically gets added to the banned pool.
The VPN engineers, Netflix, and users are in reality going around in a circle. VPN engineers come up with a workaround which slips past the VPN detection system in Netflix. Netflix in return identifies the vulnerability and fixes it. This causes the VPN engineers to R&D again and work with a fix.
There are still several reliable methods which can give you access to another country’s Netflix and allow you to watch shows.
Unblock Netflix using CyberGhost
There are several third-party software available which can unblock Netflix for you and let you watch any show from any geographic library. However, like mentioned above, many of them still get their servers blacklisted which results in downtime. VPN software like CyberGhost has dedicated streaming VPNs which guarantee viewership without any interruption. Take a look below on how to install CyberGhost on your computer and view Netflix.
Image may be NSFW. Clik here to view.Downloading CyberGhost
After downloading the VPN, install it on your computer. You might be asked for proper permissions. Make sure that you are logged in as an administrator and there provide all the permissions needed.
Once you have installed CyberGhost on your computer, launch it and your credentials necessary. You can also create an account directly from the application (if not already made). Select For streaming using the left navigation pane.
Here you will be shown different VPNs available for streaming. As you can see, the US server is optimized to run Netflix. Select it and click the power button present at the right-pane.
Image may be NSFW. Clik here to view.Selecting streaming VPN in CyberGhost
Launch your browser and try accessing Netflix from another country. Happy streaming!
The Google Pixel 3 is the latest device in the Pixel lineup from Google, and its one of the best pure Android experiences available. In this Appuals guide, we are going to show you how to root and unlock the Pixel 3 using a variety of methods you can choose from – we will also show you how to flash custom kernels, and some additional recommendations.
This guide is for the Pixel 3 and Pixel XL, with an aim towards the November 2018 Security Patch, though the downloads for each device may be different. This guide is not intended for the Pixel / Pixel XL / Pixel 2 / Pixel 2 XL phones! Proceed at your own risk!
Requirements
The latest Android 9.0.0 (Pie) Factory or OTA image “crosshatch” for Pixel 3 XL
It is highly recommended to backup your data before proceeding, as unlocking the bootloader will erase all of your user data from your Pixel 3 device!
Enable Developer Mode by going into Settings > System > About Phone > tap Build Number (7 times) until you see Developer Mode has been activated.
Now go into Settings > Developer Options > enable both OEM Unlock and USB Debugging.
Connect the phone to your computer via USB cable.
Launch an ADB terminal (hold Shift + right click in your main ADB folder and choose ‘Open a Command Window here’).
To make sure your Pixel 3 is recognized by ADB, type in the terminal: adb devices
This should display your device’s serial number in the output prompt – if it says your device is not recognized, device offline, or displays no device at all, you may need to try reconnecting the USB, or troubleshooting your USB drivers (also accept the ADB pairing dialogue on your Pixel 3 screen).
If your device is successfully recognized by ADB, type the following command into ADB terminal: adb reboot bootloader
When your Pixel 3 device boots into Bootloader Mode, you can then type into ADB terminal: fastboot flashing unlock
Then just follow the on-screen instructions to unlock your bootloader, and remember, all of your user-data will be reset!
When the process is done, you type into ADB terminal: fastboot reboot
Root Pixel 3 with Magisk, Pass SafetyNet with TWRP
Important: Set a security PIN before installing TWRP (Settings > Security & location > Screen lock > PIN).
Reboot your Pixel 3 to the Bootloader as we showed you in the unlocking guide above.
Connect your USB cable and launch an ADB terminal.
Copy twrp-3.2.3-1-crosshatch.img to the platform-tools folder (ADB) folder and rename it twrp.img, and also copy the TWRP installer.zip to your SD card.
In the ADB terminal type: fastboot boot twrp.img
When TWRP boots, disconnect the phone from your computer.
If requested, swipe to allow modifications.
Tap ‘Install’ and select twrp-pixel-installer-marlin-3.2.3-1.zip, swipe the slider to install.
After TWRP has successfully flashed, choose ‘Reboot Recovery’.
If you are re-rooting your Pixel 3, tap Install, select Magisk’s uninstaller.zip, and swipe the slider to install.
(Optional) If You Will Install a Custom Kernel
Despair
Tap Install, select Despair R7(Pie).zip or Despair RB7(Boost).zip
Tap Add more Zips, select Magisk-v17.3.zip – BETA
Swipe Slider to Install
Save Log
Reboot System
Kirisakura_Bluecross
Note: You can install this kernel with ElementalX or Franco’s Kernel Manager. If you flash the kernel zip with ElementalX or Franco’s Kernel Manager, do not reboot automatically afterwards. Launch the Magisk Manager App and flash magisk.zip.
Tap Install, select Kirisakura_Bluecross_1.7.2_Release.zip
Tap Add more Zips, select Magisk-v17.3.zip – BETA
Swipe Slider to Install
Save Log
Reboot System
HTML5
Tap Install, select HTML5_V52.zip
Tap Add more zips, select Magisk-v17.3.zip – BETA
Swipe Slider to Install
Save Log
Reboot System
Franken
Tap Install, select FrankenKernel.P3XL.R2.zip
Tap Add more Zips, select Magisk-v17.3.zip – BETA
Swipe Slider to Install
Save Log
Reboot System
ElementalX
Tap Install, select ElementalX-P3-1.01.zip
Tap Add more Zips, select Magisk-v17.3.zip – BETA
Swipe Slider to Install
Save Log
Reboot System
Proton
Tap Install, select ProtonKernel-pixel3-v2.zip
Tap Add more Zips, select Magisk-v17.3.zip – BETA
Swipe Slider to Install
Save Log
Reboot System
If You Will Not Install a Custom Kernel
Tap Install, select Magisk-v17.3.zip – BETA
Swipe Slider to Install
Save Log
Reboot System
Root/Reroot with Magisk – Pass SafetyNet with T.W.R.P, without installing it
Do not download twrp-pixel3-installer-crosshatch-3.2.3-1.zip!
Reboot to Bootloader.
Connect the phone to the Computer with USB cord.
Copy twrp-3.2.3-1-crosshatch.img to the platform-tools folder or folder that has fastboot in it and rename it twrp.img.
Open an ADB terminal on your computer.
At the ADB terminal type: fastboot boot twrp.img
When TWRP boots, disconnect the phone from computer.
Swipe to allow modifications.
If you are rerooting, tap Install, select Magisk’s uninstaller.zip, Swipe the slider to install.
Root/Reroot with Magisk – Pass SafetyNet With patched_boot.img
Note: This method requires you have extracted and patched your boot.img!
Use a File Explorer to extract the boot.img from the Factory Image.
Extract the Factory Image file (crosshatch-pda1a.999999.999-factory-99a9a99a.zip) to a folder.
Open the folder and, extract the Image file (image-crosshatch-aa9a.999999.999.zip).
Copy the boot.img to your SD card.
Activate Developer Mode.
Install latest Magisk Manager APK.
Launch Magisk Manager and go to Settings.
Set the update channel to the version of Magisk you are going to install, for example, Magisk-17.3.zip – set the channel to Beta, Magisk-17.4.zip – set the channel to Canary, etc.
Connect to mobile data or WiFi.
When you see the Install prompt, tap Install until you see ‘Patch Boot Image’. Tap Patch Boot Image.
Select the boot.img you extracted from the latest Factory Image
When it finishes, copy the patched_boot.img to your main ADB folder.
Reboot your Pixel 3 to the Bootloader Mode.
Open an ADB terminal on you computer and type: fastboot flash boot –slot a patched_boot.img
When it finishes, type: fastboot flash boot –slot b patched_boot.img
Reboot your Phone.
Returning Pixel 3 to Stock and Re-Locking Bootloader
Warning! Do not re-lock your bootloader until after you have already returned your Pixel 3 to stock!
Return Phone to Stock
Backup your data
Backup your data/Internal storage
Settings > System > Advanced > Reset Options > Erase all data (factory reset)
Lock Bootloader (Google Pixel 3 XL)
Reboot to Bootloader.
Open an ADB terminal and type this at the prompt: fastboot flashing lock
You should see a request for confirmation on your phone, use the volume keys to scroll and the power key to select.
Allow the process to complete, then type this at the ADB terminal: fastboot reboot
Enable Developer Options: Settings > System > About phone > tap ‘Build Number’ 7 times.
Go to Settings > Developer Options > disable OEM Unlock.
Install Factory Image keep or wipe data
Backup your data
Download the appropriate “crosshatch” factory image for Pixel 3 XL to your computer.
Extract the factory Image to your ADB platform-tools folder.
If You Will Keep Data
Open the folder you extracted the factory image to and edit the flash-all.bat file to remove -w from this command: fastboot -w update image-crosshatch-aa9a.999999.999.zip Warning: If you do not remove the -w, your phone’s data will not only be erased, but also your internal storage!
Reboot to your bootloader and connect your Pixel 3 to your PC via ADB.
Open an ADB terminal on your computer and type: flash-all
Several users are seeing the Could not complete your request because the smart object is not directly editable error when trying to cutting or deleting a selected portion from an image in Photoshop. This particular error is reported to occur on CS3, CS4, CS5, CS6 and all CC versions of Photoshop.
Image may be NSFW. Clik here to view.Could not complete your request because the smart object is not directly editable
What is causing the smart object is not directly editable error?
We investigated this particular issue by looking at various user reports. We also managed to replicate the error on one of our testing machines. From what we gathered, there are a couple of scenarios that will lead to the apparition of this error message:
The image layer involved in the selection is locked – The most common reason why this issue occurs is when the selected image layer is locked or partially locked. Follow Method 1 for steps on unlocking the selected image layer.
The involved layer contains vector data – This issue might also occur if you’re trying to delete a selection that contains vector data. Rasterizing the layer should resolve the issue in this case.
If you’re struggling to resolve this particular issue, this article will provide you with a couple of repair strategies. Below you have a couple of fixes that a lot of users encountering the same issue have used to get around the “Could not complete your request because the smart object is not directly editable” error prompt.
Method 1: Unlocking the image layer
As a couple of users have reported that for them, the solution was as simple as opening the image that was producing the error in Photoshop and unlocking the image layer.
This will allow you to delete, cut or modify the image selection without receiving the Could not complete your request because the smart object is not directly editable” error.
Here’s a quick guide on how to do this:
Open Photoshop and load up the image that is displaying the error message.
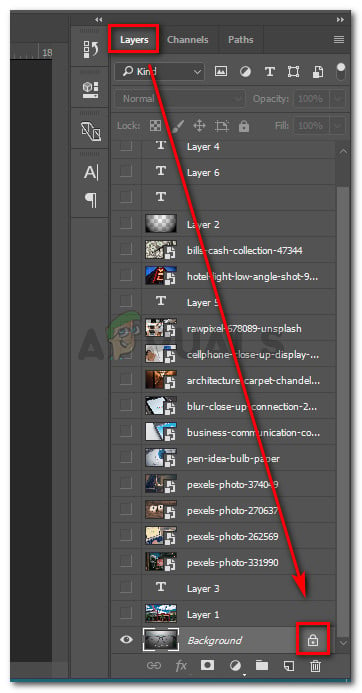
Before making the selection, go to the Layers tab using the right-hand side menu and click on the Lock icon to unlock the partially locked layer.
Image may be NSFW. Clik here to view.Unlocking the partially locked layer
With the layer unlocked, select the area that you want to cut, copy and delete and see if the error is still occurring.
If you’re still seeing the same error, move down to Method 2.
Method 2: Resolving the vector conflict
Another common approach that will produce this error is if you tried to use raster-based tools over a shape layer. There are two ways in which you can resolve the conflict of this king:
You use vectors tools to edit or remove all vector elements (pen tool, direct selection tool, etc.)
You rasterize the layer so that you can use raster-based tools
Because rasterizing is way easier and can be applied to most scenarios, we are going to focus on that. Here’s a quick guide on how to rasterize the layer that is causing you issues:
Open the Photoshop file that you’re encountering the issue on.
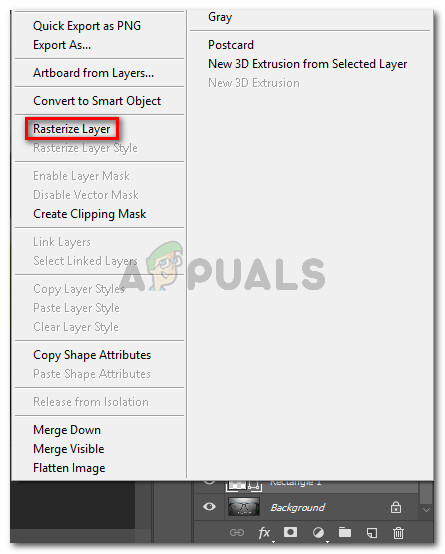
Right-click on the layer that is showing the error message and choose Rasterize Layer.
Image may be NSFW. Clik here to view.Rasterizing the smart object layer
Note: You can also use the Simplify Layer function to convert the smart object into a normal rasterized layer.
Once the smart object has been rasterized, delete, cut or repeat the same procedure that was triggering the issue. You should have no trouble completing it.
Some users reported receiving the “an attempt was made to access a socket in a way forbidden by its access permissions” error when trying to run the ipconfig/renew command in CMD in order to repair their network connection. Other users report that this issue is occurring when they try to start an Apache server. However, almost all affected users report that the issue started occurring after a Windows automatic update has been installed.
Image may be NSFW. Clik here to view.An attempt was made to access a socket in a way forbidden by its access permissions
What is causing the attempt was made to access a socket in a way forbidden by its access permissions error?
We investigated this particular issue by looking at various user reports and the repair strategies that they used to get the issue resolved. From what we gathered, there are several different scenarios that will trigger the apparition of this issue:
VPN client is blocking the involved localhost connections – Several users have discovered that in their case, the culprit responsible for the issue was their VPN client. Disabling the VPN client resolved the issue for most affected users.
3rd party firewall is blocking the connection– If you have an external firewall, it could be responsible for blocking your SMTP connections. Most of the time, McAfee Anti-Virus and Avast are confirmed as culprits.
The application is trying to open a port that is already used – One of the most common reasons why this error occurs is if you try to use an application that is configured to open a port that is already opened and actively used by a different service or application.
Windows 10 security feature – Starting with Windows 10, Microsoft has implemented a new security feature that will prevent users from grabbing a random port and giving it away to some service. This could occur if you’re using a script or a home brewed application.
Another process is listening on the desired port – Conflicts like this are known to happen quite frequently when trying to start instances of Apache Web Server or when trying to access an SQL server on Hostgator remotely.
If you’re currently struggling to resolve the issue, this article will provide you with a list of verified steps that other users in a similar situation have used to get the issue resolved. Below you have several methods that other users encountering the same error message have used to fix the problem.
For the best results, follow the potential fixes below in order until you encounter one that is effective for your particular scenario.
Method 1: Disabling Internet Connection Sharing
This one is quite a peculiar culprit because internet Sharing on Windows uses a few different ranges of ports that aren’t necessarily reported to Netstat or a similar tool.
However, several users reported that for them, the issue was resolved permanently after they disabled Internet Connection Sharing. There are two different ways that will allow you to disable Internet Connection Sharing on Windows. Follow whichever methods are more convenable for you:
Disabling Internet Connection Sharing via Control Panel
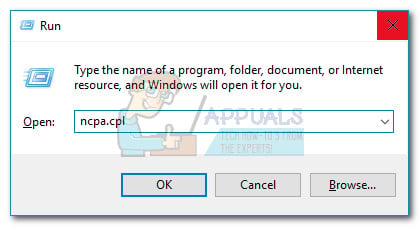
Press Windows key + R to open up a Run dialog box. Then, type “ncpa.cpl” and press Enter to open up the Network Connections window.
Image may be NSFW. Clik here to view.Run dialog box: ncpa.cpl
Inside the Network Connections window, right-click on your active network connection and choose Properties.
Image may be NSFW. Clik here to view.Right-click on your network connection and choose Properties
In the Properties screen of your network, go to the Sharing tab and uncheck the box associated with Allow other network users to connect through this computer’s Internet connection.
Image may be NSFW. Clik here to view.Disabling Internet Connection sharing
Restart your computer and see if the error message has been resolved.
Disabling the Internet Connection Sharing Service
Press Windows key + R to open up a Run dialog box. Then, type “services.msc” and press Enter to open up the Services screen.
Image may be NSFW. Clik here to view.Run dialog: services.msc
Inside the Services screen, use the right-hand pane to locate the Internet Connection Sharing (ICS) service. Once you manage to locate it, double-click on it on.
In the Internet Connection Sharing (ICS) screen, go to the General tab and change the Startup type to Disabled.
Image may be NSFW. Clik here to view.Setting the Startup type of the ICS to Manual
Restart your computer and see if the issue has been resolved.
Method 2: Uninstalling your 3rd party AV or whitelisting the connection
A lot of users have pointed out that 3rd party security suits should be checked to confirm that they’re not interfering with the SMTP connections. McAfee, BitDefender, and Avast are confirmed to blocked certain ports used by localhost connections. With certain ports, this is standard behavior in order to prevent mas mail attacks.
As some users have reported, an overprotective firewall or a similar security filtering tool can be responsible for causing the “an attempt was made to access a socket in a way forbidden by its access permissions” error.
You can typically resolve this issue by whitelisting the connection that is being blocked from your AV settings. Keep in mind that the steps of establishing a whitelist rule will be different depending on your security solution client.
Image may be NSFW. Clik here to view.In Avast, you can add a connection to the exclusion by going to Settings > General > Exclusion.
If you’re having trouble identifying the connection that is being blocked, you can temporarily uninstall your 3rd party antivirus and see if the issue is resolved.
Note: Keep in mind that disabling the real-time protection of your AV will not help you reach a conclusion since the same rules will remain firmly in place.
If you decide to uninstall your 3rd party AV, you can follow this step by step guide (here). In the event that this method wasn’t applicable or you’ve determined that the 3rd party client was not responsible for the error, move down to the next method below.
Update: IP blocking clients such as PeerBlock might automatically block an IP that is involved in the operation that is failing. Several users have reported that the issue was automatically resolved after creating a rule exception or uninstalling the IP blocking software.
Method 3: Adding an exclusion to the Windows Firewall
As it turns out, the integrated Windows Firewall can also be responsible for the “an attempt was made to access a socket in a way forbidden by its access permissions” error.
Several affected users reported that they managed to get the issue resolved after allowing the program that is displaying the error to communicate through Windows Firewall. This method is typically reported to be successful with users encountering the error with SQL server, but you can adapt the steps below to accommodate a different program.
Here’s a quick guide with what you need to do:
Press Windows key + R to open up a Run dialog box. Next, type “firewall.cpl” and press Enter to open up Windows Defender Firewall.
Image may be NSFW. Clik here to view.Run dialog: firewall.cpl
Inside the Windows Defender Firewall screen, click on Allow an app or feature through Windows Defender Firewall.
Image may be NSFW. Clik here to view.Click on Allow an app or feature through Windows Defender Firewall
Inside the Allowed apps screen, click on the Change settings button.
Image may be NSFW. Clik here to view.Click on Change settings to allow security changes
Look through the list of allowed apps and features and locate the app that is triggering the error. Once you do so, make sure that the Private and Public checkboxes associated with the application in questions are enabled.
Image may be NSFW. Clik here to view.Allowing the application on Private and Public networks
Note: In the event that you can’t find the program listed under Allowed apps and features, click the Allowanother app button and select it manually by clicking on Browse.
Image may be NSFW. Clik here to view.Allowing another application that is not listed
Once the changes have been made, restart your computer and see if the “an attempt was made to access a socket in a way forbidden by its access permissions” error is resolved at the next startup.
If you’re still seeing the same error, move down to the next method below.
Method 4: Restarting the Internet Information Services (IIS)
Several users have reported that the issue was resolved after they restarted the Internet Information Services (IIS) from an elevated Command Prompt window.
But keep in mind that restarting the IIS servers will drop all internet services including FTP, SMTP and NNTP and any data held in the applications handling the connections is lost.
Here’s a quick guide on how to do this:
Press Windows key + R to open up a Run dialog box. Then, type “cmd” and press Ctrl + Shift + Enter to open up an elevated Command Prompt window.
Image may be NSFW. Clik here to view.Run dialog: cmd , then press Ctrl + Shift + Enter
Inside the elevated Command Prompt, type the following command and press Enter to restart the Internet Information Services:
iisreset
Wait until the Internet services are successfully stopped and restarted, then repeat the same procedure that was triggering the error to see if the issue has been resolved.
Image may be NSFW. Clik here to view.Restarting the Internet Information Services
If you’re still seeing the “an attempt was made to access a socket in a way forbidden by its access permissions” error, move down to the next method below.
Method 5: Using a previous system restore point
After finding that several other repair strategies where ineffective, some users have finally managed to connect to the internet without being blocked by the “an attempt was made to access a socket in a way forbidden by its access permissions” error by reverting their machine state to a previous point in time using System Restore.
If you only started to see this error recently and you’re lucky enough to have a system restore point that is dated before you started struggling with this issue, then these following steps should help you resolve the issue for good:
Press Windows key + R to open up a Run dialog box. Next, type “rstrui” and press Enter to open the System Restore wizard.
Image may be NSFW. Clik here to view.Run dialog: rstrui
At the first screen of System Restore, select the Choose a different restore point and click Next.
Image may be NSFW. Clik here to view.Choose a different system restore point
At the next screen, start by checking the box associated with Show more restore points. Then, select a system restore point that has an older date than the apparition on the problem and click the Next button again.
Image may be NSFW. Clik here to view.Select a system restore point and click Next
Upon clicking Finish, Windows will automatically restart and the older state will be restored at the next startup. Once your computer boots back up, see if the issue was resolved.
Method 6: Disconnecting from the VPN network
Some affected users have discovered that in their case, the issue was caused by a VPN client. It turns out that the “an attempt was made to access a socket in a way forbidden by its access permissions” error can also be caused by a VPN client that is causing some involved localhost connections to fail.
To test whether this theory holds true in your case, simply disconnect from the VPN network and see if the issue is resolved. If the error message is no longer occurring while VPN is disconnected, you need to look for a different VPN client or at least keep it disabled while performing a certain task that will trigger the error.
A lot of Windows users are getting the idp.generic virus detection on their files. Basically, your antivirus will send you a notification that it caught a file infected with IDP.Generic. This IDP.Generic threat isn’t related to a specific file so there is a wide range of files that might be detected as infected with IDP.Generic. For example, some users were experiencing the IDP.Generic threat with their game files whereas some users saw this threat while using a python file. Although this threat detection isn’t specific to an antivirus but the majority of the users who experienced this were using Avast antivirus. Obviously, when your antivirus detects such viruses in files related to your games, you wouldn’t be able to play your games or other programs. So, a lot of users are worried and want to make sure whether it’s a malware or a false positive.
Image may be NSFW. Clik here to view.idp.generic/IDP Generic
What is idp.generic trojan?
IDP generic means that the detection was detected by an Identity Protection detection component of your antivirus and it is a generalized file that got detected. Your files will be flagged by this whenever the file does something identical to malware that triggers the flag.
Should I ignore it?
In general, you shouldn’t ignore any warnings from your antivirus programs. Now speaking of idp.generic, although most of its cases are false positives, you still shouldn’t ignore it completely. What we recommend is to either use another antivirus program to see if that catches the same file or use VirusTotal. VirusTotal is a website where you can upload the files and it will tell you whether the file contains any malicious component. Click here and click Choose File then select the file flagged by your antivirus. Check if it flags the file or not. If it doesn’t then simply ignore the warning and add the file to the whitelist. You should also update the antivirus program.
Image may be NSFW. Clik here to view.VirusTotal file result
On the other hand, if the VirusTotal flags your file as a threat then we recommend you perform a full scan with your antivirus.
Image may be NSFW. Clik here to view.VirusTotal file result
What causes idp.generic false positive?
The most common cause of this false positive flag is usually an outdated definition of your antivirus program. This simply means that your antivirus program isn’t updated and you should update it to the latest version or change the antivirus application if the false positives aren’t gone even after the update.
What should I do if I find a false positive?
First of all, you should take the file out of the virus vault because your antivirus will block it. You can do so by following the steps given below.
Open your Avast antivirus applications
Go to Protection
Image may be NSFW. Clik here to view.Select Avast Virus Chest
Select Virus Chest
Right-click your file
Select Restore and add excursion.
Image may be NSFW. Clik here to view.Restore file from avast virus chest
Although these steps are for Avast antivirus but these step should apply to other antivirus applications as well. Every antivirus has a virus vault and provides an option to restore the files from there.
You should also upload the file to the false positive form to let Avast know about the file. This will prevent any future false positives. Click here and fill out the details.
Image may be NSFW. Clik here to view.Upload false positive report for Avast
After upgrading to Windows 10 V1803, users have reported a system image back up error. Reports say that the system image backup fails with 0x800706BA error code. This code tells us that the Remote Procedure Call (RPC) server is not available. In addition, it’s clear that this error is only present on the 32-bit Windows 10 version, as 64-bit users have had no problems backing up.
Image may be NSFW. Clik here to view.RPC server is unavailable
What causes the Backup to Fail with RPC error 0x800706BA?
A Bug in the Windows 10 32-bit version V1803: If you go back to Windows 10 version 1709, the system image backup works. However, until the Microsoft team provides Windows users with an update to fix the bug it is unlikely that the error will be resolved. There are still solutions that, while might not resolve the error, will certainly get you backing up again in no time.
Method 1: Using a third-party tool for backup
Since, there’s a problem with Windows software itself, specifically 1803 version of wbengine.exe, downloading an external tool, free of errors, would be a better option and it’ll remain safe from any bugs from Windows updates. This method will take you through the steps to installing a popular, third-party alternative, Macrium Reflect.
Click this link: Macrium Reflect, and then click on the Home use download option.
Image may be NSFW. Clik here to view.Macrium Reflect Homepage
Follow the instructions on the website.
Now, open the email account you entered on the website and click the link provided.
Image may be NSFW. Clik here to view.Macrium Reflect download link
Your download will start automatically.
Follow these instructions to complete the installation.
Image may be NSFW. Clik here to view.Macrium Reflect Download Instructions
You’re all set.
Method 2: Go back to Windows 10 version 1709
The error has so far only been reported in the 32-bit V1803 Windows 10, hence all previous versions like Windows 10 version 1709 is free from this error. Thus, reverting back to an older version of Windows 10 is also an option to resolve the problem. This method will take you through the steps to doing just that.
Open the Windows Settings app
Image may be NSFW. Clik here to view.Settings
Click on the Update & Security option.
Image may be NSFW. Clik here to view.Update & Security
Click on the Recovery tab and then select the ‘Go back to the previous version of Windows 10’ option.
Now, click ‘Get Started’.
Image may be NSFW. Clik here to view.Update & Security/Recovery
Windows 10 will ask you why you want to roll back, you can select any answer to proceed to the next step where it will ask to check for updates.Image may be NSFW. Clik here to view.
Finally, choose the ‘No thanks’ option and wait for the older version to install. Once it has, you can start backing up without any problems.
Method 3: Replace the malfunctioning 1803 wbengine file
The system image back up bug in the 1803 version of Windows was isolated to the defected wbengine.exe file. Since we’ve identified the source file causing the error, we can simply replace it to resolve our error. This method will take you through the steps to extracting a functioning wbengine file from an older version of Windows 10, and replacing the built-in impaired file with it.
First open the link provided to download a functioning version of wbengine: New wbengine file
Extract the file.
Image may be NSFW. Clik here to view.Extract wbengine.exe file
Search wbengine.exe, right click on it and select Show in folder.Image may be NSFW. Clik here to view.Search/wbengine.exe
Now right click on it again and select Properties.Image may be NSFW. Clik here to view.wbengine.exe/properties
Now click on the Security tab.
Image may be NSFW. Clik here to view.wbengine/Properties/Security
Now, click Administrators or whichever User account you have access to.
Image may be NSFW. Clik here to view.Security/Administrator
Click the Edit option.
Image may be NSFW. Clik here to view.Edit Permissions
Check the Full Control box.
Image may be NSFW. Clik here to view.Edit/Administrator/Full control
Right click on wbengine file again and replace it with downloaded version of wbengine.exe that extracted earlier on.
Image may be NSFW. Clik here to view.wbengine.exe
Run it, to make sure it’s working and then check if the error is resolved.
Method 4: Update to Windows 10 version 1809
From among all the improvements and new features that Windows 10 version 1809 has, the Windows team has also confirmed that the system image back up error on 32-bit media has also been fixed.
Image may be NSFW. Clik here to view.Windows 10 1809 Update
The Windows 10 1809 version is set to be released by the end of November and will be available for all Windows Users soon. All you need to do is:
Click on the Settings app.
Image may be NSFW. Clik here to view.Settings
Now click on Update & Security.Image may be NSFW. Clik here to view.Update & Security
Select the ‘Check for Updates’ option.
Image may be NSFW. Clik here to view.Updates & Security/Check for Updates
The Windows 10 1809 version will be listed and ready for installation.
Once the installation is complete, try to use the system image back up software again. It should work now.
If you are a Windows user then you might notice your antivirus catch a file named as sppextcomobjpatcher.exe. The location of the file will most likely be C:\Windows\Setup\scripts\Win32\SppExtComObjPatcher or C:\Windows\Setup\scripts\x64\SppExtComObjPatcher. You might also notice this file running in the task manager as well. So, obviously, a lot of users are worried about this file and whether it’s harmful or not.
Image may be NSFW. Clik here to view.sppextcomobjpatcher.exe/AutoKMS/KMS
What is sppextcomobjpatcher.exe?
Sppextcomobjpatcher.exe is a part of the operating system (not legal) and it is related to Key Management Service (KMS) Licensing for Microsoft Products. What this means is that it is used to activate your Microsoft products and/or your operating system.
Note: Although this file/service is a part of the operating system, it isn’t an official one. Generally, sppextcomobjpatcher.exe is used for activating Microsoft products and Windows illegally. So, if you are seeing this file/service running on your system then this is an indicator that your Window is pirated. This is the reason why this file is usually flagged by your antivirus because Microsoft doesn’t want pirated copies of Windows or other products on its system.
Is sppextcomobjpatcher.exe safe?
sppextcomobjpatcher.exe (or AutoKMS) is an illegal software. Depending on where you got the file from, it might or might not be safe. The point that needs to be kept in mind is that anyone can make a file like this, include a virus, and provide it for free as a pirated Windows version. There is no check on these files. So, we cannot be sure whether the file is safe or not.
What we recommend is that you do not use pirated operating systems. If you bought the Windows from a store and you are seeing this file then you should return it because the copy of the Windows is pirated. On the other hand, if you just started seeing this threat and you have a genuine Windows then you need to scan your system with a good antivirus (we will recommend MalwareBytes).
At the end of the day, it is your choice. This sppextcomobjpatcher.exe file will be flagged by the majority of the antivirus applications whether it contains a virus or not. This is because it isn’t a legal piece of software. You can continue using it if you are accustomed to using the pirated versions and you aren’t noticing any other suspicious activity.
Since the release of Xbox One, players have complained that their console will not load the game disc. It is as if no disc was inserted at all. The scenarios vary situation to situation. In some cases, the console returned the disk back and in some, there was no action or indication from it whatsoever.
Image may be NSFW. Clik here to view.Xbox One Disk Outlet
This problem has been there in Xbox One since the very launch. You might experience it after using a few months or a few days too. This is a manufacturing fault which is there in almost the majority of the consoles.
What causes Xbox One not to load game discs?
Before we move on to the reasons, it should be duly noted that the problem might also lie in your individual disk. Disks get corrupt or unreadable if they are used roughly or they accumulate scratches. If you are absolutely sure that your disk is working perfectly (you can check it by plugging it in other Xbox consoles), you should proceed with the rest of the article.
The reasons why your Xbox One exhibits this behavior are but not limited to:
The individual disk is damaged and the data points are damaged.
The laser reader on your Xbox is damaged. This may happen with time and will probably require a replacement.
There is a problem with your disk reader. This is a manufacturing problem and can be worked around using the solutions below.
There may be a problem with the Xbox’s configuration. This is usually solved by power cycling your computer.
There are still a few checks which you should perform before starting any troubleshooting. Make sure that you have updated your console to the latest build available. Also, if it is damaged physically, you should probably take it to the nearest service center.
Solution 1: Power Cycling your Xbox
Power cycling is the act of completely shutting down your device to remove any software misconfigurations in the console. These electronics often tend to go into error states which may be caused by the installation of a potential update or through a simple software glitch. By power cycling, we will make sure the console loses all the temporary settings and starts anew when we turn it back on.
Turn off your console properly through the menu.
After turning it off, take out the main power supply of the Xbox and wait around 10 minutes.
Image may be NSFW. Clik here to view.Power cycling Xbox console
Now plug everything back on and turn the console back on.
Wait for a few minutes before plugging the disk back in.
Note: You can also try performing a hard reset of the console by pressing the power button for 10 seconds. After it completely shuts down, you can turn it back on and check.
Solution 2: Inserting the disk differently
As mentioned earlier, Xbox One consoles have manufacturing errors which causes the disk not to get read at all. You might experience the disk popping back out or hear some clicking inside the Xbox with no results on the screen. This is a very common error happening to hundreds of users each day.
The workaround is to insert the disk differently. We can either insert the disk at a specific angle or keep holding it in your hands so it gets inside properly.
When inserting the disk, make sure that you hold it by placing your finger inside the circle. Now insert the disk but keep holding it in your hand for 1 second (as shown in the gif below).
Image may be NSFW. Clik here to view.Waiting a little before inserting disk – Xbox One
Xbox will now read the inserted disk and load the game onto your console.
Another workaround is to place your console at a different angle. This makes sure that your Xbox properly takes the disk, and places it at the correct location for disk reading.
Tilt the Xbox up around 50 to 70 degrees so the disk area is slanting.
Now insert the disk inside the console and wait a little (3-5 seconds) before placing it back in the correct position.
Image may be NSFW. Clik here to view.Inserting disk at a different angle – Xbox One
Now check if the console can read disks properly.
Solution 3: Contacting Xbox Support
If the issue is widespread and none of your games are being run, it probably means that there is some hardware fault in the console. The console uses a laser module to read the data from the disks and these get inefficient with time. The spinning mechanism inside the Xbox might also be damaged which doesn’t let the disk to rotate to be read.
Image may be NSFW. Clik here to view.Xbox Live chat
You can head over to your nearest Xbox sale center and speak to a representative. You can also make a ticket in Official Xbox Support website and explain the situation to a representative there. It is advised that you don’t attempt at opening the console yourself and meddling the electronics.
An unexpected behavior of Windows 10 was reported by users where the games being played in full-screen get minimized to the desktop. This happens randomly and the time span for repeating is about 45 minutes. This strange scenario can happen to any game which you are playing.
Image may be NSFW. Clik here to view.Dota 2
This situation can be linked with process interruption of the game by other third-party programs or Windows itself. Windows has a push notification architecture where notifications are forcefully pushed to the screen. Same goes for the command prompt terminology. Many people report seeing a flashing command prompt on their screen directly after their game is minimized to Desktop.
What causes games to be minimized to Desktop in Windows?
Since this scenario is related to different third-party programs and services interrupting the game process, the causes can vary computer to computer since each one of them has a unique and distinct set of software and hardware. Some of the most common reasons why you might experience this error are:
Cortana service might be interrupting your game. Cortana is always listening for voice commands and may interrupt when it thinks it has been triggered.
Microsoft Office is performing background registration tasks. Whenever a task runs for confirming the registration, the game gets interrupted and minimized to Desktop.
Malware might have infected your computer causing random interrupts by conflicting with the running game.
Some third-party program might be interrupting your game. This happens in several cases and can be fixed by disabling the program.
Before we start with the workarounds, make sure that you have the latest version of Windows installed on your computer. Furthermore, your game should also be updated to the latest patch. Don’t forget to log in as an administrator before proceeding.
Solution 1: Disabling Cortana
Like mentioned in the causes, Cortana (if enabled) continuously monitors your voice for activating itself (when you say ‘hey Cortana’). This feature has gained a lot of backlash from the community in the past as well since it tends to interfere and break other products because of its operations. Same is the case in this scenario; the Cortana service conflicts with your game activity and forces it to minimize. We can try disabling Cortana and see how it works out for us.
Press Windows + S, type “cortana” in the dialogue box and open the first result which returns.
Once in Cortana settings, make sure that you uncheck all the options related to activating of Cortana.
Image may be NSFW. Clik here to view.Disabling Cortana
After changes, save them and exit. Restart your computer and launch the game again. Check if the bad behavior is resolved.
The service ‘OfficeBackgroundTaskHandlerRegistration’ is a background service which periodically checks your Office registration by accessing your license and Windows servers. This application was initially discovered to cause problems in the majority of the cases when it appeared on the task scheduler. We can disable this service this service and check if this makes any difference. You can always enable the task back if this doesn’t work for you.
Press Windows + R, type “task.schdmsc” in the dialogue box and press Enter.
Expand the Task Scheduler Library and navigate to:
Task Scheduler Library > Microsoft > Office
Image may be NSFW. Clik here to view.Microsoft Office scheduled tasks
Now search for the following entries from right side of the page:
Right-click on each one of them and select Disable
Image may be NSFW. Clik here to view.Disabling Office scheduled tasks
Save changes and exit. Now restart your computer and launch your game. Check if the same scenario persists.
Solution 3: Removing Malware
Malware (like other third-party software) also interrupt your computer from time to time. It is their disruptive nature and they are usually scheduled on your computer. There were several reports by different users who stated that because of malware, their game would minimize itself randomly cause frustration.
Image may be NSFW. Clik here to view.Scanning through MalwareBytes
There are several antivirus software through which you can get rid of virus or malware on your computer. It is recommended that you also get your computer scanned by third-party software in addition to the default Windows Defender. You can also check our article on how to remove malware using MalwareBytes.
Solution 4: Changing registry value
There is another module named ‘ForegroundLockTimeout’ which automatically gets you back to your Desktop even if you are using your computer at that moment. This registry value is known to cause lots of issues and can be easily changed using an elevated command prompt.
Press Windows + S, type “command prompt” in the dialogue box, right-click on the application and select Run as administrator.
Once in elevated command prompt, execute the following query:
Image may be NSFW. Clik here to view.Checking registry value of ‘ForegroundLockTimeout’
Now check the value of the registry key. If the value is not ‘0x30d40’, you can proceed with the next step. Otherwise, you can proceed with the next solution. In this case, the value is correct and we do not need to change anything.
Image may be NSFW. Clik here to view.Adding registry value
Restart your computer after making changes and check if the game minimizing is fixed.
Solution 5: Diagnosing using Process Explorer
Process Explorer is a free tool from Sysinternals which allows you to check the occurrence of every process on your computer. The good thing is that it has the time when the process was run and the duration it ran for. This can help us troubleshoot which process is conflicting with your game process and minimizing it.
Now run the program and continue playing your game. Now whenever your game minimizes, open the process controller quickly and check which process is turned on or has started its operations.
Image may be NSFW. Clik here to view.Process Explorer
Through this method, you will easily be able to diagnose which third-party program or service is interrupting your game continuously. After diagnosing, you can easily uninstall the application (Press Windows + R and type ‘appwiz.cpl’) or disable the service.
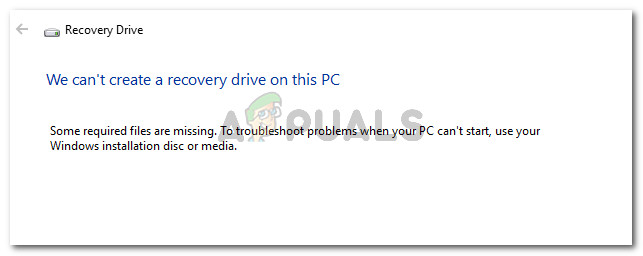
Some Windows users are seeing the “We can’t create a recovery drive on this PC” error when attempting to create a new recovery media on Windows. This issue is reported to occur on Windows 7, Windows 8 and Windows 10.
Image may be NSFW. Clik here to view.We can’t create a recovery drive on this PC Some required files are missing.
What is causing the We can’t create a recovery drive on this PC error
We investigated this error message by looking at various user reports. Based on what we gathered, there are several common scenarios that will trigger this behavior. Here’s a list with potential culprits that might be responsible for the issue:
The recovery partition information is lost – This is known to happen if the user has previously tried to clone the system on another drive.
THe winre.wip file is missing from the computer – This file is responsible for holding the Windows recovery files. Without it, creating a recovery drive is no longer possible.
Your current system construct doesn’t have a recovery environment – This is known to occur if the user has upgraded to Windows 10 from an older Windows version.
If you’re struggling to resolve this particular issue, this article will provide you with a list of verified troubleshooting guides. Below you have a collection of methods that other users in a similar situation have followed to resolve the error message permanently.
To make sure you don’t dive into unnecessary operations, follow the methods below in order – they are ordered by efficiency and severity.
Method 1: Recreating the recovery environment via CMD
Most users encountering this issue have managed to resolve the issue by using an elevated Command Prompt window to restore the recovery environment. Here’s a quick guide on how to do this:
Press Windows key + R to open up a Run dialog box. Then, type “cmd” and press Ctrl + Shift + Enter to open up an elevated Command Prompt. If prompted by the UAC (User Account Control), choose Yes to grant admin privileges.|
Image may be NSFW. Clik here to view.Run dialog: cmd , then press Ctrl + Shift + Enter
In the elevated Command prompt type the following commands in order and press Enter after each one:
Restart your machine and try to use the Recovery Disk Creator at the next startup.
If you’re still encountering the issue, move down to the next method below.
Method 2: Recovering the winre.wip file
Some users encountering the same issue have managed to resolve the issue after discovering that the winre.wim file was missing from their computer. This is one of the most common reasons why Windows users receive the We can’t create a recovery drive on this PC error.
It’s fairly uncommon for the winre.wim file to get lost, but it’s known to happen if the user deploys a deep cleanup scan with several 3rd party tools or after the user tries to clone the system on another drive.
If you’re suspecting that the winre.wim file might be missing, there are two different methods that you can follow in order to get it back in place. We will cover both approaches down below. Please follow whichever guide seems more convenable to your current situation and setup.
Option One: Fetching a copy of winre.wim from a different Windows system
For this method to work, you’ll need to have access to a different Windows system that has a healthy winre.wim file. Keep in mind that it needs to match the Windows version of the affected machine.
If this scenario is applicable to you, follow the steps below to retrieve the healthy winre.wim file:
On the healthy Windows computer (not the machine that is displaying the error), press Windows key + R to open up a Run dialog box. Then, type “cmd” and press Ctrl + Shift + Enter to open up an elevated Command Prompt window.
Image may be NSFW. Clik here to view.Run dialog: cmd , then press Ctrl + Shift + Enter
In the elevated command prompt, type the following command to disable the Recovery environment and make the winre.wim file from available from the hidden recovery to C:\ windows \ system32 \ recovery.
reagentc /disable
Note:REAgentC is a support tool that will set up a user-defined Windows recovery environment.
Minimize the elevated Command Prompt and navigate to C:\ windows \ system32 \ recovery. Once you get there, copy the winre.wim file from that folder to a USB storage drive.
Image may be NSFW. Clik here to view.Fetching the winre.wim file
In the same elevated Command, type the following command to re-enable the Windows Recovery environment again:
reagentc /enable
Image may be NSFW. Clik here to view.Re-enabling the Windows Recovery environment on healthy PC
Move to the affected machine and plug in the USB drive containing the winre.wim file. Then, copy it and paste it in C:\ system 32\ Recovery.
With the winre.wim file restored, attempt to create a new recovery drive and see if the issue returns.
Option 2: Copying the winre.wim file from the installation media
Another approach that you can follow in order to retrieve the winre.wim file is to insert the installation media of your active OS and mount the install.wim. You will be able to copy the winre.wim file from there and then paste it inside the C:\ windows\ system32 \ recovery.
Note: This method is only confirmed to work with Windows 8.1.
Here’s a quick guide on how to do this:
Insert or mount the Windows installation media.
Go to your OS drive (C:\) and create an empty directory called mount. Image may be NSFW. Clik here to view.Creating an empty directory called mount
Press Windows key + R to open up a Run dialog box. Then, type “cmd” and press Ctrl + Shift + Enter to open up an elevated Command Prompt window. When prompted by the UAC (User Account Control), press Yes to grant administrative privileges.
Image may be NSFW. Clik here to view.Run dialog: cmd, then press Ctrl + Shift + Enter
In the elevated Command Prompt, type the following command to mount the install.wim file and make the winre.wim file visible inside the new directory that you previously created.
Note: Keep in mind that your installation media might be on a different drive. In this case, change the partition letter (D, in our case) accordingly.
Using file explorer, navigate to C:\ mount \ windows \ system32 \ recovery and copy the Windre.wim file from there. Then, paste it in C:\ windows \ system32 \ recovery.
Image may be NSFW. Clik here to view.Pasting the winre.wim file in the recovery directory
Return to the elevated Command prompt and run the following command to unmount the install.wim. Once this is done, you can safely remove the installation media
dism /Unmount-Wim /Mountdir:C:\mount /discard
Finally, run the following command in the same elevated Command prompt to enable the Recovery environment:
reagentc /enable
Restart your machine and see if you are able to create a new recovery media.
If this method was not successful, move down to the next method below.
Method 3: Regain the lost recovery partition information
If you’re positive that your hard drive contains a recovery partition, there’s one procedure that several users have followed in order to regain the lost recovery information.
But keep in mind that if you have no recovery partition at all, this procedure will not work for you. Here’s what you have to do to recover the lost recovery partition information:
Press Windows key + R to open up a Run dialog box. Then, type “powershell” and press Ctrl + Shift + Enter to open up an elevated Powershell window. When prompted by the UAC (User Account Control), click Yes at the prompt.
Image may be NSFW. Clik here to view.Run dialog: powershell Then press Ctrl + Shift + Enter
Inside the elevated prompt, type the following command to run the Disk Partition tool:
diskpart
Type list volume and press Enter to see if you have any volume containing the word Recovery. If you see one, it’s very likely that you’re looking at your recovery partition. If so, take note of its volume number.
Image may be NSFW. Clik here to view.Identifying the Recovery environment
Next, type select volumeX and press Enter. Then, type detail volume and press Enter again to see on which disk it’s located. Once you see it, take note of the disk number.
Image may be NSFW. Clik here to view.Discovering the Disk number of the recovery volume
Note:X is a placeholder for the volume number of the Recovery drive.
Use the following command to select the disk you previously discovered at step 4 and press Enter:
select disk X
Note:X is simply a placeholder for the disk number you previously fetched at step 4.
Use the next command to list all partitions and inspect them. You should be able to spot a partition that matches the size of the recovery partition volume. It should have an * next to it. Take note of the partition number.
list partition
Image may be NSFW. Clik here to view.Identifying the Partition number of the Recovery environment
Close the disk partition tool by typing exit and pressing Enter.
Once you manage to leave the DiskPart tool, enter the following command and make sure to replace the X and Y placeholders:
Note: Replace the X with the disk number fetched at step 4 and Y with the partition number fetched at step 6.
Finally, type the following command and press Enter to activate the recovery partition:
reagentc /enable
Restart your machine and see if you’re able to create the recovery drive at the next startup.
If this method was not successful or you don’t have a recovery environment configured on your machine, move down to the next method below.
Method 4: Clone your computer and save it to a USB HDD
If you’ve come this far without a result, just know you can actually use a third party solution to create the 3rd party equivalent of a Windows-created recovery drive.
Several users encountering the same issue were able to create a 3rd party recovery drive by using Macrium Reflect (FREE) or a similar software.
If you decide to use Macrium Reflect, follow this guide (here) to create a backup of your computer – the equivalent of a recovery drive.
Method 5: Perform a clean install or repair install
If you’ve come this far without a result, it’s very likely that your current system configuration isn’t constructed to create a recovery media. This typically occurs if the user has previously upgraded to Windows 10 from an older Windows version.
If you’re in the same situation, the only fix (other than following Method 3) is to perform a clean install.
A clean install will re-initiate all Windows components including the Windows recovery environment. You can follow this guide (here) for steps on performing a clean install.
iMessage service developed by Apple is one of the greatest, excellent and brilliant way of keeping in touch and get in contact with other Apple device users without any additional charges on your monthly bill from your network provider. One of the most useful and used features is the capacity to send and receive messages from other devices that are connected to your iCloud account, including your Mac.
But sometimes, this can be a little bit too much. For example, if you are in your office with your Mac, iPhone or iPad and all of the devices alert you that you have a message, with some delay between them, the notification sound can be very annoying and can cause a distraction to you or anyone in that office.
In this article, we will show you how to turn off iMessage notifications on mac, and also how to sign out from iCloud in messages, how to fix when they are not working properly and some other tips and tricks for the features of iMessage that can be useful and helpful.
How to Turn off Notifications
Turn on your Mac.
Click on the Apple menu.
Choose System Preferences.
Open the Notification panel.
Click on the Messages. In the left sidebar.
Select the None option. Also, unselect the other ticks from the checkboxes.
Image may be NSFW. Clik here to view.Turn off Notifications
How to Deactivate iMessage
Turn on your Mac.
Open the Messages app on your Mac.
Find and Open Preferences from the Messages menu.
Click on the Account that you want to turn off. This is located on the left pane tab.
Uncheck the box saying Enable this account. This will disable your account on your Mac.
Image may be NSFW. Clik here to view.Deactivate iMessage
When you complete these steps, it will stop you receiving messages on your Mac but you can always whenever you want, turn them back on again. All you need to do is to check the checkbox that you have previously unchecked.
There is also an alternative if you want to turn off them permanently. You can sign out of your iCloud account in Messages. This is going to affect only the Messages app and you don’t have to worry about if this can stop you from using the iCloud Photos or iCloud Drive. In simple words, it only deregisters iMessage from your account.
How to Sign Out of iCloud in Messages
Open Messages on your Mac.
Open Preferences from the Messages menu.
Next, choose the account that you want to sign out of. You will find this in the left side window.
Click Sign Out next to the Apple ID of your account.
Confirm by clicking Sign Out. A pop-up window will appear in order to confirm that you really want to sign out of your account.
Image may be NSFW. Clik here to view.iCloud Sign out
This will sign you out from the iMessage from your Mac, but if you want later to sign in again you should Open Messages then Preferences and then you will see plus icon at the bottom of the Accounts panel, when you click on the icon you will need to enter your Apple ID and password. Note: depending on your settings about verification, for example in two-factor verification you may need to enter the passcode that it will be sent to your device.
Bonus: How to Fix Messages if it is not working properly
Maybe you are not annoyed by the notifications and sounds of the iMessage app but they are not working properly on your Mac or have a problem syncing on your iPhone or iPad and you want to deactivate them. We will help you try some things in order to solve this problem. The methods from above will be very useful.
Sign out of Messages, as shown in the steps before, and then sign in back again.
Turn off iMessage using the steps from the Deactivate iMessage method and then turn on them again.
Check the phone number that you are using on your Mac. It must be the same as your iPhone number.
Check the email address you are using on your Mac is the same that is associated with your Apple ID.
If you have two or more Apple ID make sure that you are signed in with the same Apple Id on your Mac and on your iPhone or iPad.
If you are not getting messages from your friends, go to Contacts app and search for their name. Then you need to check if the entry has the right email address or phone number that they are using for their Messages. If it is a different one, add it.
These suggestions are going to be enough in order for you to solve the problem with your Message app.
Bonus: How to Block Specific User
In this bonus method, we will show you how to block specific people to contact you from your contacts in your Message app.
Check for the user that is trying to contact you is already in your Contacts. If he is in your Contacts skip to Step number 3. If not, you must add them to your Contacts.
Click on the plus icon and add new contact fill the details from the contact card. It is important not to forget to add the email address and the phone number they have been trying to contact you from.
Open Preferences from Messages menu.
Open on the Account that you are using for iMessage.
Open the Blocked tab.
Click on the plus icon. A window will prompt with your contacts in. Search for the contact that you want to block and choose it.
The contact will be added to your blocked list. Image may be NSFW. Clik here to view.Block Contact
As you may know, you cannot uninstall the Message app on your Mac but you can easily disable or turn off from iCloud and turn off the notifications only.
When you need to buy and give some gift to your friends or family can be a real nightmare, but in recent times is getting easier because there is more choice especially in the Apple world. We all know someone that needs a gift card in order to buy better music and watch better movies so the best solution is to give them iTunes gift card. No matter how did you get your iTunes gift card, whether for birthday, Christmas or some different reason you need to know how to use that gift card. In this article, we will show you how to use your iTunes Gift Card and also a suggestion what you can buy with it.
Image may be NSFW. Clik here to view.iTunes Gift Card
Method #1. Use iTunes Gift Card with iTunes.
Open iTunes on your computer.
Check for Updates. Open Help tab on the upper menu and choose from there Check for Updates. iTunes automatically will check for updates and if there is newer version pop up will appear and will ask you to Install it.
If you don’t have iTunes Account create one. Click on Store menu, then choose to Create Apple ID and click Continue and wait until the process is finished.
If you have an account Sign in or if you have used iTunes before the software will remember you. You can Sign in using your Apple ID and you will need to enter your Apple ID password.
Select the Music tab on iTunes. It is located on the bottom menu.
Find the Redeem icon and click on it. Image may be NSFW. Clik here to view.Redeem code iTunes
Enter the promo code or the iTunes gift card number into the text field.
Click on a Redeem button. In the right top corner.
Method #2. Use the App Store on your iPhone.
Open App Store on your iPhone or iPad.
Select the Featured tab. It is located on the bottom of your screen.
Find and Click the Redeem icon. You will need to scroll down to the bottom of your screen.
Enter the promo code or iTunes gift card number into the text field. Image may be NSFW. Clik here to view.Redeem Code App Store
Click on a Redeem button. It is located in the top right corner.
These two methods are really easy and straightforward and we don’t expect to have problems with either one of them. Now you know how to use iTunes gift cards on your device and your computer.
Several users have reported that they are unable to format or partition an NTFS drive using DiskUtility on MacOS. Affected users report that they encounter the following error: “MediaKit reports not enough space on device for requested operation“. Most affected users report that the targeted drive has plenty of free space left, so the source of the problem lies somewhere else.
Image may be NSFW. Clik here to view.Mediakit reports not enough space on device for requested operation
What is causing the MediaKit reports not enough space on device for requested operation error?
We investigated this particular issue by looking at various user reports and the repair strategies that they used to resolve the error message. From what we gathered, there are a couple of common scenarios that will trigger this particular error message:
Leftover partitions automatically created during a Bootcamp installation – As per various user reports, partitions such as these are often responsible for this error since they can’t be deleted conventionally (most of the time).
Disk Utility is unable to reformat the drive from NTFS to APFS – This can’t be done from Disk Utility, but you can use the terminal (either directly on Mac or by using a Linux Live CD) to circumvent the issue.
If you are struggling to find a way that will allow you to circumvent this particular issue, this article will provide you with several troubleshooting strategies. Below you have several methods that other users in a similar situation have used to get the issue resolved.
For the best results, follow the methods below in order until you find a fix that is effective in your particular scenario.
Method 1: Partition the drive from the terminal
Several users struggling to format the drive have been able to circumvent the “MediaKit reports not enough space on device for requested operation” error by using the Terminal to identify, unmount and partition that drive that is triggering the error in Disk Utility.
Note: Keep in mind that the procedure below cannot be used on one partition alone. It will affect the entire drive.
Here’s a quick guide on partitioning the drive using the Terminal:
Click the search icon (top-right corner) and search for “terminal”. Then, double-click on Terminal to open the utility.
Image may be NSFW. Clik here to view.Opening the Terminal application on OsX
Start by typing the following command to get the name of the disk you’re trying to format:
diskutil list
In our example, we need to format the disks03 disk. In order to ensure that you’re targeting the correct drive, replace disk0s3 with the correct disk.
Now to unmount the disk, type the following command and press Enter:
diskutil unmountDisk force disk0s3
Next, we’ll need to write zeros to the boot sector in order to ensure that the procedure will search for a more complex boot manager. To do this, type the following command and press Enter:
Note: Replace partition name with the name you want to give to your new partition.
If this method didn’t allow you to circumvent the MediaKit reports not enough space on device for requested operation by using the Terminal to partition the disk, move down to the next method below.
Method 2: Using a Linux Live CD to partition the drive
Several users struggling to resolve the same issue have managed to get the issue resolved by booting from a Linux live CD and using the gdisk and GParted utility to create an NTFS partition from the free drive space.
Then, they used the gdisk utility again to order the partition table accordingly and enter the recovery & transformation menu. From there, they managed to create a new hybrid MBR that finally allowed them to complete the partitioning process.
This procedure is frequently used by users who are trying to install Windows on a drive that also has a partition reserved for OSX. If this procedure is applicable to what you have in mind, follow the steps down below to use a Linux Live CD to partition the drive:
If you’re using an Ubuntu Live CD, click on Try Ubuntu to load up the Live CD version.
Image may be NSFW. Clik here to view.Click on Try Ubuntu to launch the Live CD version
Once the Linux Live CD is loaded, open a terminal Terminal window. You can do this by clicking the Show Application icon and searching for “terminal” using the search function.
Image may be NSFW. Clik here to view.Accessing the Terminal on Linux
Inside the Terminal window, type the following command to make sure that you are using root privileges:
sudo -i
Once you have root privileges, type the following command to launch the Gdisk utility on the disk:
gdisk /dev/sda
Once the gdisk utility is launched, type ‘v‘ and press Enter to verify disk structures. If you see a message telling you that no problems where found, move down to the next step below.
Image may be NSFW. Clik here to view.Verifying the Disk integrity
Note: This is not mandatory, but it’s a precautionary diagnostic step that will help us identify any errors that might contribute to our issue.
Once the verification is complete, exit the Gdisk utility by typing ‘q‘ and pressing Enter.
Image may be NSFW. Clik here to view.Exiting the gdisk utility
Next, launch GParted on the same disk by typing the command below in the same Terminal window. You can also launch GParted by opening it directly from the menu.
gparted /dev/sda
Once the GParted utility opens, create an NTFS partition with your free space, but make sure to leave at least 128 MB of unpartitioned space between it and the OSX partition. Click the Add button to initiate the creation of the new partition.
Image may be NSFW. Clik here to view.Create a new NTFS partition and click Add
Once the operation is completed successfully, exit the GParted utility and return to the terminal via step 3. Then, follow step 4 and 5 again to grant root privileges and launch the gdisk utility.
Image may be NSFW. Clik here to view.All operations completed successfully
Once you return to the gdisk utility, type “p” to view your partition table. By now, you should have three partitions: an EFI System Partition (ESP), a Windows (NTFS) partition – the one that we previously created- and an OS X partition.
If you confirm this, type “r” to enter the Recovery & Transformation menu. Then, type ‘h‘ and press Enter to create a new hybrid MBR. Next, type “1 2 3” and press Enter to form the three partition numbers.
Image may be NSFW. Clik here to view.Establishing the three partition numbers
Next, type “Y” and press Enter (Return) at the EFI GPT (0xEE) prompt. When asked if you want to set a bootable flag, type “Y” and press Enter (Return) again. Then, type “Y” and press Enter (Return) when asked if you want to use free space to protect more partitions. Finally, enter the default MBR hex code (ee) and press Enter (Return) once again.
Image may be NSFW. Clik here to view.Configuring the Hybrid MBR partition settings
One the configuration part is complete, type the ‘w’ key and press Enter (Return) to save the changes and proceed with the final checks. When asked whether you want to proceed, type ‘y’ and press Enter (Return) once again.
Image may be NSFW. Clik here to view.The operation has completed successfully
That’s it, the free space that was previously failing with the “MediaKit reports not enough space on device for requested operation” error has been partitioned with gdisk and Gparted.
This error message pops up in your settings when you are trying to change your Apple ID email and may be confusing and very annoying if you have only one email associated with your iPhone and Apple ID.
Also, this error message can be shown when you are trying to change your default email address that is associated with your Apple ID.
Image may be NSFW. Clik here to view.This email address is not available for use as an Apple ID
First of all, we will explain why this error appears. When you are making an Apple ID, you are required to enter a secondary email address in order you forgot the password for the primary address or the password for your Apple ID. In this article, we will show you how you can get rid of and fix “This email address is not available for use as an Apple ID” error message.
Method #1. Remove Your Secondary Email Address.
Before the start, you need to check in the Apple ID settings if the email address that you are using as primary is secondary to the email address that is associated with your Apple ID. If you find out that the email address you are trying to use as your primary Apple ID is already being used as a secondary email address for other Apple ID email, you need to remove that secondary email and use an email address that you are not already using.
Open the Settings app on your iPhone.
Tap on the Apple ID at the top of the main Setting screen.
Find the section with your Apple devices.
Tap on a Device.
Select the email address that you want to remove it.
Choose the Remove from Account option.
Tap Remove to confirm.Image may be NSFW. Clik here to view.Remove Email Address
The second option for removing email address is from the Apple Server.
Click Edit at the right side of the account section. Image may be NSFW. Clik here to view.Apple Server Remove Email
Remove the email address that you want.
Click Done.
Method #2. Try with Another Email Address.
If you want to change your primary email address for your Apple ID, you try with another email address rather than using the email address that is causing this error and being rejected.
Open Settings app on your iPhone.
Open Passwords & Accounts.
Choose Add Account.
Choose the email provider. Image may be NSFW. Clik here to view.Add Account
Enter the email address and the password.
Tap on the Next button and verify your account.
Choose which information from your email account that you want to see on your iPhone. This includes Calendars and Contacts that are associated with that email address that you add to your Apple ID.
Tap Save.
Method #3. Try with Another Company Email.
If you are still seeing this error message you also can try adding another email address but from a different provider. For example, if you are using an email address from Gmail then you can try with Yahoo, Live, Outlook, Hotmail or some other provider. There can be some problem with the companies email that you are trying to use which is stopping and interfering your iPhone or iOS device from accepting the email address.
The error ‘The content of this message is unsupported in Skype’ commonly occurs when users use the video call or message feature in Skype. In about 60 seconds the call fails and ‘The content of this message is unsupported’ error is displayed on the screen. However, other features like chats are unaffected.
Image may be NSFW. Clik here to view.The content of this message is unsupported in Skype
This error can be found in Windows 10, Xbox, Android, iOS Skype, and it occurs even with Echo/Sound Test. This problem has also been isolated to just Skype Home users, while Skype for Business remains free of the error. Another strange aspect is that the error itself doesn’t quite make sense. Instead of saying “Call failed” or any other similar connection failure message, this ‘The content of this message is unsupported’ message is displayed; which means that the problem is hardware related or that a call is made/answered to/from unsupported device.
What are the causes of this error?
A Hardware Problem: Since the Skype error actually points to ‘unsupported content’, it implies a problem with the functionality of your hardware or that your hardware is outdated. Hence, before you go through all these steps, make sure you that all your hardware is up to date and working properly.
A Bug in Windows 10 built in versions of Skype: This particular error is not present in older versions of Skype, this means that there is a bug in the latest version itself. From the nature of the error and it’s solutions, the bug is probably in the app’s connecting abilities.
Method 1: Download the Classic Version of Skype
Since a majority of Skype users confirm that they hadn’t before faced this error in the older version of Skype, we can safely assume that the old or classic version of Skype is functioning well. Hence, if you had no issues with the older version, the fastest and most guaranteed method is to revert back to the classic version of Skype. This method will take you through the steps to doing exactly that.
First, we’ll uninstall our current version of Skype:
Quit Skype.
Press the WindowsImage may be NSFW. Clik here to view. + R keys on your keyboard.
Now on the dialogue box that pops up, type appwiz.cpl, and click OK.
Image may be NSFW. Clik here to view.Run Command/appwiz.cpl
Find Skype in the list, right-click it and select Remove or Uninstall.
Image may be NSFW. Clik here to view.Uninstall or Change Programs
OR
Search Powershell
Right-click on it and click Run as administratorImage may be NSFW. Clik here to view.Search/Powershell/Run as Administrator
Now, a window will pop up, type get-appxpackage *skype* | remove-appxpackage to start uninstalling Skype
Image may be NSFW. Clik here to view.Powershell/get-appxpackage *skype* | remove-appxpackage
Now that we’re done with that, we can begin downloading the classic version:
Open the link to Skype’s official homepage: Download Skype Image may be NSFW. Clik here to view.https://www.skype.com/en/get-skype/
From among the available Skype downloads. select Skype for Windows and then click on the blue download button.
Image may be NSFW. Clik here to view.Skype for Windows
Save the set up file where ever you want.
Image may be NSFW. Clik here to view.Save Skype Set up
Now double click on it and run the installer.
Follow the instructions displayed by the installation file.
Once finished, begin using your Skype app, free from errors!
Method 2: Re-installing and Rebooting
Another popular quick fix to this error a simple re-installation method. Uninstalling the app, letting Windows reboot itself and re-installing Skype, may in fact be resolving the connection problems between the new Skype (Windows 10) and Skype installed on some non-Windows devices.
Uninstall Skype according the steps listed in Method 1.
Restart your PC
Image may be NSFW. Clik here to view.Restart your PC
Now, open Microsoft Store and search for Skype.
Click the blue Get option and then InstallImage may be NSFW. Clik here to view.Microsoft Store/Skype
Once installation is complete, you can check if the error is resolved.
Method 3: Update Windows 10
There have been reports that a Windows 10 update is now available that fixed the bug in the functionality of the built in version of Skype. Hence, an easy solution to the ‘content of this message is unsupported’ Skype error is simply to update your Windows 10 and check if the updates have resolved the error.
Click on the Settings app.
Image may be NSFW. Clik here to view.Settings
Select the Update & Security option.Image may be NSFW. Clik here to view.Update & Security
Click the ‘Check for Updates’ option.
Image may be NSFW. Clik here to view.Updates & Security/Check for Updates
A list of fresh updates recently released by the Windows team will be available and ready for installation.
Once the installation is complete, use the Skype app again. Your calls should be able to through without any errors.