A lot of Windows 10 users are experiencing a weird issue where their screens are turning black and white. It is not a monitor issue though since most of the users can see the colors in their bios menu or in the monitor menu. For some users, the black and white screen is only appearing on one user. Logging in with other user accounts is fine. The black and white screen issue will start as soon as you reach the login screen. The login screen will itself be black and white, and everything else will be black and white as well.
Windows 10 black and white
What causes the Windows 10 black and white screen?
Here are the reasons that might have caused your screen to go black and white
Windows 10 grayscale shortcut: Majority of the users experience this issue because of accidental key pressing. Windows 10 comes with a shortcut key (CTRL + Windows Key + C) that lets the users change the screen filter. As you can imagine, the shortcut key is really close to the copy shortcut keys doesn’t help. A lot of users accidentally hit these keys and their screens turn black and white.
Windows Update or Unintentional Setting Change: This issue can also be caused by a Windows update. Not because it’s a bug but because Windows update sometimes resets the settings. Since there is a setting in the Personalization page that lets you change the color filter of your screen, a Windows Update can change these settings. It can also be caused by an accidental click.
In short, the issue isn’t really an issue but more of a mistake that a lot of people make. Technically, the main thing that causes your Windows 10 black and white screen is the Windows 10 color filter. This setting can be changed either via the shortcut keys or via the settings. But the good news is that it can easily be changed back to normal. Simply follow the steps given below.
Method 1: Change Windows 10 Color Filter via Shortcut Keys
The shortcut keys of changing the color filter of Windows 10 are CTRL, Windows Key, and C (CTRL + Windows Key + C). If you accidentally pressed these keys then pressing these keys again will bring the filter back to normal.
Simply press CTRL + Windows key + C keys simultaneously to change the color filter of Windows 10.
Method 2: Change Colors via Settings
The color settings for the Windows 10 screen are available in the personalized settings as well. Accessing these settings and making the required changes will fix the issue in no time.
Hold Windows key and press I
Click Personalization
Go to personalized settings
Click High contrast settings.
Get to the high contrast settings
Select Color filters from the left pane and Toggle offTurn on color filters
turn off color filters
That’s it. This should disable the grayscale color filter from Windows 10.
Some of the Google Chrome users are experiencing major issues with the browser. All of a sudden, you might notice that your bookmark bar is missing. This will happen even if you had the bookmarks bar set on “Show” option. The bookmark bar will automatically disappear. In some cases, users reported that they were able to see the bookmarks bar but only when they opened a new tab. The bookmarks bar disappears whenever they visit a website or perform a search operation.
Chrome Bookmarks Bar Missing
What causes your bookmarks bar to disappear?
Here is the reason for your bookmark’s disappearance.
Unchecked/Disabled Show Bookmarks Bar option: The thing that causes your bookmarks bar to disappear is the Google Chrome’s default behavior. It isn’t a bug or an issue with the browser, it is the way they have set up the bookmarks bar. If you haven’t turned on the “Always show bookmarks bar” option then Google Chrome will show the bookmarks bar only for a brief moment. And this brief moment is the moment when you open a new tab.
Method 1: Show Bookmarks Bar via Bookmarks Bar
The solution for your missing bookmarks bar is to simply turn on the option “Show bookmark bar”. You can turn on the option from the bookmarks bar itself. Follow the steps given below.
Open Google Chrome
Open a new tab so that you can see the bookmarks bar
When the bookmark bar appears, right-click the bookmarks bar and select Show bookmark bar
Turn on Show bookmark
That’s it. Settings this option to true will always show your bookmarks bar.
Method 2: Use Shortcut Keys to Show Bookmarks Bar
You can use the shortcut keys to turn on or off the bookmarks bar. Simply open the Google Chrome and press CTRL, SHIFT, and B buttons simultaneously (CTRL + SHIFT + B). This should enable the option to always show bookmarks bar.
Method 3: Use Settings to Turn on Show Bookmarks Bar
You can turn on the Show Bookmarks Bar option from the settings of Google Chrome. This solution is a bit longer so we will suggest methods 1 and 2. However, this solution will get the job done as well. Simply follow the steps given below
Open Google Chrome
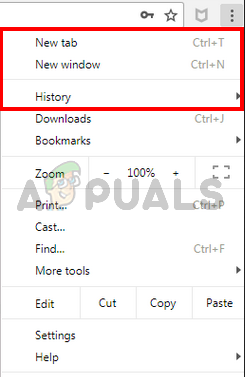
Click on the 3 dots on the top right corner
Select Settings
Google Chrome Settings
Scroll down and you should be able to see an option named Show Bookmarks Bar (it should be in the second section)
Toggle on the Show Bookmarks Bar option
Turn on Show bookmark
This should solve the issue for you.
Method 4: Update Google Chrome
If you still can’t see the bookmarks bar or you are seeing a yellow exclamation mark on the top right corner then we will suggest updating the Google Chrome. Even if you updated Google Chrome recently, we would still advise you to at least for the latest updates. Google Chrome gets regular updates and the issue might be caused by an outdated browser. Follow the steps given below to check for the updates.
Open Google Chrome
Type chrome://help/ in the address bar and press Enter
You will see a circle spinning and a status saying Checking for updates. Just wait for it to finish checking for updates.
Update Google Chrome
Your browser will automatically be updated if it wasn’t updated to the latest version.
Check if the issue persists once the browser is updated.
The Google Chrome’s most visited thumbnails are the thumbnails that show up on a new tab. The most visited thumbnails can also appear whenever you open your browser (only if you have enabled the settings). This is a very useful feature that a lot of users use but this feature broke after the latest Google Chrome update. A lot of users are either not seeing any at all or seeing a couple of thumbnails when opening a new tab. This issue appears out of nowhere and you cannot rectify the issue by a simple restart of the browser.
Google Chrome Most Visited Thumbnails Not Showing
What causes the Most Visited Thumbnails to Disappear?
Here are a couple of things that can cause your most visited thumbnails to disappear from Google Chrome.
Google Chrome Bug: The most likely cause for this issue is a bug under upgrading to new design homepage. In fact, a lot of people experienced this issue back in February of 2018 as well. Google Chrome usually checks and updates itself on regular basis, so this would explain the sudden appearance of this issue even if you didn’t update the browser yourself.
Search Engine Option: The Google search engine as your default search engine can cause this issue as well. It might have to do with a conflict between the thumbnails and the search engine text box. And the issue appears only when you have the Google search engine.
Method 1: Turn on the Local NTP Flag
There is a flag named #use-google-local-ntp in the Google Chrome. This flag is disabled by default. Turning this flag to enabled has resolved the issue for the majority of the users. You can turn on this flag by following the steps given below.
Open Google Chrome
Type chrome://flags/#use-google-local-ntp in the address bar and press Enter
Access use-google-local-ntp flag
Select Enabled from the drop-down menu in form of the flag
Enable use-google-local-ntp flag
Relaunch the browser
This should fix the thumbnail issue.
Note: If this doesn’t fix the issue then follow the steps given in method 2 and then perform the steps given in this method.
Method 2: Change Chrome Flags (Alternative)
There are a couple of other Google Chrome flags that you can turn on or off to fix the thumbnail issue. These flags are experimental in nature but allow the users to change the Google Chrome’s configuration. So, do not change any other flags and follow the instructions given below.
Open Google Chrome
Type chrome://flags/#top-chrome-md in the address bar and press Enter
Access top-chrome-md flag
Select Normal from the drop down menu in from of the flag
Disable top-chrome-md flag
Type chrome://flags/#ntp-ui-md in the address bar and press Enter
Access ntp-ui-md flag
Select Disabled from the drop-down menu in from of the flag
Disable #ntp-ui-md flag
Relaunch the browser
Once done, check if the issue persists or not.
Method 3: Update Google Chrome
Since the bug was introduced by the Google Chrome itself, they will most likely be releasing a fix in the latest updates. Sometimes it takes a little bit time to get the latest updates so we will advise you to manually check for the updates to get them ASAP.
Open Google Chrome
Type chrome://help/ in the address bar and press Enter
You will see a circle spinning and a status saying Checking for updates. Just wait for it to finish checking for updates.
Update Google Chrome
Your browser will automatically be updated if it wasn’t updated to the latest version.
Check if the issue persists once the browser is updated.
Note: If you see weird circles on the thumbnails after the update, then try to change the flags (mentioned below). This will revert the changes that you made in the methods 1 or 2.
Open Google Chrome
Type chrome://flags/#ntp-icons in the address bar and press Enter
Access ntp-icons flag
Select Disabled from the drop-down menu in from of the flag
Disable #ntp-icons flag
Type chrome://flags/#ntp-ui-md in the address bar and press Enter
Access ntp-ui-md flag
Select Disabled from the drop down menu in from of the flag
Disable #ntp-ui-md flag
Relaunch the browser
This should bring your thumbnails back to normal. Note: For some users, changing the values of these flags brought back the original problem. If you are experiencing this issue then follow the steps mentioned in method 2 and then follow the steps from method 1 (in this specific order). This should bring back the old thumbnails and fix the issue.
Method 4: Change Google Search Engine
Changing the default search engine has solved the issue for a considerable amount of users. Although we aren’t sure why it solves the problem it might have to with a conflict between the thumbnails and the search engine text box. And the issue appears only when you have the Google search engine. So, if you don’t mind using a different search engine, anything but the Google search engine, then follow the steps given below.
Open Google Chrome
Click the 3 dots on the top right corner
Select Settings
Google Chrome Settings
Scroll down and you should be able to see a section named Search engine
Select any other search engine from the drop-down menu of Use Search Engine option
Change search engine
Relaunch browser
This should bring back the most visited thumbnails.
Method 5: Reset Settings
Resetting the settings of Google Chrome should be your last resort. This has worked for a few users but keep in mind that this will reset everything and clean the entire history. So, apply this solution only if you are ok with getting rid of your history, saved password, and several other things (the things that will be erased and reset will be mentioned in the confirmation dialogue).
Open Google Chrome
Click the 3 dots on the top right corner
Select Settings
Google Chrome Settings
Scroll down and click Advanced
Google Chrome advanced settings
Click Restore settingsto their original defaults. This should be under Reset and clean up
Google Chrome Reset settings
Click Reset settings
Google Chrome Reset settings
Once done, reboot the browser and check the thumbnails. They should be working fine now.
Almost every latest browser nowadays offer the feature of going incognito. This option is usually available from the settings menu of the browser and allows users to surf the internet and not worry about the browser saving their history. But, some Chrome users are experiencing an issue where the option of opening an Incognito Window is missing. This can be problematic since users
Chrome incognito missing
What causes the Incognito Mode to Disappear?
There are a couple of things that can cause this issue. So, here is a list of things that can cause your Chrome’s incognito mode to disappear.
Extensions: Extensions are known to causes issue and interfere with the proper functioning of a browser. So, if you recently installed a new extension or you have a lot of extensions installed on your Brower then one of those extensions might be causing the issue.
Improper or corrupt settings: Sometimes the issue might simply be caused by a corrupt setting or file. It’s not uncommon for settings to get changed after a long period of time. Sometimes these settings get corrupt or change on their own or because of another file (not necessarily virus). Simply resetting the settings to their default will fix the issue if the incognito mode vanished because of that.
Incognito Mode Availability key: There is a key named IncognitoModeAvailability in the registry editor. This key belongs to the Google Chrome and the value of the key shows or hide the incognito mode option from the Google Chrome. The issue can be caused by that key as well. If the value of the key was changed, intentionally or unintentionally, to 1 then the incognito mode option will disappear from the Google Chrome. But the good news is that you can easily fix the issue by changing the value of the key.
Note: Try to open the Incognito mode with its shortcut keys. Press and hold CTRL, SHIFT, and N (CTRL + SHIFT + N) while your browser is open. Check if this opens up the Incognito mode or not.
Method 1: Disable Extensions
Disabling or completely uninstalling extensions have worked for quite a few users. This works because some extensions might interfere with the browser. So, start by disabling all the extensions (you don’t have to uninstall all the extensions yet). You can then check whether the problem persists or not. If the Incognito mode comes back then you can enable the extensions one by one to check which extension was causing the issue.
For users who can’t see the scroll bar in Google Chrome, follow the steps given below
Open Google Chrome
Type chrome://extensions/ in the address bar and press Enter
Disable extensions
This should show you a page with all the extensions on your Google Chrome. Click Remove or toggle off the switch on the bottom right corner of every extension on the page. Toggling off the extensions will disable them. Do this for all the extensions.
Disable extensions
Once done, reboot the browser and check if the problem is resolved or not. If the problem is gone and you want to enable the extensions then repeat the steps given above until step 2. Once you see the extension page, Toggle on one of the extensions. Reboot the browser and check if the problem is back or not. Repeat this process for every extension. If enabling an extension brings back the problem then you’ll know which extension was the culprit behind this. You can remove that specific extension and enable all the other extensions.
Method 2: Reset Settings
Resetting the settings of Google Chrome should be your last resort. This has worked for a few users but keep in mind that this will reset everything and clean the entire history. So, apply this solution only if you are ok with getting rid of your history, saved password, and several other things (the things that will be erased and reset will be mentioned in the confirmation dialogue).
Open Google Chrome
Click the 3 dots on the top right corner
Select Settings
Google Chrome select settings
Scroll down and click Advanced
Google Chrome advanced settings
Click Restore settingsto their original defaults. This should be under Reset and clean up
Google Chrome Reset settings
Click Reset settings
Google Chrome Reset settings
Once done, reboot the browser and check the thumbnails. They should be working fine now.
Method 3: Reset the IncognitoModeAvailability key
Resetting the Incognito Mode Availability key via the registry editor can help solve the issue as well. The steps to reset this key is given below
Hold Windows key and press R
Type regedit and press Enter
Open Registry Editor
Now navigate to this location in the registry editor HKEY_Local_Machine\SOFTWARE\Policies\Google\Chrome. If you aren’t sure how to navigate to this location then follow the steps given below
Locate and double-click HKEY_Local_Machine from the left pane
Locate and double-click SOFTWARE from the left pane
Locate and double-click Policies from the left pane
Locate and double-click Google from the left pane. Note: If you don’t see a Google entry, right-click Policies > New > Key and name is Google
Open IncognitoModeAvailability key
Locate and click Chrome from the left pane. Note: If you don’t see a Google entry, right-click Policies > New > Key and name is Chrome
Double click IncognitoModeAvailability from the right pane. If you can’t see this entry then right click anywhere on an empty space on the right pane and select New > DWORD (32-bit) value. Name it IncognitoModeAvailability and double-click it.
IncognitoModeAvailability key
Enter 0 as its value and click Ok. 0 means Incognito mode is available and 1 means it is Disabled. If you already had this entry then its value must have been 1. Simply changing the value to 0 will resolve the issue.
IncognitoModeAvailability key set to 0
Once done, the incognito mode should be available.
Facebook provides a great way to socialize and connect with your friends and family. However, some users are facing some difficulties when signing in to Facebook. The problem isn’t related to a specific browser. You might experience this problem on all browsers or you might just experience it on a single one. The problem you’ll face is that you won’t be able to open Facebook. Entering the www.facebook.com won’t get you to the Facebook front page nor does googling and selecting the Facebook page from Google will. You might see the loading icon (spinning wheel) indefinitely or you might see a white page or you might see a partially loaded page, there are different variations. For some users, they were able to get to the sign in page but they experienced the same issue after entering their Facebook credentials.
Facebook won’t load
What causes Facebook not to load?
There are a couple of things that can cause this issue.
Your ISP: This is likely the case if you can’t access Facebook on any device while connected to a particular network. Facebook might be banned by your ISP. If Facebook isn’t banned then it’s likely that there’s a problem on your ISPs end.
Extensions: Some extensions are known to cause issues with Facebooks and various other websites. So if Facebook isn’t loading on some browsers and it is working on others then this is most likely the case
Note:
Try signing in to Facebook from other browsers if you haven’t already. This will help you narrow down the issues that might be causing this issue. If the issue is only with a single browser then the most likely reason can be incompatible/problematic extensions or outdated browser. On the other hand, if you can’t get into Facebook at all then the problem might be with your network or ISP.
Method 1: Disable Extensions
Sometimes the issue might be caused by an extension. Extensions are known to interfere with websites. So, disabling or completely uninstalling the extensions is the way to go. You don’t have to uninstall the extensions actually, you can just disable them and check if the issue gets fixed. If the problem goes away after disabling the extensions then you can figure out which extension is the culprit behind it and uninstall that one.
Disable Extensions for Google Chrome
Open Google Chrome
Type chrome://extensions/ and press Enter/
Open Chrome extension page
Toggle off all the extensions by clicking on the toggle switch on the bottom right corner of every extension box
Disable Chrome extensions
Once done, you should be able to access Facebook.
Disable Extensions for Firefox
Open Firefox
Type about:addons in the address bar and press Enter
addons page Firefox
You should be able to see the list of extensions. Simply click Disable for all of the extensions
Disable extensions of Firefox
Once the extensions are disabled, check if the issue is resolved.
Disable Extensions for Microsoft Edge
Open Microsoft Edge
Click on the 3 dots on the top right corner
Select Extensions
Microsoft Edge extensions
You should be able to see a list of all the extensions that you have installed on Microsoft Edge. Toggle them off and check if this solves the issue.
Microsoft Edge turn off extensions
Method 2: Contact your ISP/ Use another connection
If the issue is from your ISP’s end then there’s nothing you can do from your computer. So, if you have already tried everything from your end then try to contact your ISP and ask them about the issue with Facebook. There might be an issue from there end or they might have blocked Facebook in your area.
One way to check whether the issue is with your ISP is to try to connect to another ISP’s internet. This won’t always be possible but if you have a friend or neighbor who is using internet from another ISP then try their internet and check if the Facebook loads or not.
On the other hand, if your ISP tells you that Facebook is banned then you use a VPN software to change your location. This will allow you to use Facebook even if it’s blocked in your area. You can use any VPN software you like. Most of them offer a free trial version as well.
Method 3: Update Browsers
Make sure your browsers are up to date. This isn’t likely to happen with browsers like Google Chrome or Firefox since these browsers automatically check for updates on a regular basis. But if you are using Microsoft Edge then this might be an issue. This is because Microsoft Edge updates via the Windows Update and if you have blocked the Windows Update then your browser might not have been up to date.
If you want to update your Microsoft Edge then you should check for Windows Updates. You can do this by following the steps given below
Hold Windows key and press I
Click Update & Security
Open Update & Security
Click Check for updates
Check for Updates Windows 10
Install the updates if the system finds any and check if the problem persists or not.
Plugins provide a great way of improving your browser experience. You will find plenty of useful plugins like Flash, Silverlight, and so many others for almost all types of browsers. Most of these plugins can easily be found from the browser market.
If you are using Google Chrome, you can access the plugin page by typing chrome://plugins in the address bar. This page shows all the plugins installed on your Google Chrome. The plugin page allows users to enable or disable plugins and change various other settings. However, some users are facing issues while accessing the Google Chrome plugin page. Mostly, you’ll see a “This site can’t be reached” page” with an ERR_INVALID_URL message. This issue will obviously create a lot of problems because you won’t be able to access the Google Chrome plugins.
Can’t access chrome plugins
What causes Chrome plugin page to be inaccessible?
The Google Chrome Plugin page is inaccessible because it has been removed by Google. It is not a bug or an issue with the browser. The latest updates have removed this page and moved the plugins in the settings page. Since there isn’t any message on the screen about the update, a lot of people just get confused about it and starts thinking that there is an issue with the browser.
Method 1: Access Plugins Page via Settings
You can easily access the plugins and change their settings via the settings page. Just follow the steps given below
Open Google Chrome
Click the 3 dots on the top right corner
Select Settings
Google Chrome Settings
Scroll down and select Advanced
Google Chrome Advanced Settings
Scroll down and look for the Privacy and security section
Select Content Settings
Google Chrome Content Settings
You should be able to see the plugins in that section.
Method 2: Open Plugins via Contents Page
This method is just an alternative to method 1. Rather than following all the steps from method 1, you can enter the URL of the contents page in the address bar and Chrome will open the contents page for you. Since plugins are now moved to the contents page, you will be able to access and change any settings from there. The steps for opening the contents page are given below
Open Google Chrome
Type chrome://settings/content and press Enter
Google Chrome Content Settings
That’s it. You should be in the contents page and plugins should be on this page.
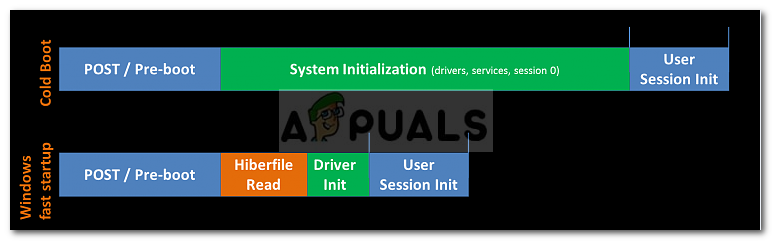
The error 0xC00000D4 is caused by a number of reasons which includes recent system updates, system crashes etc due to which the users cannot fast boot their systems. People usually use SSDs to speed the data transferring which means faster boot up. We all know that after using an installed version of Windows for a while, the bootup sequence gets slower day by day. That is due to the software and packages installed daily. However, if you didn’t know, Windows has a fast startup feature that speeds up your boot sequence. Albeit, you shouldn’t use it if you have SSDs connected to your board as the feature’s effect is all in vain in front of SSDs speed.
Some of us, have definitely come across the ‘Error 0xC00000D4’ error which means that the fast startup has failed or crashed due to some reason. This can be quite easily solved so no need to worry.
Comparison b/w Fast Startup and a Normal Boot
What causes the Fast Startup to Fail with Error 0xC00000D4?
The fast startup feature failure causes include, but is not limited to –
A system update. One of the reasons includes a recent system update meaning the feature might have been affected by the update.
External hardware connected to the system. Some users have reported that connecting external hardware like dvb-t usb stick caused the error.
System crash. If your system crashed before the error popped up, it might have corrupted your system files making it a possibility of the error pop up.
There are a few generic solutions for solving this error, however, if none of them work for you, you have but one solution remaining which is mentioned below:-
Solution 1: Running SFC Scan
Sometimes, if you had a recent system update or crash, it might’ve resulted in corrupting in your system files due to which you should start off with running a system files check. To do this:
Go to Start Menu, type in cmd.
Right click on cmd and click ‘Run as an administrator’.
Click ‘Run as an administrator’
Type in the following command:
sfc /scannow
SFC Scan
Wait for it to complete as it is going to take a while.
Solution 2: Disconnecting any external hardware
If you’ve connected some external hardware like USB sticks or anything else and the error pops up, the possibility of it being a reason is to be considered. Hence, in such a case, you are to complete your task for which you’ve connected the device and then remove it.
Disconnect any external hardware
Solution 3: Turning off Fast Startup
Unfortunately, if the above-mentioned solutions don’t fix your problem, you are probably going to have to disable Fast startup. Microsoft knows about this error yet they haven’t released an official fix for it. Hence, you are going to have to turn it off for now till Microsoft releases a fix. To turn it off, do the following:
Make sure you are logged in as an Administrator.
Go to Start Menu and click on Control Panel.
Search for Power Options.
In Power Options, on the left side, click on ‘Choose what the power buttons do’.
Click ‘Choose what the power buttons do’
There, click on ‘Change settings that are currently unavailable’.
Click ‘Change settings that are currently unavailable’
If a User Account Control box pops up, click Yes.
After clicking Yes, you’ll see the lowers options are not greyed out any longer.
To turn off Fast Startup, uncheck the ‘Turn on fast startup’ box.
Uncheck the box
Click ‘Save changes’ and close the window.
Using a .BAT File:
If you prefer a much easier way of turning off fast startup, follow these instructions:
Samsung recently launched the Android One UI for their Galaxy S9 and S9+ phones in the United States, Germany, and South Korea. Thanks to the development and modding community, the OTAs were released / leaked for all model variants of the S9 and S9+ (both Exynos and Snapdragon), and we will show you how to install the Android One UI beta on your Galaxy S9.
Please note that you will not be able to receive OTA updates after installing the Android One UI, either from Samsung or your carrier. We’re not sure if this will change in the future, though its likely you will be able to download the official release and flash it via Odin once it becomes available, overwriting the unofficial leak version and allowing you to do OTA updates again.
Please note the instructions vary slightly per device, so follow only the instructions specific to your Galaxy S9 / S9+ variant.
Updating Galaxy S9 using Odin Tool.
Galaxy S9 Exynos
Connect your Galaxy S9 to your PC via USB, and transfer the BRJ6 to ZRKA update.zip to your SD card.
Launch Odin on your PC.
Put your Galaxy S9 into Download / Odin Mode by shutting it down completely, then holding Power + Volume Down + Bixby together.
Extract the BRJ6 Odin files on your PC, you need the folder named SM-G960F_1_20181031161553_2yj261n7q7_fac.zip.
In Odin, click each tab for BL, AP, CP, and HOME_CSC, and choose the corresponding files from inside the extracted Odin files archive. Leave USERDATA tab blank, or you could wipe all the data on your phone!
Click the Start button in Odin – it will flash the new firmware, and then reboot your phone when its done.
Do nothing for 5 minutes! Make a pot of coffee. After about 5 minutes, turn off your phone and reboot into Recovery Mode by holding Power + Volume Up + Bixby.
Using your volume buttons, choose ‘Apply Update from SD Card’, and select the BRJ6 to ZRKA .zip you transferred earlier.
The update process will take about 5 to 10 minutes – when its done, you can reboot to System, and begin using the new One UI beta.
Galaxy S9 Plus Exynos
Connect your Galaxy S9 Plus to your PC via USB, and transfer the BRJ6 to ZRKA update.zip to your SD card.
Launch Odin on your PC.
Put your Galaxy S9 into Download / Odin Mode by shutting it down completely, then holding Power + Volume Down + Bixby together.
Extract the BRJ6 Odin files on your PC, you need the folder named SM- G965FXXS2BRJ6.zip.
In Odin, click each tab for BL, AP, CP, and HOME_CSC, and choose the corresponding files from inside the extracted Odin files archive. Leave USERDATA tab blank, or you could wipe all the data on your phone!
Click the Start button in Odin – it will flash the new firmware, and then reboot your phone when its done.
Do nothing for 5 minutes! Make a pot of coffee. After about 5 minutes, turn off your phone and reboot into Recovery Mode by holding Power + Volume Up + Bixby.
Using your volume buttons, choose ‘Apply Update from SD Card’, and select the BRJ6 to ZRKA .zip you transferred earlier.
The update process will take about 5 to 10 minutes – when its done, you can reboot to System, and begin using the new One UI beta.
Galaxy S9 Snapdragon
Connect your Galaxy S9 Plus to your PC via USB, and transfer the BRJ6 to ZRKA update.zip to your SD card.
Launch Odin on your PC.
Put your Galaxy S9 into Download / Odin Mode by shutting it down completely, then holding Power + Volume Down + Bixby together.
Extract the BRJ6 Odin files on your PC, you need the folder named G960USQU3BRJ5_G960UOYN3BRJ5_VZW.zip.
In Odin, click each tab for BL, AP, CP, and HOME_CSC, and choose the corresponding files from inside the extracted Odin files archive. Leave USERDATA tab blank, or you could wipe all the data on your phone!
Click the Start button in Odin – it will flash the new firmware, and then reboot your phone when its done.
Do nothing for 5 minutes! Make a pot of coffee. After about 5 minutes, turn off your phone and reboot into Recovery Mode by holding Power + Volume Up + Bixby.
Using your volume buttons, choose ‘Apply Update from SD Card’, and select the BRJ6 to ZRKA .zip you transferred earlier.
The update process will take about 5 to 10 minutes – when its done, you can reboot to System, and begin using the new One UI beta.
Galaxy S9 Plus Snapdragon
Connect your Galaxy S9 Plus to your PC via USB, and transfer the BRJ6 to ZRKA update.zip to your SD card.
Launch Odin on your PC.
Put your Galaxy S9 into Download / Odin Mode by shutting it down completely, then holding Power + Volume Down + Bixby together.
Extract the BRJ6 Odin files on your PC, you need the folder named G965USQU3BRJ5.zip.
In Odin, click each tab for BL, AP, CP, and HOME_CSC, and choose the corresponding files from inside the extracted Odin files archive. Leave USERDATA tab blank, or you could wipe all the data on your phone!
Click the Start button in Odin – it will flash the new firmware, and then reboot your phone when its done.
Do nothing for 5 minutes! Make a pot of coffee. After about 5 minutes, turn off your phone and reboot into Recovery Mode by holding Power + Volume Up + Bixby.
Using your volume buttons, choose ‘Apply Update from SD Card’, and select the BRJ6 to ZRKA .zip you transferred earlier.
The update process will take about 5 to 10 minutes – when its done, you can reboot to System, and begin using the new One UI beta.
The Huawei Play is a gaming-oriented Android phone that unfortunately comes with a handful of Huawei / EMUI bloatware. Since Huawei started locking down its devices and stopped giving out bootloader unlock codes, it may not be possible for users to use traditional rooted methods of debloating their Huawei device. Fortunately, the Huawei Play can still be debloated over ADB.
In this Appuals guide, we will show you how to debloat the Huawei Play over ADB, as well as list the packages you can disable. If certain packages will have a negative impact on your device, we’ll be sure to place a note next to it – thus, read the list of packages carefully to decide what you can remove, or what can be removed and replaced with alternative apps.
First enable USB Debugging on your Honor Play. This is done in Settings > About Phone > tap Build Number 7 times, until Developer Mode is activated. Then go to Settings > Developer Options > enable USB Debugging.
Now connect your Honor Play to your PC via USB, and launch an ADB terminal (hold Shift + right click inside your main ADB folder and choose ‘Open a command window here’).
In the ADB terminal, type: adb devices
Your ADB terminal should display your Honor Play’s serial number. If no devices or detected, or you see “Device Offline”, you may need to troubleshoot your USB cable or USB drivers. You may also need to accept an ADB pairing dialogue on your Honor Play’s screen.
If ADB returned your device’s serial, you can go ahead and type: pm list packages | grep ‘huawei’
This will list all packages that belong to the /Huawei directory. You can proceed to uninstall packages using the following command:
Pm uninstall -k -user 0 ‘package name’

For example pm uninstall -k -user 0 ‘com.huawei.android.contactscamcard’
Here is a list of common EMUI bloatware, and an explanation for them. Pay attention to our notes for each package, as some are not safe to remove.
com.hisi.mapcon - Don't disable/remove this if you use WiFi Calling, or it'll kill the app. If you don't use WiFi Calling, this is safe to remove.
com.huawei.android.FMRadio - Radio FM app. DO NOT remove this.
com.huawei.android.hwouc - System update app. DO NOT remove this.
com.huawei.android.instantshare - Huawei Share features. DO NOT remove this.
com.huawei.android.launcher - Huawei launcher app.
com.huawei.android.mirrorshare - MirrorShare feature.
com.huawei.android.projectmenu - ProjectMenu interface. DO NOT remove this.
com.huawei.android.thememanager - Theme Manager. DO NOT remove this.
com.huawei.android.totemweather - Huawei Weather app.
com.huawei.android.wfdirect - Wi-Fi Direct feature.
com.huawei.bluetooth - Import contact via Bluetooth function.
com.huawei.contactscamcard - CamCard is a business card reader app. Safe to remove.
com.huawei.compass - Huawei Compass app.
com.huawei.fido.uafclient - Fast ID Online function. Safe to remove.
com.huawei.geofence - GeofenceService. Safe to remove.
com.huawei.hidisk - Huawei File Manager app.
com.huawei.hwasm - FIDO UAF Autenthicator-Specific Module.
com.huawei.hdiw - Huawei ID app. Safe to remove.
com.huawei.HwMultiScreenShot - Sliding screen feature.
com.huawei.iaware - Need more details about this one.
com.huawei.ihealth - MotionService package, it's required for actions like shaking the phone to shut off the alarm, ecc. - remove it, if you don't care about this.
com.huawei.phoneservice - HiCare app. Safe to remove.
com.huawei.mirror - Huawei Mirror app. Safe to remove.
com.huawei.scanner - Huawei Scanner function. DO NOT remove this.
com.huawei.screenrecorder - Huawei Screen recorder feature. DO NOT remove this.
com.huawei.systemmanager - Huawei System Manager app. DO NOT remove this.
com.huawei.trustagent - Intelligent unlock feature.
com.huawei.vassistant - HiVoice app. Safe to remove.
com.huawei.videoeditor - Video editor function. DO NOT remove this.
com.nuance.swype.emui - Huawei Swype functions.
There are scenarios where you may forget a password to a website or other user-account, yet you desperately need to get back into it. Sometimes we’ve lost the recovery email associated with the account, or it’s a website you frequently auto-login to on your home computer, but have never logged into on your mobile device.
In this Appuals guide, we are going to show you a couple methods for ‘retrieving’ passwords from your Android phone.
This method only works if you have Chrome installed on both your PC and your Android phone, and they are both using the same account.
Basically, every time you allow Chrome to ‘remember’ a password for a website, it gets stored on your Google account. You can find all of your passwords on Chrome for PCby pointing the browser to the following URL:
chrome://settings/passwords
Of course, this command doesn’t work on the Android version of Chrome. To get to the same page on the Android version, you must launch Chrome on your Android device.
Next tap the 3 dots in the upper right corner, and tap Settings.
In the Settings menu, tap ‘Passwords’. Now you will be shown a list of all the websites, along with their username and passwords that you have ever allowed to be saved on the desktop version of Chrome.
Method 2 – SQL DB Files on Android
This method requires a rooted Android device, and a root file explorer.
First launch the root file explorer (we’re using MiXplorer, its awesome) on your Android device.
Login Data is a good place to start.
Navigate to the /Root structure. Now, there is no “one size fits all” procedure for this, because different Android vendors can store the necessary DB files in different locations. Basically, you need to search in the /Root structure (using the search function in MixPlorer) for a few different file names. They are typically named:
WebView DB
Accounts DB
Login Data
However, there really can be a lot of variations on these file names – your best bet is to search the entire /root structure for ‘.db’.
Now copy each .db file you find (and you think may be relevant for our purposes) to your Internal Storage or SD Card – this is because we need to transfer them to your computer, and you cannot browse the /root structure of Android devices from a PC.
After you have transferred the .db files from your Android to your PC, you can launch DB Browser for SQLite, and open the DB files one by one.
After you have loaded one of the DB files into DB Browser for SQLite, you can click the ‘Browse Data’ tab, and scroll through the tables to see if they contain usernames and passwords for various websites and accounts.
The below screenshot is taken personally from “Login Data” SQL database file from my Android device – I have blanked out my passwords for obvious reasons.
Usernames and passwords taken from SQL database on Android device.
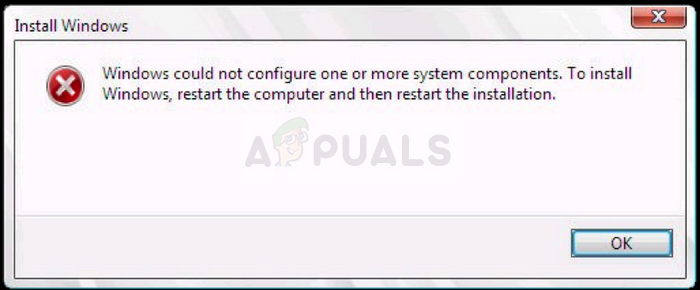
This error code ‘Windows could not Configure One or More System Components‘ appears to users running Windows on their computers and it appears when trying to update their PCs to the latest available build of Windows. The full error message goes like:
"Windows could not configure one or more system components. To install windows, restart the computer and then restart the installation."
Windows could not Configure One or More System Components
Despite the need for a restart, it has barely helped anyone and people are desperate for a real solution. We have decided to gather the most successful solutions which have actually helped people online and present them in a detailed manner. Good luck with solving your problem!
What Causes the “Windows could not configure one or more system components” Error?
There are several things to look out for if you want to stay away from this annoying error code. Here is the full list:
Faulty or missing keys used to encrypt the configuration store for the AES Provider
Old and outdated wireless drivers (or drivers in general)
Misconfigured or faulty Internet Information Services tool which needs to be uninstalled
Solution 1: Remove Certain Files From Your Computer
If your computer’s keys that IIS (Internet Information Server) uses to encrypt the configuration store using the AES Provider are somehow missing or corrupted, then the provider instantiation will fail.
Because of the fact that the Window 10 installer will also try to install IIS (Internet Information Server), and this fails, the upgrade fails and is rolled back. The correct way to solve this problem is to remove certain files from your computer. They will be recreated once you run the Windows 10 installer.
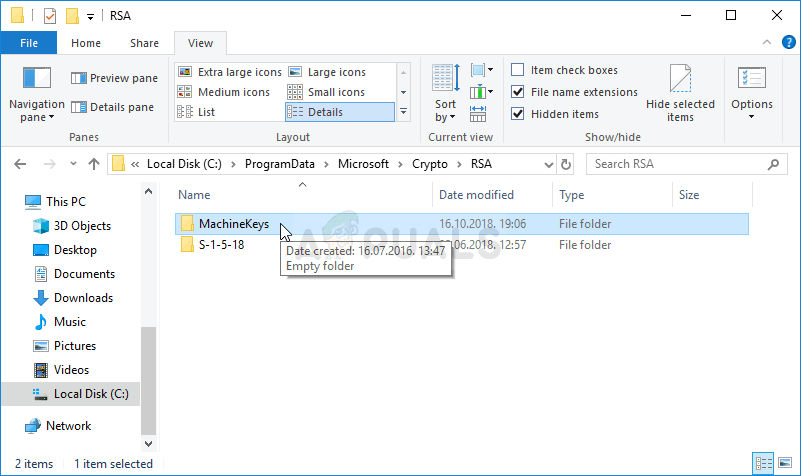
Navigate to the following location on your computer by opening the Windows Explorer and clicking on This PC:
C:\ProgramData\Microsoft\Crypto\RSA\MachineKeys
If you are unable to see the ProgramData folder, you may need to turn on the option which enables you to view hidden files and folders. Click on the “View” tab on File Explorer’s menu and click on the “Hidden items” checkbox in the Show/hide section.
Enabling the view of ProgramData folder
Here are the files you should look for. The name of the file will begin with the first sequence of numbers and letters and end with the GUID of your machine (different for each user:
Select these files, right-click on them, and choose the Delete option which will appear from the context menu. The files will be recreated when you run the Windows updater or Windows installation and the problem should be gone.
Solution 2: Try Using the Media Creation Tool
If an update was released for Windows 10 and you tried to install it the conventional way before you received the error code, you might want to try an alternative which consists of using the Windows Media Creation Tool. This is a file you download from Microsoft’s official website. You will be given the option to update Windows to the latest build after you download it.
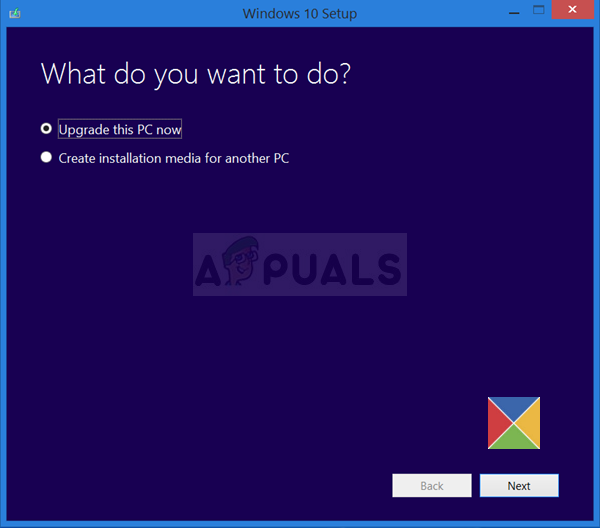
Download the Media Creation Tool executable from Microsoft’s website and wait for the download to complete. Double-click on the downloaded file in your Downloads folder called MediaCreationTool.exe in order to open the setup. Tap Accept at the first screen.
Select the “Upgrade this PC now” option by enabling its radio button and click on the Next button to continue. The tool will download certain files, check for updates, and scan your PC to see if it is ready so please stay patient.
Upgrade this PC now
Accept the license terms from the next window if you want to continue with the installation and wait again to communicate with Microsoft for updates (again).
After that, you should already see the Ready to install screen with Install Windows and Keep personal files and apps options being listed. This has been chosen automatically since you are already running Windows 10 and you want to keep everything. The install should now proceed so your computer should be updated after the tool finishes with its process and the error should no longer appear.
Solution 3: Uninstall Your Old Wi-Fi Drivers and Update Others
Old and outdated drivers are also a known cause for this issue. There are several different ways in which the drivers are to blame. Some users claim that their old Wi-Fi driver was to blame and they were able to solve the problem by uninstalling it.
Others claim that they needed to update all of their drivers before proceeding. Try out both of these methods and see which one works the best for you!
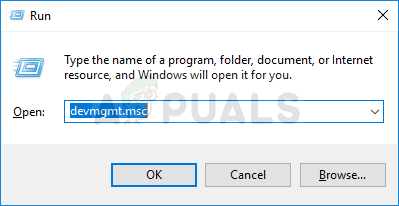
Click the Start menu button at the lower left part of your screen, type in Device Manager, and click its entry from the list of results at the top.
You can also use the Windows Key + R combination by clicking both of these keys simultaneously in order to bring up the Run dialog box. Type in “devmgmt.msc” in the box and click OK.
Running Device Manager
Locate the wireless adapter driver under Network adapters, right click on it, and select Uninstall device from the drop-down menu which will appear. Confirm any prompting dialogs.
Right-click on other devices on your computer where the driver needs to be updated and choose Update driver from the drop-down menu. There are tools which can automate the process for you if you want.
Uninstalling the Wireless Adapter
After you have updated your drivers and gotten rid of the wireless driver, try running the installation and check to see if the “Windows could not configure one or more system components” error still appears!
Internet Information Services (IIS, formerly Internet Information Server) is an extensible web server created by Microsoft for use with the Windows NT family. IIS supports HTTP, HTTP/2, HTTPS, FTP, FTPS, SMTP and NNTP.
If you are not using it, you should know that it could be the culprit behind your frustrations regarding this error and you should consider uninstalling it immediately!
On your keyboard, use the Windows Key + R key combination to open the Run dialog box. Also, you can search these directly in the Start menu if your Windows OS supports it.
Type in Control Panel and click OK in order to open it. Make sure you change the view in Control Panel to View by: Category and click on Uninstall a program under the Programs section.
Uninstall a program in Control Panel
At the right side of the screen which opens, click on Turn Windows features on or off and locate the Internet Information Services entry on the list. Uncheck the box next to it and click the OK button in order to apply the changes. Check to see if the error is gone!
Solution 5: Unplug your SD Card Reader
This might be an odd way to solve the problem but plenty of users suggested that the problem has automatically fixed itself after users have disconnected the SD card from their respective computers. You can reconnect if after the update finishes or after you install Windows successfully!
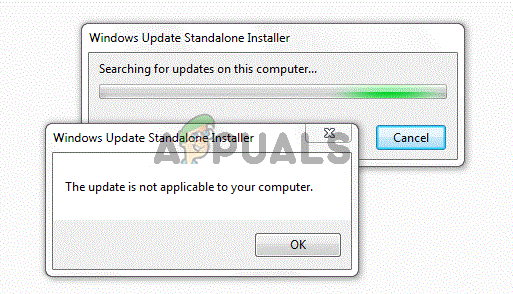
Updates are an integral part of the Windows system; without these updates, your PC will not perform up to its potential.
A lot of users are reporting that when they try to install an update, they get an error message that reads “This update is not applicable to your computer”. This error message suggests that either your system is missing a prerequisite update or your PC is incompatible with the new update.
What causes the “This update is not applicable to your computer” error message
Before we go into details on how these issues could be fixed, we need to determine the possible causes. Here are the most frequent scenarios.
Unmatched Update package: The update that you are trying to install might not be meant for your system, or it might not be compatible with your processor architecture. You will need to make sure that it matches your system specs.
Update already installed: Maybe the update that you are trying to install is already installed into your windows. The only way to find this out is to check the update history.
Problem with windows updater: A problem could have occurred with the windows updater, which could cause the update to not install. To fix this you will have to use the troubleshooter.
Most recent update might not be installed: Maybe the most recent KB update is not installed in your system. You will have to install it to get the error fixed.
Corrupt system files: Corrupt system files could be preventing the updates from installing properly, so running a DISM and SFC scan could be your way out.
Wrong system locale: If you are getting the “this update is not applicable to your computer” error and can’t find any cause then try changing your system locale to English. A wrong locale could cause this issue to appear.
Not to worry, the methods below will allow you to find and fix the cause of this issue.
Method 1: Check whether the windows update package matches your windows version
The first thing that you could do is try to check that the update is compatible with your windows and also with your processor architecture. You can go to the Microsoft Update Catalog by clicking here and then using the search on the website to search for the name of the update that you are trying to install, if it is compatible with your windows then you could follow the steps below to see if you have a compatible processor architecture to install that version of update.
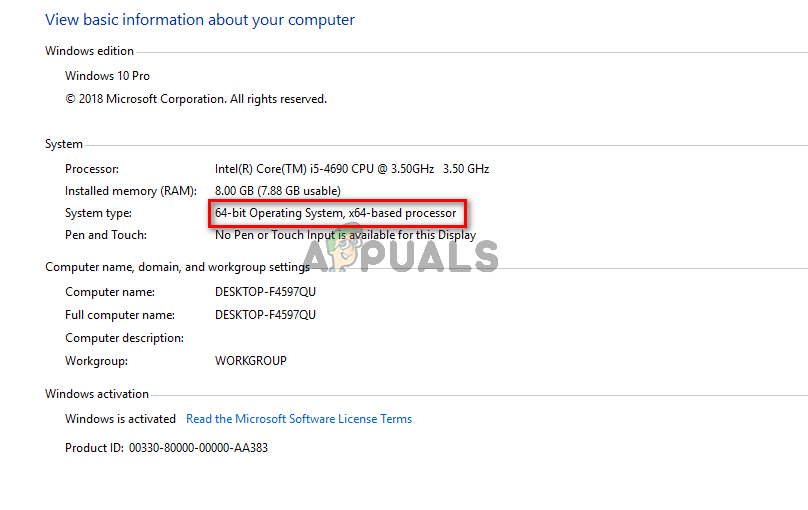
Open the start menu and type This PC and press Enter.
open This PC
Now right click anywhere and click Properties.
Open the Properties of This PC
Once in the properties, you could see the architecture of your processor and your windows next to the System type If it is 64-bit and x64 then the update’s catalog must also show 64-bit or else the update is not for your system and can’t be installed.
View the System type
Method 2: Match your update with the Update history
If the update you are trying to install is compatible with your processor, then the next thing to do is to check whether if it is already installed on your PC. Sometimes the update that you are trying to install is already installed into your windows, you can check this out by going into the window update history and match the update code with the installed updates.
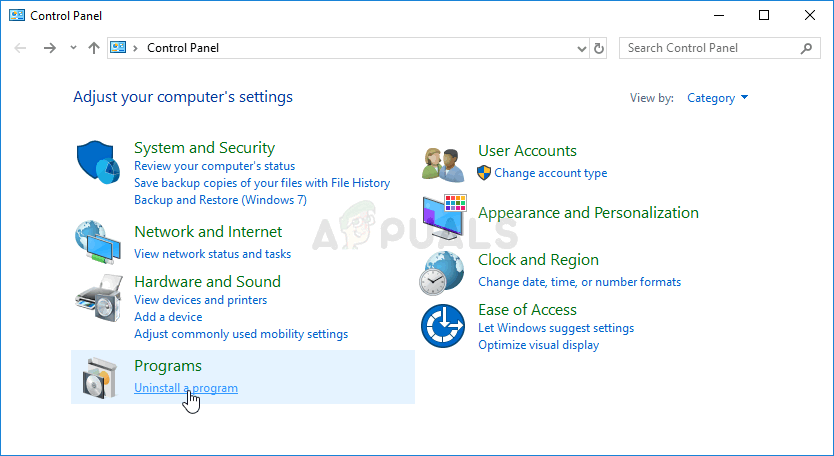
Open the start menu by clicking on the start button and then open the control panel by typing Control Panel.
Open Control Panel
Once in the control panel, click on Programs.
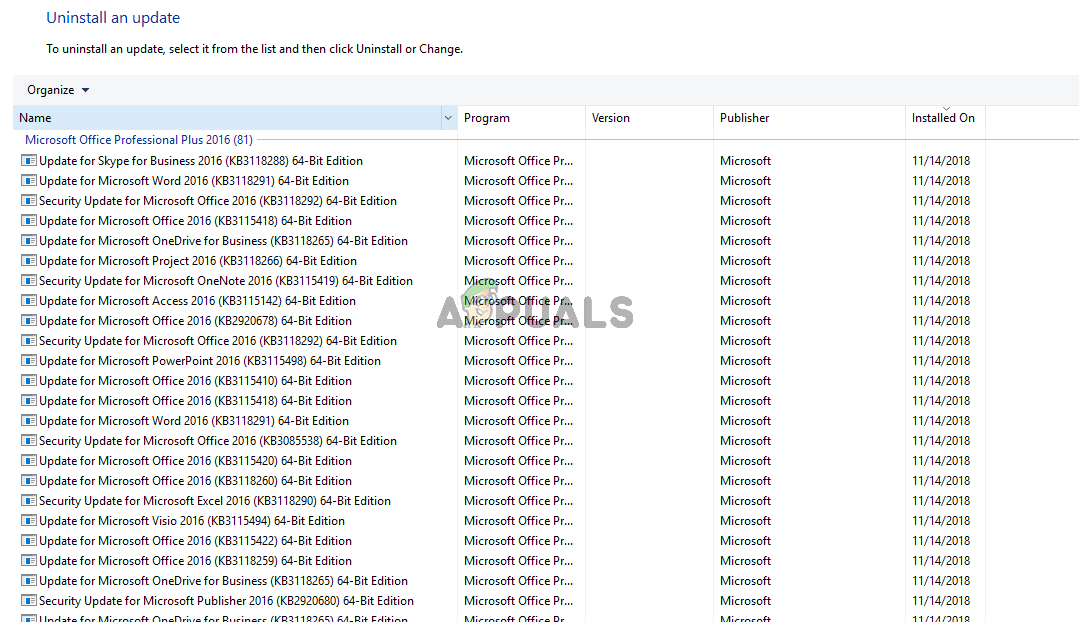
Now click on View installed updates under the Program and Features menu to open the installed updates folder.
Check if the update is already installed or not
Here you will need to match the code of each update with the update that you are trying to install to see if it isn’t already installed on your computer. If it isn’t installed, then proceed to the next solution.
Method 3: Run the update troubleshooter
If there is a problem with the window’s updater, then you could use the windows troubleshooter to diagnose and fix the problem.
Open the start menu and type Troubleshoot, and press Enter.
Open Troubleshoot
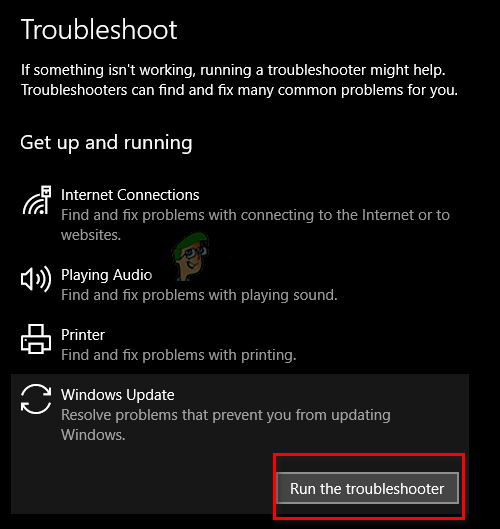
The Troubleshoot windows will appear, Click the Windows Update under the Troubleshoot menu and then click on Run the troubleshooter to start the process.
Run the troubleshooter
Now the process will start and it will take a while to diagnose the problems with the windows updater, you need to wait till it finishes.
If it finds any errors, then it will ask to fix them. Click on Apply repairs automatically to fix any errors.
Method 4: Installing the most recent KB update
If your system doesn’t have the most recent KB update installed, then you might consider installing it using the windows catalog.
Open this webpage which includes a list of the most recent windows 10 updates.
Now on the page try to find the most recent Windows 10 KB update, the top on the left panel is usually the most recent one. Note down its number.
Now open the Microsoft update catalog website by clicking here and then write the KB number into the search box, after that download and install the update.
Method 5: Run DISM and SFC scan through the command prompt
The DISM and SFC tools can scan the integrity of system files and the registry files. Any error in these files could cause a windows update issue, so fixing the registry could potentially fix update errors.
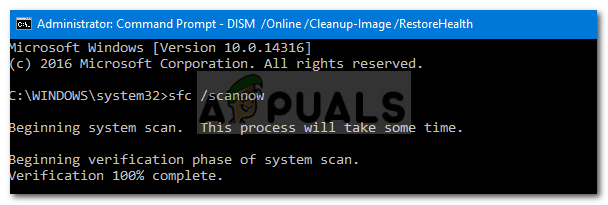
Open the Start Menu and type CMD and press Shift + Ctrl + Enter to open the command prompt with administrative privileges, click Yes if prompted by UAC.
Now once the command prompt is open, type DISM.exe /Online /Cleanup-Image /RestoreHealth / Source:C:\RepairSource\Windows\LimitAccess and press Enter.
Run the DISM.exe
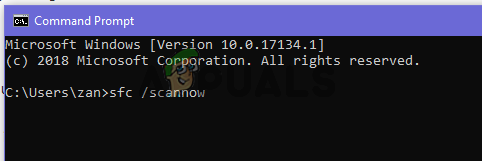
After the DISM is done you will need to start the SFC scan by typing sfc /scannow in the command prompt.
Run sfc /scannow
After the SFC scan, restart windows and try to install your update again.
Method 6: Change the system locale to English
Some users reported fixing the error by changing the system locale to English. Here are the steps to get this done.
Open the Start menu and type control panel. Now click on the Control Panel to open it.
Open the Control Panel
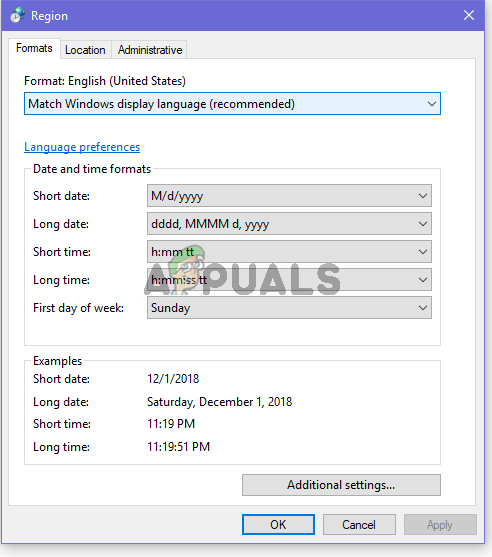
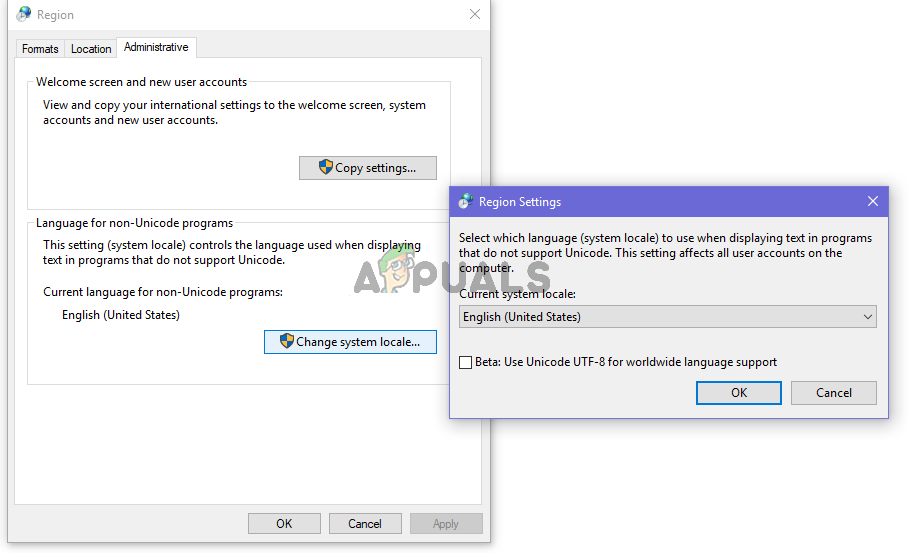
Once in the control panel, open the Region.
In the Region dialog box under the Formats tab, set the format to English (United States).
Select the Format as English
Now click on the Administrative tab and click on the Change system locale button and set the system locale to English (United States). Now try installing your update.
Set the system locale as English
Method 7: Use system restore to go back to a previous version
If you can’t solve the issue with the previous methods, then try the system restore and try to install your update. Here’s how to do it.
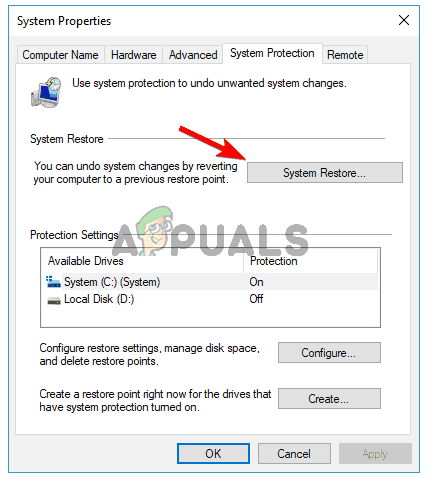
Open the start menu by clicking on the start button, and then type Restore in the search and click on the Create a restore point.Run the Create a restore point
Now under the System Protection tab, click on the System Restore. This will start the system restore process, click Next.
Click on System Restore
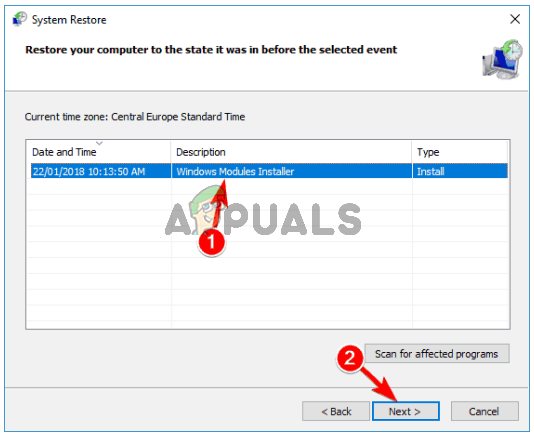
Next, select a restore point from the list, try the most recent one and click Next.
Select a recent restore point
Now after the restore is complete, try to update your PC.
Method 8: Upgrade windows through the Media Creation Tool
The last thing to try is the Windows Media Creation Tool. It is a tool by Microsoft, that allows you to either install a fresh copy of windows or upgrade it.
Download the Media Creation Tool by clicking here and then run it as administrator by double-clicking on it.
Now select Upgrade this PC now.
Setup will take a while and download the needed upgrades.
Once the setup is ready you will see Ready to install screen, Select Keep personal files or else your files will be deleted, now click Next.
The Setup will start installing the upgrades. You won’t need to install your update because the upgrade will do that and install the latest updates for you.
Updates are an integral part of Windows. Whenever an update fails to install, then it generates an error code so that the problem could be diagnosed and solved. The error code 0x800f0247 is generated when there are any corrupt files in the Window’s registry.
What does an Error code 0x800f0247 mean?
Some users are getting the error code 0x800f0247 in a result of a failed update. This error code always indicates that there is corruption in either the system files or the registry. Usually, the update was not suitable for the system, or Windows was unable to install the update because of a faulty registry or bad system files. So in order to fix this error will have to find the exact cause and then proceed accordingly.
Error code 0x800f0247
What causes the Error code 0x800f0247?
The error 0x800f0247 is specifically caused by corrupted files in the registry; either after a failed software installation or after an unsuccessful windows update. Bad sectors in your hard drive could also cause this error. You will have to try all of the listed fixes in order to find the real culprit that is causing this issue.
Incompatible hardware driver update: In rare cases, the Windows force a hardware driver update that is not compatible with the device, this causes a failed update with the error code 0x800f0247. Disabling the Hardware Updates fixes the problem.
Bad sector or a corrupted file allocation table: Most of the times this error is caused by either a corrupted file in the allocation table or by a bad sector in the hard drive. This can easily be fixed by a simple disk scan.
Corrupted System files: Some users report that the error was fixed by running an SFC scan. The SFC scan checks the integrity of the system files.
Component Store corruption: Sometimes the error code 0x800f0247 could also be caused by a corrupted registry in the Component Store. Running a DISM scan will usually fix that problem.
Not to worry. If you follow the given step-by-step procedures then, you will be able to get rid of this issue.
Method 1: Disabling the Hardware Updates on your Windows
A few people with older hardware specs reported that the error with the code 0x800f0247 was fixed when they turned off the Windows updates for hardware drivers. Windows sometimes force newer drivers on older hardware which causes a lot of problems including this one. So turning off updates for older hardware and downloading the required drivers from the manufacturer’s website was the only solution.
Open This PC from the desktop.
This PC
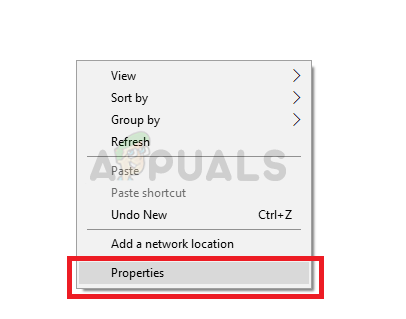
2. Right-click anywhere and select Properties.
Click on Properties
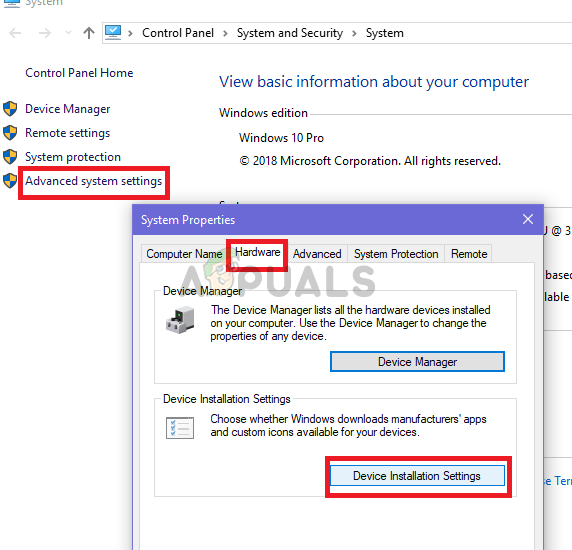
3. Select Advanced system settings from the upper left panel.
4. Now select the hardware panel from the dialog box and click on Device Installation Settings.
Click on Device Installation Settings
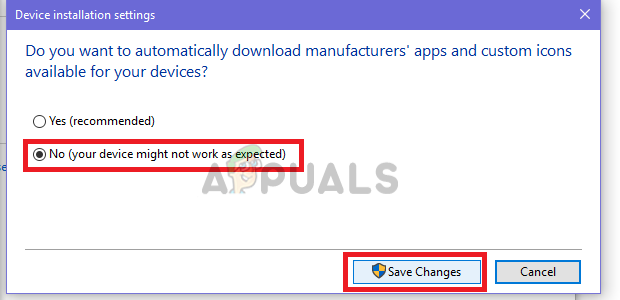
5. Click No and then click Save Changes.
Select No and Save Changes
6. Restart the computer to let the settings take effect.
Method 2: Using Scan-disk to check for bad sectors and file system errors
In most cases, the Windows update was generating the error because there were bad sectors or file system errors on the hard drive. Although bad sectors cannot be regenerated, the data in them can be moved to good sectors and file system errors can be easily fixed just by a simple disk scan.
Open This PC from the desktop.
Open This PC
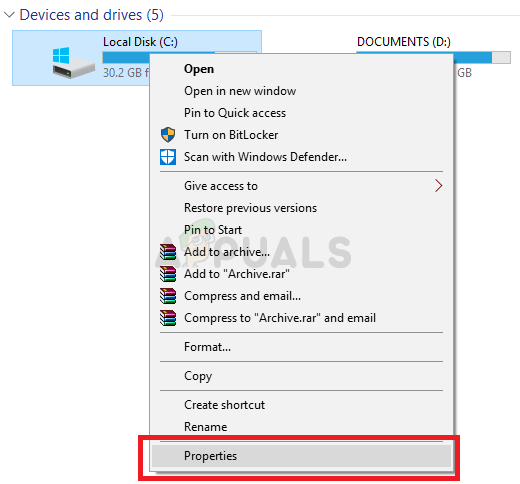
Right click on the Windows drive and select Properties.
Open Properties
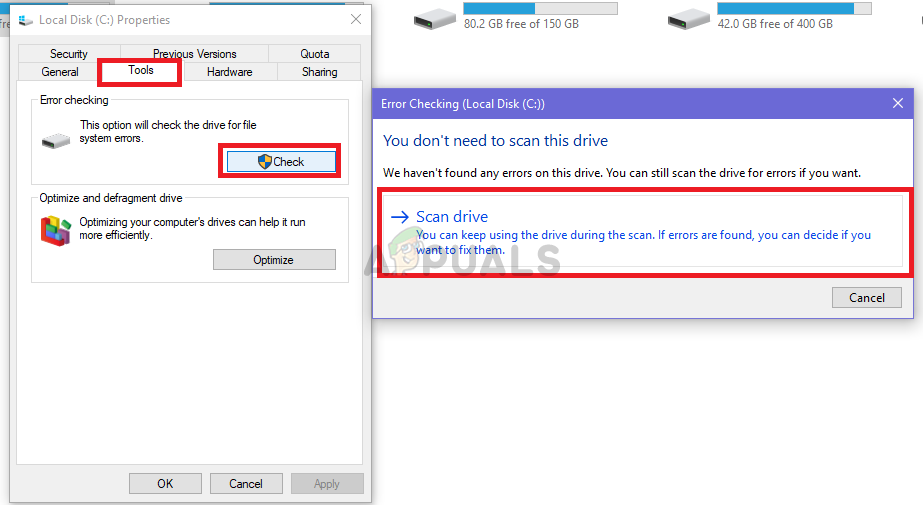
Go to the Tools panel and click on the Check button under the “Error-checking” section.
Now click on Scan Drive button. This will start the scanning process and will take some time. If errors are found then it will ask to fix them, click on Fix errors. If no errors were found, then move on to the next method.
Click Scan drive after clicking Check under Tools
Method 3: Running an SFC scan for corrupted System files
A lot of users encountering this issue have managed to resolve it just by running an SFC scan, an SFC scan automatically checks and resolves issues related to the file system. It takes some time to check the whole system and it cannot be paused or canceled.
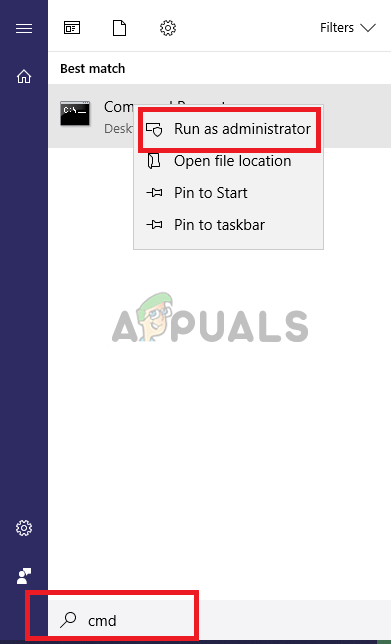
Open the Start menu and type “cmd” in the search bar.
Run the command prompt as admin by right clicking on it and then clicking “Run as administrator”. If prompted by UAC (User Account Control) then click yes to grant administrator privileges.
Run CMD
Type the following command in CMD “sfc /scannow” and hit Enter. This will take a while and verify the integrity of the whole system.
Type sfc /scannow in CMD
Method 4: Running a DISM scan
DISM (Deployment imaging servicing and management tool) is a tool that enables the user to restore the health of his system back to normal. DISM has three commands, but only the “RestoreHealth” command repairs the system files.
Open the Start menu and type “cmd” in the search bar.
Run the command prompt as admin by right clicking on it and then clicking “Run as administrator”. If prompted by UAC (User Account Control) then click yes to grant administrator privileges.
Run CMD as administrator
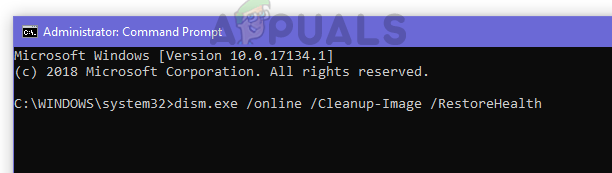
Type the following command in CMD “dism.exe /online /Cleanup-Image /RestoreHealth” and hit Enter. You will have to wait patiently because the scan will get stuck at 20%.
Type dism.exe /online /Cleanup-Image /RestoreHealth
Hearthstone (originally Heroes of Warcraft) is an online collectible game which is developed by Blizzard (the same company who develops Warcraft and Overwatch). Even though Blizzard is a giant in the gaming industry, its products are no different from others when it comes to technical issues.
Hearthstone
One of these issues is Hearthstone lagging. It doesn’t matter whether you have a high-end PC or a normal one, the game will lag and stutter so much that it becomes unplayable. This issue surfaced in the early 2017 and players still come across it every once in a while.
What causes Hearthstone to lag?
Since games are huge applications relying on several different modules to get running, there can be many different causes ranging from video settings to conflicts with third-party software. Since each computer’s setup and configurations are different, the causes of the issue can vary as well. Here are some of the causes:
Video/graphics settings: The graphics settings in your graphics hardware might not be set correctly. If any setting is out of place, you will experience the lagging.
Bad installation files: There may be bad or corrupt installation files of the game. If any module is misconfigured and fails to sync up with other ones, you will experience the lagging indefinitely.
Dynamic Location Service: Hearthstone searches for nearby friends using Window’s location service. This considerably slows down the performance of the game.
Bad configurations/cache: Hearthstone keeps a record of all configurations in an external file at its installation folder so it can fetch them whenever necessary. If these are corrupt, you will experience issues with Hearthstone.
We’ll start getting into solutions starting with the easiest one and working our way down. Make sure that you have an active internet connection and are logged in as an administrator. Also, make sure that you are not behind proxies or firewalls.
Solution 1: Changing Graphics options
Graphics card manufacturers such as NVIDIA or AMD provide a separate control panel from where you can change the graphics settings which are directly linked to the hardware. Newer graphics cards have advanced video improvement policies which help in a better gameplay. However, there are also several cases where these options cause issues with some games. We will try disabling these options and check if this solves the issue.
Open your NVIDIA control panel (right-click anywhere on your Desktop and select NVIDIA control panel).
Now select Manage 3D settings from the left navigation pane and click Program settings.
Changing NVIDIA graphics settings
Select Hearthstone from the drop-down menu. Under the settings there, look for ‘Monitor technology’. Change this setting from ‘Global/Gsync’ to ‘Fixed Refresh’.
Now next to the “Preferred refresh rate” feature make sure it is set to “Application-controlled“.
Apply changes and exit. Now restart your computer and check if the lagging in Hearthstone is solved.
Solution 2: Turning off location
Hearthstone has a network of friends where they can communicate with each other over the channel and even locate nearby friends using location obtained through your internet in Windows. This forms a network of friends in order to make your experience playing good. However, it seems that this location caused many issues and the game started to lag when the application was searching for nearby friends. We will try to disable this setting and check if this solves the issue.
Press Windows + S, type “location privacy settings” in the dialogue box and open the application.
Location privacy settings
Now toggle the options “Location for this device” and “allows apps access to your location” off.
Turning location off – Settings
Save changes and exit. Now try launching Hearthstone and check if the issue is resolved.
Solution 3: Refreshing the configurations file
Each game has its local copy of configurations which it retrieves whenever it starts up to load the initial settings. This configuration file can easily get corrupt and become unusable by the system. When this happens, the game starts to display technical glitches like the lagging. We will refresh this file and check if this does the trick.
This path assumes that you have chosen the default file path for the installation of Hearthstone. If you have some other custom directory set, navigate to that location.
Now rename the following file
options.txt
to
optionsold.txt
Save changes and exit. Restart your computer and check if the issue is resolved. The initial startup of the game might take a little longer than usual as the file is being remade.
Solution 4: Reinstalling thegame
If all the above methods don’t work, you can try reinstalling the game completely. If you have reached this without any improvement in the lagging, it probably means that the installation files of the game are either incomplete or are corrupt. A reinstall will refresh all the settings and fetch the latest version.
Launch net application. Click Games from the top tab, select Hearthstone and click on options. From the drop-down, select Uninstall game.
Uninstalling Hearthstone
Restart your computer and launch Battle.net again. Search for Hearthstone and install it again on your computer.
Try launching the new version and see if the issue is fixed.
In addition to all the solutions, you can also try the following:
Perform the following steps to edit the ‘options.txt’ file:
Go to C:\Users*YOUR USER HERE\AppData\Local\Blizzard\Hearthstone
Open options.txt
Insert the following:
targetframerate:i=144 (number = desired framerate)

vsync:b=False

showfps:b=True (for a little number to show your fps, if desired)
Changing the entire Hearthstone folder to ‘_Hearthstone’ in the directory:
uTorrent is a BitTorrent client software with over 150 million users across the globe. It is made to allow peer-to-peer file sharing between its users, it uses the BitTorrent protocol to transfer files from one peer to another. It consists of peers, seeds, and leaches. Peers and seeds are the uploaders while leaches are the downloaders.
Error: Access is denied, (WriteToDisk)
A lot of users on the uTorrent forums reported that most versions after the update 3.4.2, give a vague error when trying to download a torrent. The error says that access to disk has been denied and that the torrent can’t be downloaded. The error could occur while a torrent is in progress.
What causes uTorrent to give “access is denied (write to disk)” error?
Before we try and find a solution, we first have to determine the cause of this problem. Here are the most frequent causes.
uTorrent not having administrative privileges: Most of the times the error where the torrent says that it can’t write to disk is because it is not given administrator privileges. To fix this, all you would have to do is to give administrator privileges to uTorrent and it will start downloading again.
Folder not granted access: In some cases, users reported that the folder in which a torrent is being downloaded is not giving access to uTorrent, it is somehow set to read-only. To fix this issues you would either have to remove the read-only property of that folder or just create a new folder and download your torrents there.
An internal bug that stops the download: There are some chances that a bug in the uTorrent is responsible for this behavior. Some users got the problem fixed when they tried resetting the download location through the uTorrent client.
Not to worry, the following methods will allow you to find and fix the cause of this problem.
Method 1: Granting administrative privileges to uTorrent
In order for an application to work properly on windows, it must be granted administrative privileges. The same is true for uTorrent. In most cases, the “access is denied” error is caused because the uTorrent doesn’t have the required privileges. To fix this you could just run it as administrator, but then you would have to run it as administrator every time you start it. To permanently run it as administrator, follow the given steps.
Open the Start menu and search for uTorrent.
Open the file location of uTorrent
Once it appears in the search, right click on it and open its file location by clicking on Open file location. This will take you to the uTorrent’s shortcut folder.
Right click on the uTorrent’s shortcut and again click on Open file location.
Now once you are in the root directory of uTorrent, right click on the uTorrent.exe and click Properties.
Go into the Compatibility tab and check the Run this program as an administrator tick box.
Tick the Run this program as an administrator tick-box
Click Apply and then click OK. Now start the client and see if the error is gone or not.
Method 2: Unchecking the read-only property of the download folder
If the first method didn’t work for you, then the error might be caused due to the fact that the folder in which you are downloading your torrent has its Read-only property checked. You will have to create a new folder and un-tick its Read-only property to get rid of this error.
To create a new folder, right-click anywhere and then hover the pointer over the New option and then click Folder.
Create a New Folder
Once the folder is created rename it to your needs and right click on it and then open its properties by clicking on Properties.
Under the General tab, untick the Read-only (Only applies to files in the folder).
Untick the Read-only tick-box
Now click on Apply and then click on OK. It might take some seconds to apply the changes.
Now try downloading your torrent again and only use this folder as your download folder for uTorrent.
Method 3: To reset the download folder from the torrent settings
Now, this method is similar to the previous one, there is a bug in the uTorrent that doesn’t allow it to recognize the folder in which it has started downloading, the folder is there but still, it gives the write error.
Right click on the torrent that is displaying the error message: access is denied (write to disk).
Hover the mouse pointer over Advanced. Now select Set download location.
Set the download location
Next, you will have to re-select the same folder that was used before or select a new folder. Now click OK.
Now right click on the torrent again and select Start. See if this fixed the error.
Restart the torrent
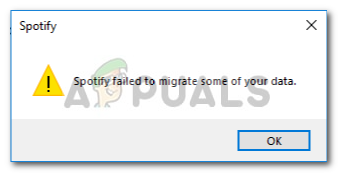
The error ‘Spotify failed to migrate some of your data’ is caused by errors in registry entries or a faulty installation which leads to not being able to transfer your data from one account to another. Music is of great essence in the present world and if you try to contemplate the top-notch music streaming applications right now, you’ll have but one answer. Spotify is arguably the best music streaming software out right now and has no real-time competitor aside SoundCloud.
When you create a new account on Spotify and try to migrate your data i.e playlists, songs etc from your previous account to the new one, you might, rarely, encounter this error. This was an error that Spotify tech themselves didn’t have a solution for at that time, however, after some duration, an effective solution did come out. Thus, we are here with the solutions that are certainly going to solve your problem.
Spotify failed to migrate some of your data
What causes Spotify Failed to Migrate some of your Data?
The error is a rare one, but a hurdle nonetheless. It can be caused but surely is not confined to –
Registry errors. Sometimes, this error pops up when your Windows registry for Spotify contains some errors.
Faulty installation. If you’ve had a faulty installation i.e power outage whilst installation or anything else, this could potentially be spurred because of it.
To fix your issue, you have but only two options:-
Solution 1: Reinstalling Spotify
Like we said, one of the causes of this error is a faulty installation that might have left some traces in the system files which are interfering with your process, therefore, a potential fix for such a course of events will be to reinstall Spotify application. To do this, you’ll have to:
First off, to uninstall Spotify, press Winkey + X and click on ‘Apps and Features’ located at the top of the list.
There, search for Spotify.
Some of you might end up with two results, you’ll have to uninstall them both.
Uninstall Spotify Windows version
Once you’ve uninstalled Spotify, download the software again from Spotify’s website or Windows 10 Store.
Install Spotify.
Once you’ve installed Spotify again, log in to your account and check if the error still pops up. If it does, check out the next solution.
Solution 2: Deleting Spotify Registry Entry
The other and last possible fix for this issue would be to delete the Spotify entry in the Windows registry. If your problem isn’t fixed after reinstalling Spotify it is probably due to the fact that a previous entry of Spotify is left in the Windows registry. In such an event, you’ll have to delete the entry along with deleting some folders from your system files (related to Spotify of course). To do this, follow the given instructions:
First and foremost, end-all of the Spotify processes from Task Manager.
End Spotify Processes
Once you’ve done that, delete Spotify folders from the following directories:
Delete the Spotify Folder
{User}\AppData\Roaming\
3. After that, delete the Spotify folder from:
Delete the Spotify Folder
{User}\AppData\Local\
Delete the Spotify Folder
{User}\AppData\Local\Packages\
4. Upon deleting the folders, uninstall the Windows version of Spotify as mentioned in solution 1.
Uninstall Spotify Windows version
5. Now, it is time to delete the key of uninstalled Spotify from the registry. Press Winkey + R to open Run and type in ‘Regedit’.
6. Copy and paste the following address in the address bar of the Registry Editor.
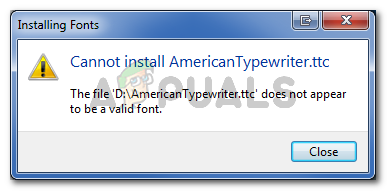
Several Windows users are reporting that they are unable to install certain fonts. The error that comes up is “The file ‘Font Name’ does not appear to be a valid font”. This particular error is reported to occur with every recent Windows version including Windows 7, Windows 8.1 and Windows 10.
The file ‘FileName’ does not appear to be a valid font
What is causing the does not appear to be a valid font error?
We investigated this particular issue by looking at various user reports and trying to replicate the error message on our error machine. Based on what we gathered, there are several reasons why this error is occurring:
Font installation doesn’t have admin privileges – You’ll need administrative privileges in order to install a font on a Windows machine. You might encounter this particular error message if you’re using a limited (guest) Windows account.
TTC is not supported directly by Windows – TrueType Collection fonts are not directly supported by Windows. Since Windows doesn’t natively support TTC fonts, you will need to use some kind of Font manager.
Windows Firewall is disabled – The built-in font manager will not function properly if the Windows Firewall service is disabled on your machine.
If you’re struggling to resolve this particular issue, this article will present you with a selection of verified troubleshooting steps. Below you have a couple of methods that other users in a similar situation have used to resolve or circumvent the issue.
For the best results, follow the methods in the order that they are advertised until you come across a fix that resolves the problem in your particular scenario.
Method 1: Using a user account with administrative privileges
Keep in mind that the built-in font manager is known to throw the “does not appear to be a valid font” error if the current user account doesn’t have administrative privileges.
Several users struggling with the same issue have managed to install the font that was previously failing with this error by performing the operation through a user account with administrative privileges.
To do this, simply hit the Windows key, right-click on the account icon and then click on an account that has administrative privileges.
Using an admin user account
Once you are logged-in with it, attempt to install the font again and see if the error is still occurring. If you’re still seeing the “does not appear to be a valid font” error, move down to the next method below.
Method 2: Enabling Windows firewall
Another popular frequent reason why this error occurs is if the machine that is attempting the operation has the Windows Firewall service disabled by default. Several users encountering the same error message have managed to get it fixed by using the Services screen to re-enable the service.
Here’s a quick guide on how to do this:
Press Windows key + R to open up a Run dialog box. Then, type “services.msc” and press Enter to open the Services window.
Run dialog: services.msc
Inside the Services window, use the right pane to scroll through the list of services and locate Windows Firewall. Once you see the entry, right-click on it and choose Properties.
Right-click on Windows Firewall and choose Properties
In the General tab of Windows Firewall Properties, set the Startup type to Automatic and click Apply to save your changes.
In the General tab, set the Startup type to Automatic
Close the Services menu and restart your computer. At the next startup, see if the error has been resolved.
If you’re still seeing the “does not appear to be a valid font” error when trying to install a font, move down to the next method below.
Method 3: Drag & drop the file into the font application
Some users that have been getting the “does not appear to be a valid font” error when trying to double-click the font to install it have reported that the procedure was finally successful after they dragged and dropped them inside the Font application.
Here’s a quick guide on how to do this:
Press Windows key + R to open up a Run dialog box. Then, type “control” and press Enter to open Control Panel. Run dialog: control
Inside Control Panel, click on Fonts.
Click on Fonts
Next, simply drag & drop the font that you wish to install inside the Fonts window.
Drag & drop the font
Follow the on-screen prompts to complete the installation of the font.
If the installation fails with the same error message, move down to the next method below.
Method 4: Taking the file through a Font Converter
Some users have reported that the issue was resolved after they filtered the file through an online font converter. Based on their reports, they were able to install the font after the conversion was complete, even if the extension is still specified as being TTF.
Here’s a quick guide on how to convert the font with Online Font Converter:
Visit this link (here) and enable the ttf checkbox from the list of font extensions.
Visit the Online Font Converter website and enable the TTF checkbox
Next, click on Select Font(s) and drag & drop the font or click Choose files and browse to its location manually.
Drag & drop the font or browse manually to load it inside the converter
Once the .ttf file is loaded inside the online converter, simply click on Done and wait for the process to complete.
Click on Done to start up the conversion process
Once the process is complete, click on Save your font. Saving the converted font
From the next screen, click Download Attachment.
Downloading attachment
Extract the converted font and open it from the converted-files folder.
Open the font from the converted-files folder
Click the Install button and grant administrative privileges by clicking Yes at the UAC prompt to install the font. You should no longer encounter the does not appear to be a valid font error.
Installing font
The ‘igfxEM module has stopped working’ error is usually caused if you have an outdated Intel Graphics driver or an unstable one. It is a component of the Intel® Common User Interface and is not, in any way, related to the core of Windows. It is mostly used in Laptops and works as a Display Resolution persistent. However, some malware uses this process as a disguise so be thoughtful of it. Please refer to this article if you are intrigued to find more information relating igfxEM.exe file.
You are most likely to get this error after your Windows boot up though it’s not a security risk. This only means that your drivers are outdated or you are using an unstable version in which case you should roll back your graphics driver.
igfxEM module has stopped working
What causes igfxEM module has stopped working?
Well, this error is not generic and it doesn’t occur that commonly, however, whenever you encounter this issue, it is caused by the following reasons –
An outdated graphics driver. One of the reasons you encounter this error is an outdated driver in which case you’ll have to update your graphics driver to the latest version released by Intel.
An unstable graphics driver. Secondly, if you have an unstable graphics driver, that could potentially cause this error in which phenomena you’ll have to roll back to the last stable driver. Quite simple.
With all of that being said, what’s the right course to deal with this error? Well, to know that, go through the following solutions:
Solution 1: Updating the Graphics Driver
As we mentioned, the error could be caused due to an outdated driver, therefore, to eliminate that possibility, you’ll have to update your graphics driver. Here’s how to do it:
Go to Desktop, right-click on ‘This PC’ and select ‘Manage’.
From the list on the left-hand side, choose ‘Device Manager’.
Click on ‘Display Adapters’ to expand the list.
Right click on your Intel graphics card and select ‘Update driver’.
Click Update Driver
After that, click ‘Search automatically for updated driver software’.
Click Search automatically..
If Windows shows you an update, follow through the steps otherwise jump to Solution 2.
Solution 2: Installing the Driver Manually
One of the things you can do to resolve this issue is installing the graphics driver manually. For this, firstly, you’ll have to check your Intel graphics card model and then search for the driver on Intel’s website. Make sure to uninstall your graphics driver with your internet disabled and reboot your device before you follow the given instructions. Here’s how to manually install your driver:
To check your graphics card model, Press Winkey + R to open Run.
Type in ‘dxdiag’.
Type in dxdiag
Switch to the ‘Display’ tab where you’ll find your graphics card model.
Graphics card model
Once you’ve found your model, open up a browser and head to Intel’s website.
After that, click on ‘Support’ located on the top right of the homepage.
Click ‘Download Drivers and Software’.
Type in your model in the search box.
Search in your graphics card model
Download the driver for your respective Windows version.
Install the driver and reboot your system.
See if the error persists.
Solution 3: Rolling back your Driver
Lastly, you can get this error fixed by rolling back your graphics driver to a more stable version. To do that, go through the following instructions:
Open ‘Device Manager’ as mentioned in solution 1.
Expand ‘Display Adapters’ and right click your Intel graphics card.
Select Properties.
Switch to the ‘Driver’ tab and click ‘Roll Back Driver’.
Click Roll Back Driver
Select an option from the given list and click Yes.
Wait for it to complete and then reboot your system.
Several Windows users are reporting that they are prevented from ripping music with Windows Media Player by the “Windows Media Player cannot rip one or more tracks from the CD” error. Most affected users report that the issue occurs when they try to rip an Audio CD.
Windows Media Player cannot rip one or more tracks from the CD
What causes the Windows Media Player cannot rip one or more tracks from the CD error?
We investigated this particular issue by looking at various user reports and the methods that they used to resolve the issue. Based on what we gathered, there are several common scenarios that will typically trigger this particular error message:
Error correction is disabled – Windows Media Player is equipped to fix minor errors that cannot be fixed conventionally. However, this option is disabled by default, so you’ll need to enable it manually.
Unavailable locations are listed as libraries – This is a well known WMP bug that has been manifesting since Windows Vista. It usually occurs if one of the specified music libraries is actually a broken rip location.
CD is being ripped to a low quality – You might be seeing the error message because you’re trying to rip the CD to a low quality. If that’s the case, you most likely circumvent the issue by ensuring that you’re ripping to an improved audio quality.
If you’re struggling to resolve this particular issue, this article will provide you with a collection of verified troubleshooting steps. Below you have a list of methods that other users in a similar situation have deployed to either resolve or circumvent the issue.
For the best results, follow the methods below in the order that they are advertised until you stumble upon a fix that resolves the problem in your particular situation.
Method 1: Enable Error correction
Some affected users have managed to resolve the issue by accessing the settings menu of Windows Media Player and enabling error correction. This can be done by accessing the Tools menu and checking error correction for both ripping and playback.
Error correction enables Windows Media Player to play or rip CDs that contain errors. This can be useful if you’re encountering the issue due to a CD writing error.
Here’s a quick guide on how to enable error correction in Windows Media Player:
Press Windows key + R to open up a Run dialog box. Then, type “wmplayer” and press Enter to open Windows Media Player (WMP).Run dialog: wmplayer
Inside Windows Media player, right-click on a free space where the ribbon should be and select Tools > Options.
In WMP, right-click on a free space and go to Tools > Options
In the Options screen, go to the Devices tab and select your CD/DVD writer (the one that you want to use to rip your music files. With the writer selected, click the Properties menu.
Go to the Devices tab, select your writer and click Properties
In the Properties screen of your DVD writer, enabled Digital for both Playback and Rip, then check the box associated with Use error connection. Finally, hit Apply to save the changes.
Set Playback and Rip to Digital, then enable Use error correction
Try to rip the music again and see if you still receive the same error message.
If you’re still seeing the “Windows Media Player cannot rip one or more tracks from the CD” error, move down to the next method below.
Method 2: Boost the quality of the ripped music
Other users encountering the same error message have managed to resolve the issue after using the Audio quality slider to set it to the highest (or second highest) quality available. Several affected users reported that once this setting was active, they where no longer encountering the “Windows Media Player cannot rip one or more tracks from the CD” error.
Here’s a quick guide on adjusting Rip settings quality in order to eliminate the error message:
Press Windows key + R to open up a Run dialog box. Then, type “wmplayer” and press Enter to open up Windows Media Player.
Run dialog: wmplayer
Inside Windows Media Player, right-click on the ribbon and choose Tools > Options.
In WMP, right-click on a free space (in the ribbon) and go to Tools > Options
In the Options window, go to the Rip Music tab and max the audio quality slider for each Format under Rip settings.
Set the slider for each Format under Rip settings to Best Quality (or second best)
Hit Apply to save the current configuration, then attempt to burn the music again to see if the process completes without the “Windows Media Player cannot rip one or more tracks from the CD” error.
If you’re still encountering the same issue, move down to the next method below.
Method 3: Removing unavailable locations
As some users have reported, the issue can also occur if you’re Windows Media Player is holding broken rip music locations. These can interfere with the ripping process and are known to trigger the “Windows Media Player cannot rip one or more tracks from the CD” error.
Several users in a similar situation have managed to resolve the issue after removing any unavailable locations and setting the correct music library as the default. Here’s a quick guide on how to do this:
Press Windows key + R to open up a Run dialog box. Then, type “wmplayer” and press Enter to open up Windows Media Player.
Run dialog: wmplayer
Inside Windows Media Player, click on Organize > Manage Libraries, then click on Music.
go to Organize > Manage libraries > Music
In the Music Library Locations screen, remove any location that is no longer available by selecting it and clicking Remove. Once you removed every unavailable location, make sure that the files you’re trying to rip are located inside the Default folder.
Removing any unavailable location from Music Library Locations
Restart Windows Media Player and see if the rip attempt is successful this time.
If you’re still encountering the “Windows Media Player cannot rip one or more tracks from the CD” error, move down to the next method below.
Method 4: Setting up the Music libraries folder
Several users struggling to resolve the same error have finally managed to get it resolved after noticing that they didn’t have a location to where the music is being ripped to. They fixed the issue by making sure that the main library folders (Music, Pictures, Videos and Recorder TV) all had specified locations.
Here’s a quick guide on how to do this:
Press Windows key + R to open up a Run dialog box. Then, type “wmplayer” and press Enter to open Windows Media Player.
Run dialog: wmplayer
Inside Windows Media Player (WMP), right-click inside the ribbon bar and go to Tools > Options.
In WMP, right-click on a free space (in the ribbon) and go to Tools > Options
Go to the Rip Music tab and see if you have any location listed under Rip music to this location. If you don’t have one, move down to the next steps below.
See if you have a location listed under Rip music to this location
Note: If you already have a location listed, jump straight to Method 5.
In WMP, click on the Organize tab, then choose Manage Libraries > Music.
Organize > Manage Libraries > Music
Under library locations, you should see a Music folder (typically located in C:\Users\*youruser*Music). If you don’t see it, click the Add button and then click on Include folder to add it manually.
Click Add, browse to the location of Music folder and click Include Folder
Repeat step 5 with every library folder left (Video, Pictures, Recorded TV).
Making sure the Library folder is set correctly for every type of media
Return to the Rip Music tab using step 5 and confirm that the Music library folder is set correctly. If it is, try to rip the music CD again and see if you’re still getting the same error message.
If you’re still seeing the “Windows Media Player cannot rip one or more tracks from the CD” error or this method wasn’t applicable, move down to the next method below.
Method 5: Restoring the Music library folder to Default
If you’ve come this far without a result, it’s very likely that WMP (Windows Media Player) is dealing with some corrupted files or settings that are inhibiting the ripping feature.
Several users have reported that they managed to resolve the “Windows Media Player cannot rip one or more tracks from the CD” error after restoring the Music library to the default and making sure that the save location is properly selected.
Here’s a quick guide on how to do this:
Make sure that Windows Media Player is properly closed.
Open File Explorer and expand the Libraries menu. Then, right-click on the Music library and choose Properties. Right-click on the Music library and click on Properties
In the Music Properties window, click on Restore Defaults.
Click on Restore Defaults
Once the default settings have been reverted, restart your computer and see if you are able to burn the music without encountering the “windows media player cannot rip one or more tracks from the cd” error.
The ability of users to tweak the appearance of their Windows UI was one of its greatest features from the start and users have always wanted to keep their desktop fresh and unique. However, sometimes when users try to change the theme on their computers, this error pops up along the “This theme cannot be applied to the desktop” text.
This Theme cannot be Applied to the Desktop
The error is not that serious but it can be annoying to see you’re unable to change the theme of your PC. We have gathered several working methods which can bring that functionality back so make sure you follow the methods below!
What Causes the “This theme cannot be applied to the desktop” Error?
Among the many causes for this specific problem, some of them stand out as being the most commonly occurring ones. The error’s nature is not problematic and it can be caused by the silliest problems. Here is the list:
Syncing themes across multiple accounts. This was noted as problematic and it should be turned off in Windows 10 Settings.
Themes or Desktop Window Manager services may not be running properly and you should make sure to turn them on and set their startup type to Automatic.
The Remove background images (where available) option available in Control Panel’s Ease of Access Center has also proven itself to be quite problematic when dealing with this issue and it should be disabled.
Solution 1: Turn of Theme Syncing Across Your Accounts
This solution can mean the world of difference and it has helped numerous users suffering from the same problem. Technically, it’s easy to perform it and it’s the most likely methods used to solve this problem. You don’t want to sync themes across multiple accounts on one or more computers.
Use the Windows Key + I key combination to open Settings on your Windows 10 PC. Alternatively, you can search for “Settings” by using the search bar located at the taskbar or you can click the cog icon right above the Start menu button after it opens
Locate and open the “Accounts” sub-entry in the Settings app by clicking on it once.
Accounts in Settings
Navigate to the Sync your settings tab and check under the Individual sync settings section for the entry called “Theme”.
Slide the slider by clicking on it or by dragging it in order to disable theme syncing and click the Apply button right below.
Disable Theme syncing
Restart your computer immediately and try running changing the theme of your computer to see if the “This theme cannot be applied to the desktop” error comes up!
Solution 2: Make Sure the Themes and Desktop Window Manager Services are Running
Changing and applying themes is closely related to these services and they absolutely must be running if you want to remain free of these errors. The Themes services and the Desktop Window Manager (DWM) should be started and their startup type should be set to Automatic.
Open the Run utility by using the Windows Key + R key combination on your keyboard (press these keys at the same time. Type “services.msc” in the newly opened box without the quotation marks and click OK in order to open the Services tool.
Running Services
The alternative way is to open Control Panel by locating it in the Start menu. You can also search for it using the Start menu’s search button.
After the Control Panel window opens, change the “View by” option at the top right part of the window to “Large Icons” and scroll down until you locate the Administrative Tools entry. Click on it and locate the Services shortcut at the bottom. Click on it to open it as well.
Services in Administrative Tools
Locate the Themes or the Desktop Window Manager service on the list, right-click on it and select Properties from the context menu which appears.
If the service is started (you can check that just next to the Service status message), you should stop it for now by clicking the Stop button in the middle of the window. If it is stopped, leave it stopped until we proceed.
Make sure that the option under the Startup type menu in the service’s properties window is set to Automatic before you proceed with other steps. Confirm any dialogue boxes which may appear when changing the startup type. Click on the Start button at the middle of the window before exiting. Make sure you repeat the same process for both of the services we mentioned.
Starting the Themes service
You may receive the following error message when you click on Start:
“Windows could not start the service on Local Computer. Error 1079: The account specified for this service differs from the account specified for other services running in the same process.”
If this happens, follow the instructions below to fix it.
Follow the steps 1-3 from the instructions above in order to open the service’s properties window. Navigate to the Log On tab and click on the Browse… button.
Under the “Enter the object name to select” entry box, type in your account’s name, click on Check Names and wait for the name to become available.
Click OK when you are finished and type in the password in the Password box when you are prompted with it if you have set up a password. It should now start without issues!
Solution 3: Uncheck “Remove background images (where available)” Option in Ease of Access Center
This annoying option might prevent you from being able to change your theme. The option might be useful for some uses but it prevents you from being able to change your theme to nothing but a solid color. Disable this option to fix the “This theme cannot be applied to the desktop” problem.
Start up the Control Panel by searching for the utility in the Start button or by clicking the Search button (Cortana) button at the left part of your taskbar (bottom left part of your screen.
You can also use the Windows Key + R key combo where you should type “control.exe” and click Run which will also open Control Panel directly.
Running Control Panel
After Control Panel opens, change the view to Category and click on Ease of Access in order open this section. Note that you will have to solve the problem using Control Panel and not Settings on Windows 10.
Under the Ease of Access Center section, locate the Optimize visual display option, left-click on it once, and scroll until you see the Make things on the screen easier to see section.
Disabling the problematic option
Uncheck the box next to the Remove background images (where available) option and Apply the changes you have made. Check to see if the problem still appears!