The Error 0x80246019 appears when users are downloading applications from Microsoft Store or while updating their systems. Windows 10 has a built-in application called MS Store where you can download and install different applications into your system which is pretty cool. To get the latest features released by Microsoft for their OS, one has to keep updating his/her system. However, these updates can sometimes be a bad choice as you might encounter an error.
Windows MS Store Error 0x80246019
Many users have been facing issues recently in regard to their MS store i.e whenever they try to download an application, instead of the app they’re prompted with an error. There are a number of solutions for this error and a number of reasons that can cause it. Hence, without further due, let’s take a look at the causes of this error.
Windows Update Error Windows MS Store Error 0x80246019
What causes Windows 10 Error 0x80246019?
Well, this error could be caused due to a number of reasons and while doing two different tasks i.e downloading an app from MS Store or updating your Windows. It can potentially be caused due to –
$WINDOWS.~BT directory. This directory is responsible for storing files temporarily while you are updating your system. Albeit, it can be easily corrupted and can cause a number of issues including this one.
Windows firewall. Sometimes, when your firewall isn’t allowing certain outgoing or incoming requests, the error can pop up in which case you’ll have to disable your firewall.
Now, let us get into the solutions.
Solution 1: Resetting MS Store
Windows 10 comes along with a built-in utility that lets you reset MS Store should you encounter any issues. This potentially solves many errors so we’re going to start off with this. To reset your MS Store, do the following:
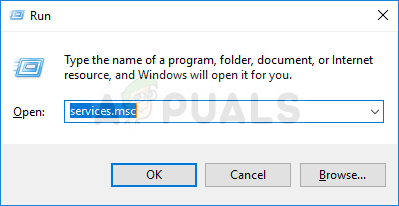
Press Winkey + R to open Run.
Type in ‘wsreset’.
Wait for the process to complete and then try downloading your application.
Solution 2: Deleting the $WINDOWS.~BT directory
Well, if you are receiving the error while updating your Windows 10, deleting the $WINDOWS.~BT directory is what you should start off with. Most of the users have reported that doing this solved their problem so it should be your top priority as well. Here’s how to do it:
Go to Start Menu, type in ‘Disk Cleanup’ and open it up.
Select your System drive i.e where your Windows is installed.
Wait for it complete calculating.
Wait for it complete
Select ‘Clean up system files’.
Click ‘Clean up system files’
There, from the list, check the ‘Previous Windows Installation’ or ‘Temporary’ box.
Check the ‘Previous Windows Installation’ box
Hit ‘OK’.
Once prompted, click ‘Delete files’.
Wait for it to complete.
After that’s done, try to update your Windows again.
Solution 3: Running Windows Troubleshooter
Making use of the Windows Troubleshooter is essential while solving an issue. This is likely to solve the generic errors on its own. To run Windows Troubleshooter, do the following:
Press Winkey + I to open Settings.
Go to Update and Security.
On the left-hand panel, click ‘Troubleshoot’.
Execute Windows Update troubleshooter if your error appears while updating.
Execute Windows Update Troubleshooter
Run Windows Store Apps troubleshooter if it pops up while downloading an app from the MS Store.
Run Windows Store Apps troubleshooter
Once done, try updating your system or downloading apps from the Store.
Solution 3: Unplug any External Hardware
The error can also be caused by any external hardware that is connected to your device such as USB or printer etc. For some users, the issue has been resolved by unplugging their USB, webcam or printer before downloading an application from the MS Store. Therefore, if there’s anything connected to your PC, unplug it and see if it solves the issue.
Solution 4: Changing Insider Program Settings
If your Windows update error still persists after deleting the $WINDOWS.~BT directory, then it is probably caused by your Insider program settings. In such a case, you’ll have to change your settings. To do this, follow the instructions:
Press Winkey + X and select ‘Settings’.
Once the Settings window open, click on ‘Update and Security’.
Click Update and Security
On the panel located to the left side, click ‘Windows Insider Program’.
If your issue hasn’t been resolved by now, this could be due to corrupted system files. If your system files are corrupted, your PC won’t function normally and you’ll probably encounter errors such as this. Hence, we recommend running SFC and DISM to check and verify your system files and to repair the files that are corrupted using a backup stored in your PC.
To run SFC and DISM, please refer to SFC and DISM articles written quite thoroughly by our experts.
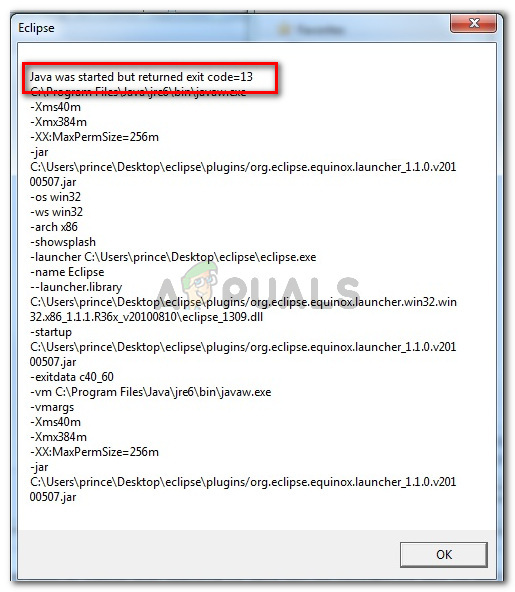
Some users are getting the Java Was Started but Returned Exit Code=13 Eclipse error when trying to run Eclipse. The issue is reported to occur with Windows 7, Windows 8, Windows 10 (32 and 64 bit).
Java was started but returned exit code =13
What is causing the ‘Java was started but returned exit code =12’ error?
We investigated this particular issue by looking at various user reports. Based on what we gathered, there are several fairly common scenarios that are known to trigger this particular error message:
An incompatible Eclipse or Java version is installed – This is the most common reason why this error message is occurring. It’s likely that likely that you’ve installed a 64-bit version of Eclipse or Java while your computer only supports 32-bit (or vice-versa).
Eclipse includes special characters in the installation directory – Several users have managed to resolve this error message after removing the special characters (#$%^) from the installation directory.
The computer is using an unsupported version of JVM (Java Virtual Machine) – Even if you ensure that you’re using the latest version of Eclipse, it’s possible that you’re seeing this error because you’re running an unsupported version of JVM.
The Java Environment Path Variable is incorrectly set – Some users have managed to resolve the issue after discovering that the issue was caused by an incorrectly set Java Environment PATH variable.
If you’re struggling to resolve this particular error message, this article will provide you with a list of quality troubleshooting steps. Below you have a collection of methods that other users in a similar situation have used to get the issue resolved.
For the best results, follow the methods below in order that they are presented until you encounter a fix that is effective in getting fixing the problem in your particular scenario
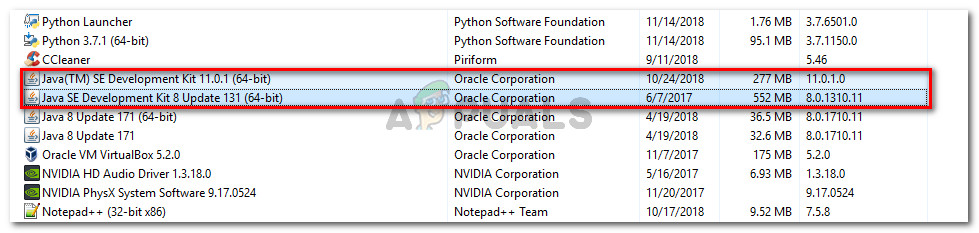
Method 1: Using the correct combination of Eclipse – JDK
Eclipse and JDK (Java Development Kit) are very picky when it comes to working with one another. Keep in mind that there are only several working combinations of OS, JDK and Eclipse bitness. If you happen to use an unsupported combination, of Operating System, JDK and Eclipse, you will get the Java Was Started but Returned Exit Code=13 Eclipse error message.
Below we’ve compiled a list of working combinations. Use them for reference to verify whether is issue occurs due to an unsupported combination:
If you have a different setup, uninstall the unsupported component and then install an appropriate one until you are able to open Eclipse without encountering the error message.
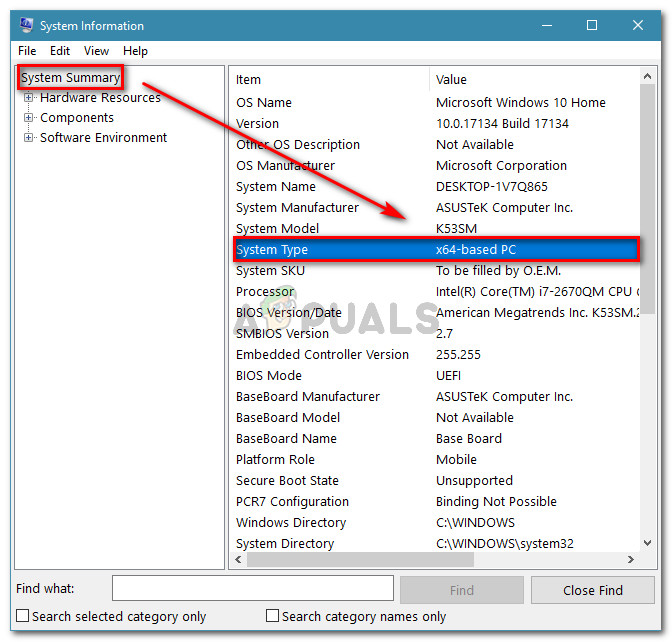
Note: In the event that you don’t know the bit architecture of your operating system, press Windows key + R to open up a Run dialog box. Then, type “msinfo32” and press Enter to open the System Information screen. In the System Information screen, go to System Summary and check up the System Type from the right pane. That’s where you’ll find your OS architecture.
Verifying the system architecture
If this method wasn’t applicable, move down to the next method below.
Method 2: Removing special characters from the Eclipse directory path
You might also be encountering the issue because the installation directory contains special characters. Several users who were in a similar situation have managed to get the issue resolved after eliminating the special characters (@#$%^&*()+) from the directory name.
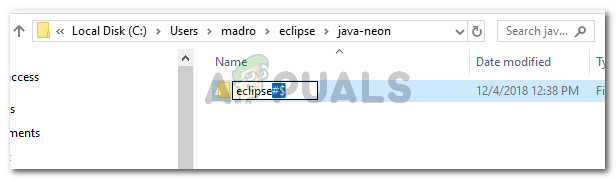
By default, you should be able to find Eclipse in C:\IDE\eclipse or in C:\Users\*YourUsername*\eclipse. However, if you installed in a custom location, you might have mistakenly added a special character that is creating the issue.
You can remedy the issue by navigating to the location of the Eclipse installation manually and removing any special character that might end up creating the error message.
Deleting the special characters from the location of Eclipse
Note: Certain users have reported that they started getting a different error after removing the special characters from the Eclipse installation directory. This is most likely occurring because there are other dependencies that were relying on that particular location and they no longer function properly due to the change. In this case, you can resolve the problem entirely by reinstalling Eclipse.
If this method didn’t allow you to resolve the Java Was Started by Returned Exit Code=13 Eclipse error, move down to the next method below.
Method 3: Removing the broken System PATH variable
As it turns out Java 8 and a few other Java updates have the potential to mess up the environment variables, triggering the Java Was Started but Returned Exit Code=13 Eclipse error message.
If you only started to get this error message after installing Java (or a Java update), follow the steps below to remove the broken System variable PATH:
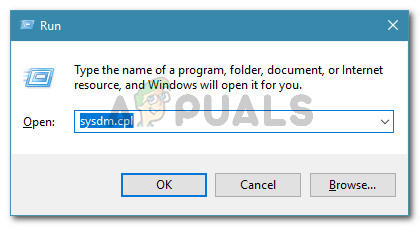
Press Windows key + R to open up a Run dialog box. Then, type “sysdm.cpl” and press Enter to open System Properties.
Run dialog: sysdm.cpl
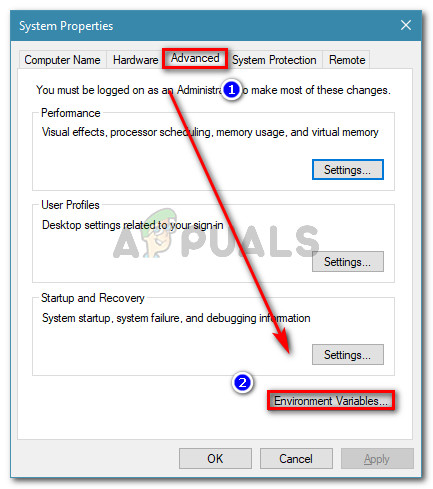
In the System Properties window, go to the Advanced tab and click on Environment Variables.
Go to the Advanced tab in System Properties and click on Environment Variables
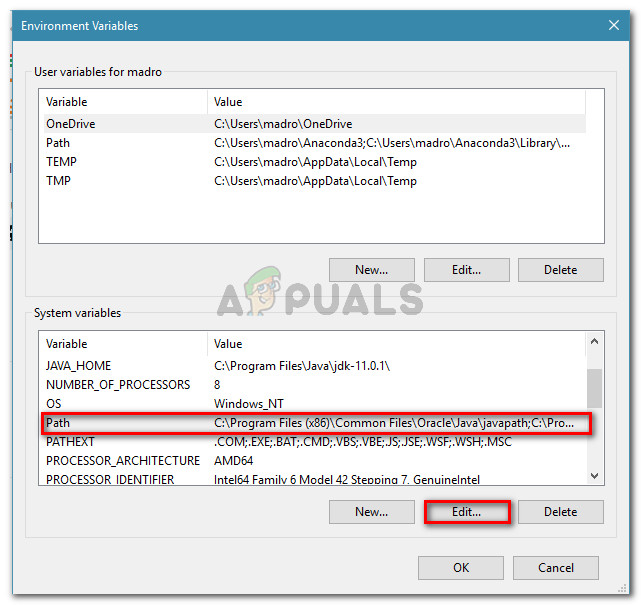
Inside the Environment Variables window, go to System variables, select Path and click on Edit.
Edit the Path variable
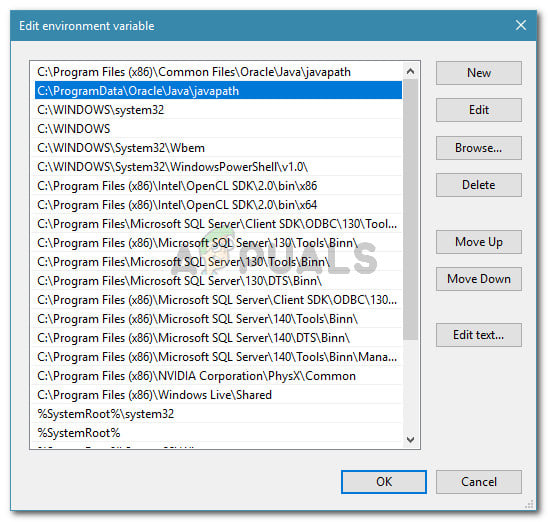
In the Edit environment variable window, look for an environment variable mentioning Java. Once you see it, click on it once to select it and then click Delete.
Deleting the Java PATH environment variable
Restart your computer and see if you are able to start Eclipse at the next startup without encountering the error message.
If you’re still encountering the same error message, move down to the next method below.
Method 4: Reinstalling the JAVA JDK
If you’ve come this far without a result, you can probably resolve the issue by clean installing the latest JAVA JDK version. Several users finding themselves in a similar situation have reported that the Java Was Started but Returned Exit Code=13 Eclipse error was finally resolved after they uninstalled their current JDK and they installed the latest version available.
Here’s a quick guide on how to do this:
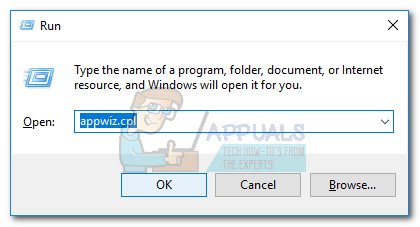
Press Windows key + R to open up a Run dialog box. Then, type “appwiz.cpl” and press Enter to open Programs and Features.
Run dialog: appwiz.cpl
Inside Programs and features, scroll down through the application list and right-click > Uninstall Java Development Kit along with any updates.
Uninstalling Java Development Kit
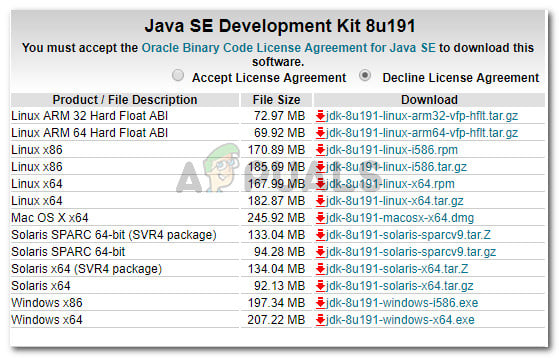
Visit this link (here) and download the latest version of the JDK according to your OS version and bit-architecture.
Installing the latest JDK
Open the installer and complete the installation by following the on-screen prompts. Once the process is complete, restart your computer.
See if the error message has been resolved by opening Eclipse at the next system startup.
Several users report receiving the “Sorry, there was a problem mounting the file” when trying to mount a file on Windows Server 2012 R2, Windows 7, Windows 8.1 or Windows 10. The issue is only reported to occur with the built-in ISO mounter.
Sorry, there was a problem mounting the file.
What is causing the “Sorry, there was a problem mounting the file” error
We investigated this particular issue by looking at various user reports and the repair strategies that they used to get the issue resolved. Based on what we gathered, there are several common scenarios that will trigger this particular error message:
Internet-downloaded ISO file is blocked – This is the most common reason why the error message occurs in the first place. If you downloaded the file over the Internet, a Windows security feature might have blocked it.
The ISO file is already mounted – Another common reason why this error occurs is if the ISO file is already mounted by Windows. Keep in mind that with certain procedures, Windows might mount the ISO automatically as soon as the download completes.
MicroSD card is interfering with the mounting – A couple of affected users have reported that for them the issue was occurring due to a MicroSD memory card that was inserted.
ISO file is not set to Read Only – Keep in mind that the built-in disk imaging utility will have trouble mounting the ISO file if it doesn’t have a read-only flag. Reports suggest that the initial verifications are specifically looking for that.
The disk imaging driver is corrupted – This is known to happen quite often on Windows 7 and Windows 8. Several affected users have managed to repair it to a working state using Registry Editor.
ISO file has the sparse attribute set – This scenario is typically reported to occur on Windows 10 and Windows Server 2012. Several users have managed to resolve the issue by removing the sparse attribute.
If you’re currently struggling to resolve the “Sorry, there was a problem mounting the file” error, this article will provide you with a selection of verified troubleshooting steps. Below you have several methods that other users in a similar situation have used to resolve or circumvent the issue.
For the best results, follow the methods below in order until you encounter a fix that resolves the problem in your particular scenario. Let’s begin.
Method 1: Verifying if the ISO is already mounted
Before trying anything else, it’s important to ensure that the ISO file that is triggering the error is not already mounted. Quite a few of users that were struggling with the “Sorry, there was a problem mounting the file” error discovered that the reason it was not working is that the file was already mounted.
Apparently, with certain ISO files Windows will automatically mount the drive at the end of the procedure. This is known to occur on Windows 8.1. So, with this in mind, open File Explorer and see if the ISO file is already mounted.
Check if the ISO file is already mounted
If it isn’t, move down to the next method below.
Method 2: Making a copy of the ISO and mounting it
The most popular fix for this particular error message is to make a copy of the ISO file and mount it using the same built-in Windows mounter. Several users encountering the same error have reported that the error is no longer occurring with the new ISO copy.
So, in order to circumvent the error message, simply right-click the ISO file that is giving your troubles and choose Copy. Although there is no official explanation why this method was successful for so many people, Windows users speculate that it’s probably because creating a new copy of the ISO file get’s rid of the blocked property that was preventing the ISO from being mounted. Essentially, the sparse flag is avoided when creating a copy of the file.
Copying the ISO file
Next, right-click on an empty space (in a different or the same location) and choose Paste, then wait for the process to finish. Once you have two versions of the same ISO, right-click on the copied version and choose Mount.
Mounting the copied file
The mounting process should complete without the “Sorry, there was a problem mounting the file” error.
If this method didn’t allow you to resolve the error message, move down to the next method below.
Method 3: Unblocking the ISO file
Another way to go around resolving this issue is to unblock the file using File Explorer. Several users encountering the same error message have reported that the error was resolved in their case after they unblocked Internet-downloaded files.
Here’s what you need to do:
Open file Explorer and navigate to the location of the ISO file.
Select the ISO file and press Alt + Enter to open up the Properties menu. You can also right-click on it and choose Properties.
Right-click and choose Properties or select and press Alt + Enter
In the Properties window of the ISO file, go to the General tab and check the Unblock box associated with Security and hit Apply to confirm the changes.
Unblocking the ISO file
Attempt to mount the file again and see if the procedure is successful.
If you’re still seeing the “Sorry, there was a problem mounting the file” error, move down to the next method below.
Method 4: Removing the microSD card
Another verified reason why the “Sorry, there was a problem mounting the file” error occurs is if you have an active microSD card when you’re trying to mount an ISO file. On Windows 7 and Windows 8.1, this is reported to interfere with the mounting procedure, producing the error message.
If this scenario is applicable to your current situation, simply remove the microSD card from your computer and see if the error message is resolved.
If you’re still encountering the same error message when you try to mount the ISO file with the built-in disk imaging utility, move down to the next method below.
Method 5: Setting the ISO file to Read-Only
Some users struggling to resolve the same error message have reported that the issue was resolved entirely on Windows 7 and Windows 8.1 after they modified the properties of the ISO file to specify that it’s Read-only.
Apparently, the built-in disk imaging software will specifically look for this tag whenever it needs to mount the file. If the tag is missing, you might encounter the “Sorry, there was a problem mounting the file” error.
Here’s a quick guide on setting the Read-Only tag to your ISO file:
Navigate to the location of your ISO file, right-click on it and choose Properties. You can also select it and press Alt + Enter to reach the same screen.
Accessing the Properties screen of the ISO file
In the Properties screen of the ISO file, go to the General tab and make sure that the Read-only checkbox (next to Attributes) is checked. Then, click Apply to save the changes.
Enabling the Read-Only tag
Mount the image again and see if you’re still facing the same error message. If you are, move down to the next method below.
Method 6: Repairing the disk-imaging driver with Registry Editor
Several users encountering the same error message have managed to resolve the issue after discovering that the issue was caused by the disk imaging driver (some registry problems related to it). Some affected users were able to resolve the issue by using Registry Editor to repair the integrity of the registry keys.
Note: This guide has only been confirmed to work with Windows 7 and Windows 8.1.
Here’s a quick guide on how to do this:
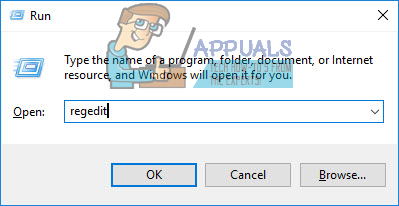
Press Windows key + R to open up a Run dialog box. Then, type “regedit” and press Enter to open Registry Editor. When prompted by the UAC (User Account Control), press Yes to grant admin privileges.
Run dialog: regedit
Let’s start by creating a registry backup just in case things don’t go our way. To do this, in Registry Editor, go to File > Export. Go to File > Export
Next, save your backup somewhere convenable, give it a name and make sure that the Export range is set to All.
Creating a registry backup
Note: In case you ever need to use the backup that we’ve just created, go to File > Import and select the backup file.
Once the backup has been created, use the navigation pane (left pane) to arrive at the following registry subkey:
Once you get there, move over to the right- pane, right-click on UpperFilters and choose Delete.
Deleting the UpperFilters string value
Note: Do not delete the UpperFilters.bak registry.
Right-click on LowerFilters and choose Delete. Deleting the LowerFilters value
Close Registry Editor and restart your computer.
At the next startup, see if the issue has been resolved by attempting to mount the ISO file again with the built-in imaging disk utility.
Method 7: Removing the sparse attribute
If you’ve come this far without a result, it’s very likely that the ISO file is not mounting correctly because it has the sparse attribute set. This is typically reported to occur on Windows Server and Windows 10.
If this scenario is responsible for the “Sorry, there was a problem mounting the file” error, you can fix it by removing the sparse attribute. This can be done by either doing things manually or using a freeware utility. Follow whichever guide seems more convenable to your current situation.
Using Remove Sparse to delete the sparse attribute set
If you decide to go with the route that involves using a GUI, follow the guide below to install and use Remove Sparse:
Visit this link (here) to download Remove Sparse. Then, extract the contents of the .zip file in an accessible folder.
Open the Remove Sparse.reg and click Run at the Security Warning.
Running the .reg file
After clicking Yes at the UAC (User Account Control) prompt, click Yes at the Registry Editor prompt to operate the required changes to the Registry.
Operating the changes to the Registry
Once the operation is complete, simply right-click the ISO file. You should now have the option to Remove Sparse if the ISO file still has the sparse attribute set.
Removing the sparse attribute
Using an elevated Command Prompt to remove the sparse attribute
Another way to go around resolving the problem is to recreate the functionality added by the .reg file above from an elevated Command Prompt. Here’s what you need to do:
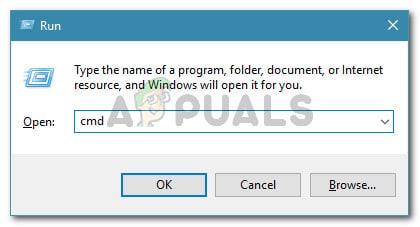
Press Windows key + R to open up a Run dialog box. Then, type “cmd” and press Ctrl + Shift + Enter to open up an elevated Command Prompt with administrative privileges.
Run dialog: cmd
When prompted by the UAC (User Account Control), click Yes to grant administrative privileges.
In the elevated command prompt, type or paste the following command and press Enter (but be careful to replace the placeholders with your own):
Note: Keep in mind that PathToISO is merely a placeholder for the actual location of the ISO file. Replace it with the full location in your particular situation.
If this method didn’t enable you to resolve the “Sorry, there was a problem mounting the file” error, move down to the next method below.
Method 8: Using a 3rd party application
If you’re you are prepared to let go of the disk-imaging utility, you can use a 3rd party disk imaging utility to mount the ISO file. Several users encountering the same error message have managed to circumvent the issue by using an external solution.
Here’s a quick guide on avoiding the error file by mounting the ISO file with Daemon tools:
Visit this link (here) to download the free version of Daemon Tools.
Open the installation executable and follow the on-screen prompts to install a Free license of Daemon Tools.
Installing Daemon tools FREE
When asked if you want to install the Storage controllers, click the Install button.
Installing the Storage Controllers
Once the installation is complete, right-click on the Daemon Tools icon in the taskbar and choose Mount.
Mounting the iso image with Daemon tools
Use the navigation window to navigate to the location of the ISO that you’re trying to mount. Then, select the ISO file and click Open.Open ISO file
The ISO file should be mounted momentarily. This way, you’ll be able to circumvent the “Sorry, there was a problem mounting the file” error.
Discord is a voice, video, and text chat app specifically designed for gaming communities. Since Discord app provides amazing features, its use isn’t limited to gaming communities. Just like any other Windows application, Discord comes with a set of basic features including the auto-start at every login feature as well. This feature is designed to make it easier to use the Discord app and that’s why it is turned on by default. But a lot of people aren’t a fan of the auto-start feature especially because they want more control over their system. So, it’s understandable that many of you are looking for a way to turn off this feature.
There are a couple of ways of turning the auto-start feature of the Discord app. You can turn off the auto-start feature via Discord app’s settings or you can use the Task Manager to disable the Discord from its startup application’s list. Both of these methods are listed below.
Method 1: Turn off Auto Start from Discord
Here are the steps for turning off the auto-start feature from within Discord settings.
Open Discord
Click on the User Settings (gear icon). This should be on the right side of your avatar.
Discord User Settings
Select Windows Settings from the left pane
Toggle offOpen Discord option from the section System Startup Behavior
Turn off Discord Auto-start
This should disable the auto start behavior of the Discord app on Windows.
Method 2: Disable Discord App Auto-Start via Task Manager
Windows provide a way to access the list of applications that are scheduled to run at every startup. You can have a look at this list and disable the auto-start of the Discord app from this list. Follow the steps given below
Press and hold CTRL, SHIFT, and Esc keys simultaneously (CTRL + SHIFT + ESC). This will open the task manager
Click the Startup This should show a list of apps that are scheduled to open at every startup
Locate the Discord app from this list and select it
Click Disable from the bottom right corner
Turn off Discord Auto-start Task Manager
That’s it. This should prevent the Discord app from automatically starting in the future.
Ark: Survival Evolved is an adventure-action survival video game which was released in the late 2017 and has made its way to almost every platform out there ranging from Linux to Windows to Xbox. The game gained immense popularity after its initial release and is hailed one of the best survival games out there.
Ark: Survival Evolved
Despite its success and expansion, users playing Ark on Windows platform reported several issues with the game. According to user reports and experiments done ourselves, we saw that the game kept crashing randomly in between sessions which not only caused the game to crash but also the entire PC.
What causes Ark: Survival Evolved to Crash your PC?
Most of the games crash whenever they face errors or problems when operating. However, if the game is using your resources and they get affected, your PC might crash as well. This is the case with Ark; the game crashes your PC. Here are some of the reasons why this might happen:
Bad hardware: Since games like Ark heavily rely on your hardware to play, they might crash if you have bad hardware such as RAM or PSU.
Mods: If you are running an Ark server, additional mods installed in the application might be one of the causes. Since the game updates every now and then, mods can conflict with the new features.
Bad drivers: Outdated graphics drivers can cause your game not to run and may crash your game and your PC.
Missing/corrupt game files: If the installation files for the game are missing or corrupt, the game may fail to launch or crash upon startup.
Before you move on to the solutions, you need to make sure that you have the minimum system requirements for running the game on your computer. Keep in mind that these are the minimum requirements and do not reflect the optimal requirements needed for the game. The requirements are:
OS: Windows 7 or 8
Processor: 2Ghz Dual-core 64-bit CPU
Graphics: DirectX11 Compatible GPU with 1 GB Video RAM
Hard Drive: 20000 MB available space
DirectX: Version 11
If you do not meet these requirements, you should upgrade your hardware first before proceeding with the solutions listed below.
Solution 1: Verifying Integrity of Game Files
The very first thing to do when troubleshooting problems with games present in Steam is to verify the integrity of Steam game files. There are a number of cases where the game files on your computer might be corrupt or have missing modules. This tool automatically downloads the latest manifest from the website and compares the files on the manifest with the ones on your computer. If there is any difference, the files are replaced.
Open your Steam application and click on Games from the top bar. Now select Ark: Survival Evolved from the left column, right-click it and select Properties.
Once in Properties, click on Local Files category and select Verify Integrity of Game Files.
Verify Integrity of Game Files – Ark Survival
Now, wait until the process is complete. Restart your computer after the verification is complete and launch Ark again. Check if the crashing is resolved.
Solution 2: Rolling back/Updating Graphics drivers
If your game files are complete and not damaged, the culprit of your game crashing might be your graphics drivers. If the graphics drivers are not updated to the latest build available, it may cause issues with the running of the game. However, it should be noted that in some cases, installing the latest drivers caused further problems. Hence you have to try two methods; update your drivers to the latest build and see how it goes or try rolling back your drivers.
Press Windows + R, type “devmgmt.msc” in the dialogue box and press Enter.
Once in the device manager, navigate to Display adapters and expand the category. Right-click on your graphics driver and select Update driver software.
Updating driver software
Select the first option Search automatically for updated driver software. Windows will now check for latest drivers available on Windows Update.
Updating driver through Windows update
If you already have the latest drivers installed on your computer, attempt at uninstalling them (if your game worked perfectly before the latest driver software release).
Manually download the version of the driver which worked for your system from the manufacturer’s website and use DDU to uninstall the driver completely before installing the chosen one.
Solution 3: Removing Mods and Reducing Graphics options
If you are running a server for Ark: Survival Evolved, you should disable the mods used in the game. Mods are a great add-on to the game but may cause problems when frequent updates for the game are released. Their settings clash and the game crashes.
Reducing graphics options – Arc Survival
Also, you should try reducing the graphics options in the game. Reduce the cloud detail, the viewed distance, shadows etc. Try playing on low graphics settings and see if this solves the crash from happening.
Solution 4: Reinstalling and Checking Hardware
If all three solutions don’t work for you, you can try to reinstall the game on your computer. The reinstall is meant to eliminate the possibility of corrupt or broken installation files on your computer. When you reinstall, Steam will automatically load your user data back onto your game.
Launch Steam and navigate to your Games Library. Right-click on Ark: Survival Evolved and select Uninstall.
Reinstalling Ark Survival
Restart your computer after the uninstallation and download the game again from Steam.
If even the reinstallation doesn’t work in your case, you should check your computer hardware for problems. We got several user reports where faulty modules such as RAM and PSU caused the PC to crash whenever Ark started using the hardware resources. If you are experiencing the crashing with other resource consuming applications as well, you should check your hardware independently.
The ‘DCOM got Error 1084’ usually appears if you’ve recently updated your Windows which can be due to corrupt system files or registry errors. DCOM (Distributed Component Object Model) is a Microsoft component that allows COM objects to communicate with each other. The symptoms of this error include computer freezing in which case you are impelled to shut it down or restart. The freezing of circle dots while your system boots also indicate this problem. That, however, at times, can be solved by just waiting it out or with a restart.
The error can also indicate failing hard disk in which case you’ll have to verify your drives using CHKDSK. Some users have reported that they weren’t able to even boot up their Windows because of this error and the only resolution was to repair their Windows.
What causes DCOM got Error 1084?
The DCOM error is usually popped because of –
Corrupt system files. The DCOM error usually points to corrupted OS. If you had a recent Windows update, there’s a possibility that it might’ve messed around with your files due to which the error is occurring.
Due to DCOM got Error 1084, you might face screen flickering, frequent freezes or your Windows won’t boot up. To solve these errors, follow the provided solutions:
Solution 1: Reinstalling Graphics Driver
If you are facing screen flickering, there’s a possibility it is caused by this error. If this is not the case for you, skip to the next solution. Resolving this issue is pretty straightforward. This frequently occurs due to bad graphics driver in which case you’ll have to reinstall them. To do this, follow the instructions:
Go to Start Menu and type in ‘Device Manager’.
Open Device Manager.
There, locate ‘Display Adapters’ and click to expand it.
Right click on your graphics card driver and select ‘Uninstall device’.
Follow the prompted instructions and your driver will be uninstalled.
Reboot your system.
After your system has loaded up again, download the latest graphics driver from your graphics card manufacturer’s website and install it. This will remove the corrupted files and your screen won’t flicker anymore.
Solution 2: Running SFC and DISM
Utilizing Windows built-in utilities is important while resolving certain issues. Like we mentioned earlier, the DCOM error indicates corrupt OS most of the time, therefore, System File Checker and Deployment Image Servicing and Management can potentially find and repair the corrupted files on your system.
Follow the SFC and DISM articles already published on our site in detail to learn how to run SFC and DISM.
Solution 3: Running Safe Mode
Sometimes, the third-party software installed on your system can be the one causing the issue. To verify this, you’ll have to start your system in Safe mode. Safe mode allows you to boot up your system with the minimal services required for boot-up so that you can investigate if a third-party software is causing the issue. To boot up your PC in Safe mode, do the following:
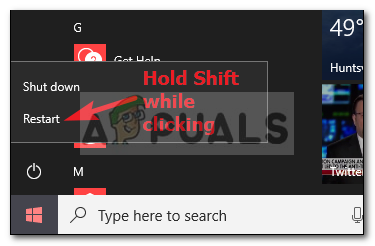
Go to the Start Menu.
Click on the Power button and while holding Shift, click Restart.
Click Restart while holding shift
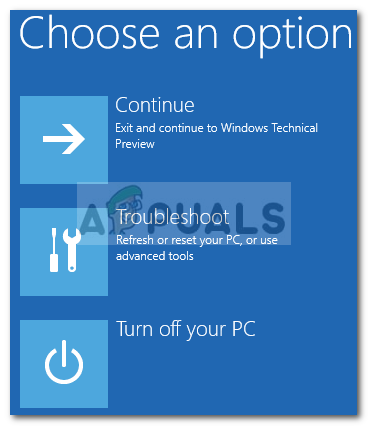
When your system boots up you will be shown a blue screen with a list of options. Select ‘Troubleshoot’.
Select Troubleshoot
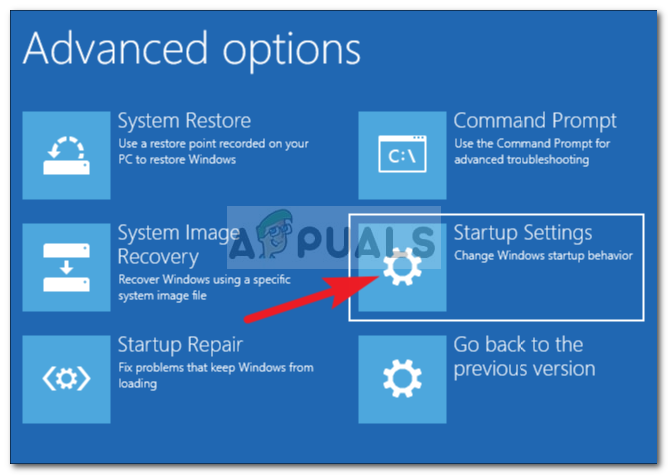
There, select ‘Advanced Options’.
Inside Advanced options, click on ‘Startup Settings’.
Click Startup Settings
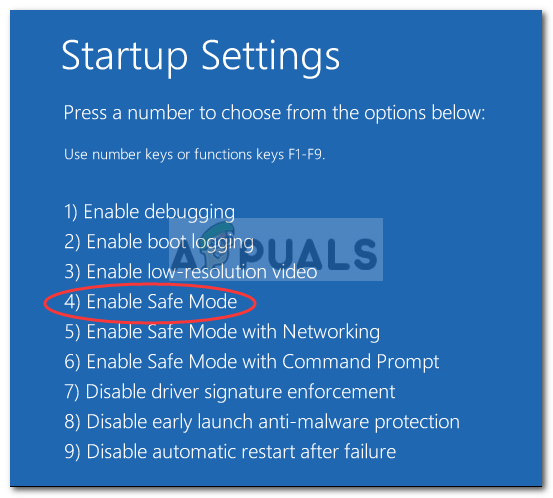
You’ll be shown a list, press F4 to boot your system in Safe Boot mode.
Press F4 for Safe Mode
If your system runs fine in safe boot mode, this means a third-party software is interfering with your system which causes the error, thus, you’ll have to uninstall the software that you had installed before the error popped up.
Solution 4: Restoring your System
If you failed to find the third-party software that is responsible for the error, perhaps you should try restoring your system. System Restore allows you to restore your PC to a point where certain apps weren’t installed. By doing this, you might just solve your error.
We’ve already written an article on how to restore your system to a certain point – so please refer to this article where you’ll learn how to restore your system quite thoroughly.
Solution 5: Repair your Windows
Some users have reported that when this error occurred to them and they couldn’t even boot up their windows as a result, repairing their Windows solved their problem. You can repair your Windows without having to lose your personal files. Here’s how to do it:
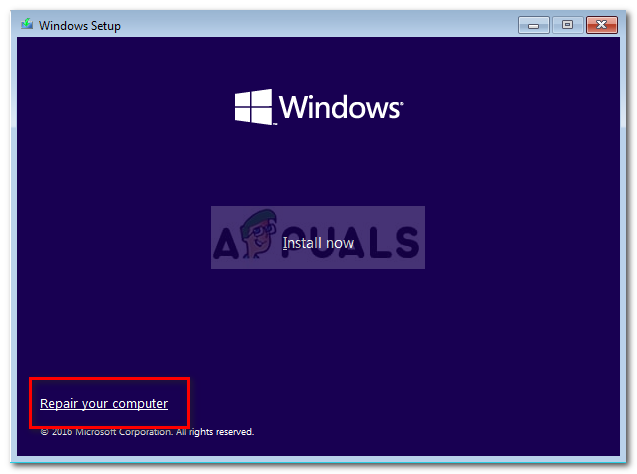
Insert a Windows Setup DVD or bootable USB.
When prompted ‘Install Windows’ option, select ‘Repair your computer’.
Select ‘Repair my computer’
Follow through the instructions and see if it solves your problem.
Several Office users report getting the “Microsoft is waiting for another application to complete an OLE action” error when trying to run a VBA script or when trying to run Excel from a BI launch pad. The issue is reported to occur on all the recent Windows versions including Windows 7, Windows 8.1 and Windows 10)
Microsoft Excel is waiting for another application to complete an OLE action
What is an OLE action?
An Object Linking & Embedding (OLE) action is essentially a mechanism designed to help various Office applications (Word, Excel, Powerpoint, Sharepoint) to communicate with other applications in order to complete an operation successfully.
What is causing the ‘Microsoft Excel is waiting for another application to complete an OLE action’ error?
We investigated this particular issue by looking at various user reports and looking at the official Microsoft documentation. We even managed to replicate the issue on one of our testing machines.
If Excel issues a communication request to another application (let’s say Word), it does it using the OLE object and then waits for the response from the application. If the response does not arrive in the default time threshold, Excel will trigger the following warning to the end user: ‘Microsoft Excel is waiting for another application to complete an OLE action’
Although the error message is always the same, there is actually a couple of fairly common scenario that will trigger this particular error in Microsoft Excel:
DDE Protocol is disabled from Excel – This issue might be occurring because the Dynamic Data Exchange (DDE) protocol is disabled from Excel’s settings.
Corrupted Office installation – Some affected users have reported that the issue was resolved after they reinstalled or repaired the entire Office installation.
Adobe Acrobat PDFMaker add-in is conflicting with Excel – There have been multiple reports of users that have been able to resolve the issue by disabling or uninstalling the PDFMaker plugin.
IE (Internet Explorer) process is interfering with the DDE – This is typically reported to occur when the user tries to save a file in Microsoft Excel. In this case, the solution is to close the process manually.
If you’re currently struggling to resolve this particular error message, this article will provide you with a selection of troubleshooting steps. Below you have a selection of methods that other users in a similar situation have successfully used to get the issue resolved.
For the best results, follow the methods below in order until you encounter a fix that is effective in getting the issue resolved. Let’s begin
Some users have managed to resolve the error message by uninstalling the Adobe Acrobat PDF Maker add-in. As it turns out, this plugin has the potential to conflict with certain versions of Microsoft Excel.
Here’s a list with Office versions that are compatible with PDF Maker:
Office 2010 (Office 14) 32 bit and 64 bit
Office 2013 (Office 15) 32 bit and 64 bit
Office 2016 (Office 16) 32 bit and 64 bit
Note: You can consult Adobe’s full compatibility guide (here).
If this scenario is applicable and you don’t rely on PDF Maker that heavily, you can most likely resolve the issue by either disabling or uninstalling the Adobe Acrobat PDFMaker add-in.
Here’s a quick guide on how to do this:
Update: You can also use the this Fix-it (here) to automatically disable the PDFMaker add-in automatically. It’s compatible with every recent Windows version including Windows 10, Windows 8.1, Windows 7 and Windows Vista.
Open Microsoft Excel and click on File using the ribbon bar.
Open Microsoft Excel and go to File
From the File menu, click on Options (at the bottom of the menu list).
Go to File > Options
In the Excel Options menu, click on Add-ins using the left-hand side menu. Next, move over to the right-hand pane, expand the drop-down menu associated with Manage and choose COM Add-ins. Then, click the Go… button to launch the Com Add-ins menu.
Go to Add-ins, choose COM Add-ins from the drop-down menu and click Go
In the COM Add-ins box, either uncheck the box associated with Acrobat PDFMaker Office COM Addin or select it and click Remove to delete it completely.
Restart your computer and recreate the steps that were previously producing the error once the next startup is complete.
If you’re still encountering the ‘Microsoft Excel is waiting for another application to complete an OLE action’ error, move down to the next method below.
Method 2: Allowing applications that use DDE in Excel’s settings
As a lot of users have reported, the issue might occur if Microsoft Excel is set up to ignore any applications that try to communicate with Excel using the Dynamic Data Exchange (DDE) protocol.
For example, say you double-click on an Excel workbook in Windows Explorer – as soon as the command registers, a dynamic data exchange (DDE) is sent to Excel. That exchange will instruct Excel to open the workbook that you’ve just double-clicked.
If Excel is set up to ignore applications that use the Dynamic Data Exchange protocol, the exchange will not happen and you will see the ‘Microsoft Excel is waiting for another application to complete an OLE action’ error message instead.
Luckily, you can easily rectify this issue by accessing the Options menu of Excel and enabling the DDE protocol. Here’s a quick guide on how to do this:
Open Microsoft Excel and click on File. It doesn’t matter if you open a new workbook or a new document.
Open Microsoft Excel and go to File
In the File menu, click on Options from the left-pane.
Go to File > Options
In the Excel Options menu, click on the Advanced tab from the left-hand menu. Then, move over to the right pane and scroll down until you reach the General section. Once you get there, make sure that the box associated with Ignore other applications that use Dynamic Data Exchange (DDE) is unchecked.
Enabling the DDE protocol in Excel
Click Ok to save the changes, then restart Microsoft Excel. Then, repeat the operation that was previously causing the “Microsoft is waiting for another application to complete an OLE action” error and see if the issue is still occurring.
If you’re still encountering the same error message, move over to the next method below.
Method 3: Killing the Internet Explorer (IE) process
Several users seeing the “Microsoft is waiting for another application to complete an OLE action” error when trying to save the file, you might be seeing the error because of an IE process is interfering with the Dynamic Data Exchange (DDE) exchange.
Users in a similar situation have reported that the issue was resolved after they killed the IE process manually. Here’s a quick guide on how to do this:
Press Ctrl + Shift + Esc to open Task Manager.
Inside Task Manager, go to the Processes tab and see if you have any process belonging to Internet Explorer that is currently active.
If you see one open, simply right-click on it and choose End task to close it.
Closing the Internet Explorer (IE) process
Return to Excel and see if the “Microsoft is waiting for another application to complete an OLE action” error is still occurring when you’re trying to save the file.
If you’re still encountering the same error, move down to the next method below.
Method 4: Suppressing the Excel Application Messaging
If you’re seeing the error message when trying to run a VBA script, one workaround would be to suppress the application messaging by using a tiny piece of code.
But keep in mind that this will not treat the issue itself – It’s only a workaround that prevents the error message from appearing. However, it will be helpful if your only goal is to prevent the error message from appearing.
Here’s a quick guide on inserting a VBA code to excel Workbook that will suppress the excel application messaging:
Open your workbook in Excel and press Alt + F11 to open the Visual Basic Editor (VBE).
In the Project bar (left-hand side), right-click on ThisWorkbook and choose Insert > Module.
Right-click on ThisWorkbook and choose Insert > Module
In the newly created module, paste the following code (in the right section of the screen):
Private Declare Function CoRegisterMessageFilter Lib "ole32" (ByVal IFilterIn As Long, ByRef PreviousFilter) As Long

Public Sub KillMessageFilter()

   Dim IMsgFilter As Long

   CoRegisterMessageFilter 0&, IMsgFilter

End Sub

Public Sub RestoreMessageFilter()

   Dim IMsgFilter As Long

   CoRegisterMessageFilter IMsgFilter, IMsgFilter

End Sub
Update: Other users have reported that they managed to prevent the error prompt from appearing by using the following VBA code:
Sub CreateXYZ()

      Dim wdApp As Object

    Dim wd As Object

         On Error Resume Next

    Set wdApp = GetObject(, "Word.Application")

    If Err.Number <> 0 Then

        Set wdApp = CreateObject("Word.Application")

    End If

    On Error GoTo 0

    Set wd = wdApp.Documents.Open(ThisWorkbook.Path & Application.PathSeparator & "XYZ template.docm")

    wdApp.Visible = True

    Range("A1:B10").CopyPicture xlScreen

    wd.Range.Paste

End Sub
Press Ctrl + S and click No when you see the “The following features cannot be saved in macro-free workbook” warning.
Click No at the warning prompt
Then, choose a suitable location for the modified workbook set a proper name and make sure that the Save as type is set to Excel Macro-Enabled Workbook. Once everything is in order, click on Save to create the Excel Macro-Enabled Workbook.
Creating an Excel Macro-Enabled Workbook
Press Alt + Q to close the editor and go back to your workbook. Once you’re back in your editor press Alt + F8, select the Macro that you’ve just created and click Run.
Once this procedure is complete, you should no longer see the ‘Microsoft Excel is waiting for another application to complete an OLE action’ error with this WorkBook (even though it might still occur in the background).
Some users have managed to resolve the issue after discovering that the Excel executable was running in Compatibility mode. This can happen due to manual user intervention or a 3rd party application.
If you suspect that Excel is running in compatibility mode, disable it and see if the ‘Microsoft Excel is waiting for another application to complete an OLE action’ error stops appearing. Typically, the error is reported to occur if the Excel executable is configured to run in Compatibility mode with Windows Vista and older.
Here’s a quick guide on disabling Compatibility Mode:
Right-click the Excel executable (or the shortcut) and choose Properties.
Right-click on the Excel executable and choose Properties
In the Properties window, go to the Compatibility tab and uncheck the box associated with Run this program in compatibility mode.
Uncheck Run this program in compatibility mode
Windows 10, Microsoft’s latest and greatest, is one of the most popular, if not the most popular, operating system today. However, it is also very expensive. If you already have obtained Windows 10 one way or another, we couldn’t blame you if you wanted to save some money on your new computer by transferring your Windows 10 license from your old one.
Fortunately, Microsoft does allow this, even for people who took advantage of the “free upgrade” from Windows 7 or 8 and got Windows 10. There are some limitations, however, so before we get into how you would transfer the license, let’s talk about those, and see what issues you might run into.
Differentiating the license types
For people who upgraded an OEM or retail version, Windows 10 carries over the same type of licensing. If you upgrade from an OEM version, Windows 10 will also have the rights of an OEM version, and the same applies for retail, too – upgrading from a retail version carries over retail rights.
With the full retail version, you have transfer rights to another computer, and you don’t require a previous qualifying version of Windows. The upgrade retail version is cheaper but requires that you have a previous, qualifying version of Windows installed. Note that a full retail version lets you transfer it as many times as you want, while an upgrade retail version is entitled to only a one-time transfer.
With an OEM license, there are a few differences from the full retail version. To begin with, you don’t have any free Microsoft direct support. The license is tied to the first computer you install it and activate it on, and you can’t use an OEM version if you want to directly upgrade from an older version of Windows. Last but not least, you could upgrade all your hardware, except for a different model motherboard. If you do change the motherboard, this invalidates the upgrade license, since it doesn’t have a base qualifying license anymore.
So, how would you go about transferring the license?
There are two ways to go about this. One of them is to remove the license from your computer and then transfer it to the new one. The second one is to tie it to your Microsoft account, instead of the hardware on your computer. Which one you go for is completely up to you, but we’ll take a look at both below.
Method 1: Remove the license from your system, and re-activate it on the new one
In order to move your license, you can’t have it in use on another system. Since Windows 10 doesn’t have a deactivation option, you’re stuck with either uninstalling the product key or formatting your computer. Uninstalling the key is as close to deactivating as you’ll get. It doesn’t tell Microsoft’s activation servers that the license is no longer in use, but in case they do check later down the road, they won’t find it in use on more than one system. Formatting will ensure that the license isn’t in use on the computer, and you could use Microsoft’s Reset option that’s built-in Windows 10. The steps below apply if you want to uninstall the key.
On your old computer, press the Windows key and X, then choose Command Prompt (Admin) from the list that pops up.
Type in “slmgr.vbs /upk”, and press Enter to execute the command. This uninstalls the product key, and you can use it elsewhere.
Admin CMD command
Start installing Windows 10 on your new computer. When prompted to enter the product key, choose I don’t have a product key if you have upgraded. If you have bought your Windows 10 as a full retail version, you can enter the key.
Choose your edition. If you’ve upgraded from Windows 7 Starter, Home Basic, Home Premium or Windows 8.1 Core, you should choose Windows 10 Home. If you’ve upgraded from Windows 7 Professional or Ultimate, or Windows 8.1 Pro, choose Windows 10 Pro.
You might be prompted to enter the product key again – do the same thing as earlier. Choose to Do this later if you’ve upgraded, or enter the key if you have a full retail version of Windows 10.
Once you’re done installing and are at the desktop, it’s time to enter your key. Ever since last year’s November Update, people who upgraded can simply enter their Windows 7 or Windows 8 key. There are two ways to do this:
Click Start, then Settings, and go to Update & security and then You’ll see Change the product key. Enter the key here, and click Next to activate it. Or, open the administrator command prompt as described in step 1, and enter “slmgr.vbs /ipk”, followed by your product key in this format “xxxxx-xxxxx-xxxxx-xxxxx-xxxxx”, then press Enter to execute. This method should be used if you’re having issues with the Settings.
Since the license was used on another computer previously, you’ll want to reactivate it by contacting support. Press Windows key and R, type in slui.exe 4, and press Enter or click OK.
Activation wizard country selection
You should see the activation wizard here, so choose your country and click Once you’re at the activation screen, call thenumber, or launch Contact Support. You’ll need to explain the situation to Microsoft’s Answer Tech, and they’ll need the installation ID on the screen. They’ll then verify the product key and give you a confirmation ID for reactivating.
Click on Enter confirmation ID and enter the ID. This should be it, and the license should be transferred without issue.
Method 2: Associate your license with your account instead of the hardware
This method comes from Microsoft themselves and is what they advise you do if you’ll be making significant hardware changes. Since the license is tied to your hardware, changing it will make it invalid. But if you tie it to your account, you can use it again by signing in with the same account afterward. The steps to be followed are the ones below.
To begin with, on your old machine, click Start, go to Settings, Update & security and then You should have Windows 10 activated already. If you don’t, make sure you complete the activation process.
From within the same window, check if you find “Windows is activated with a digital license linked to your Microsoft account”. If this is the case, you can skip steps 3 and 4.
Windows is digitally linked
Go to Settings, Accounts and Your Info. You should see Administrator under your name. Check if that administrator account is your Microsoft account by checking whether you have an email address above Administrator. If you have it, you’re good to go.
Once you’ve confirmed this, you can go back to the Activation window, choose Add an account and then sign in with your Microsoft account.
Follow steps 3 through 5 of the previous method to get past the installation of Windows 10 on your new computer.
You should get issues with activation, so you’ll need to run the Activation troubleshooter. From the Activation window, choose You will get a message saying “Windows can’t be activated on your device”, so choose “I have changed hardware on this device recently”, and click Next.
Enter the email and password of your Microsoft account and click Sign in. You should get a list of devices linked to your Microsoft account, including the computer where you previously used Windows 10. Choose that one by selecting it, then the checkbox where it says This is the device I’m using right now.
Click Activate, and you should be good to go.
What to do if this doesn’t work?
There are a few reasons why this might not work. For example, you could be choosing a different edition of Windows than what’s linked to your digital account, or the type of device might not match. You might have reached the limit regarding how many times you can reactivate Windows 10. We mentioned all of these things earlier, so you might want to go back and check them, as this might be a potential issue. Solve them, and you should be up and running again.
Some users are prevented from viewing certain web pages in Chrome. The error that comes up is ‘You Don’t have Authorization to View this Page’. As it turns out, the issue is not website or IP-specific because the same users report that the web content is accessible from a different browser and works without issues.
Access to ‘website’ was denied You don’t have authorization to view this page HTTP Error 403
Here’s another variation of the error that affected users are seeing:
You are not authorized to view this page You do not have permission to view this directory or page using the credentials you supplied
What is causing the ‘You are not authorized to view this page’ error?
We investigated this particular error by looking at various user reports and the repair strategies that they advertised as being successful in resolving the issue. Based on what we gathered, there are several scenarios that will trigger this specific error message in Chrome:
Expired or cached browser cookie – This is about the only reason why this error occurs. It typically occurs with poorly maintained websites.
Google Drive download was interrupted – This issue is also encountered with Google Drive right after a download is suddenly interrupted by an unexpected shutdown.
If you’re currently struggling to resolve this particular error message, this article will provide you with a couple of troubleshooting steps specific to this issue. Below you have two methods that other users in a similar situation have used to get the issue resolved.
For the best results, follow the methods in the order that they are presented until you encounter a fix that successfully resolves the issue for you.
Method 1: Open the page in Incognito Mode
Several users encountering the same issue have managed to circumvent the ‘You Don’t have Authorization to View this Page’ by opening the web page in Incognito mode.
This is more of a workaround than a proper fix, but it will allow to visit the page without receiving the error if you’re in a rush of time.
To open the webpage in Incognito Mode, open Google Chrome, click the action button (three-dot icon) and choose New Incognitowindow.
Click the action button and select New Incognito window
In the new Incognito window, type or paste the web address that was giving you troubles and see if you’re still getting the error message.
If this method wasn’t successful or you’re looking for a more permanent fix, move down to the next method below.
Method 2: Clearing the cookies of your Chrome browser
Other users encountering this issue have resolved the issue by clearing the cookies on Google Chrome and restarting the browser. Based on their reports, the issue was no longer occurring once they cleared the browsing data.
Here’s a quick guide on clearing the Chookies on Chrome:
Open Google Chrome, click the action button (three-dot icon) and then click on Settings.
Click the action button and go to Settings
In the Settings menu, click on the Advanced drop-down menu. Then, scroll down to the Privacy and security tab and click on Clear browsing data.
Under Privacy and security, click on Clear browsing data
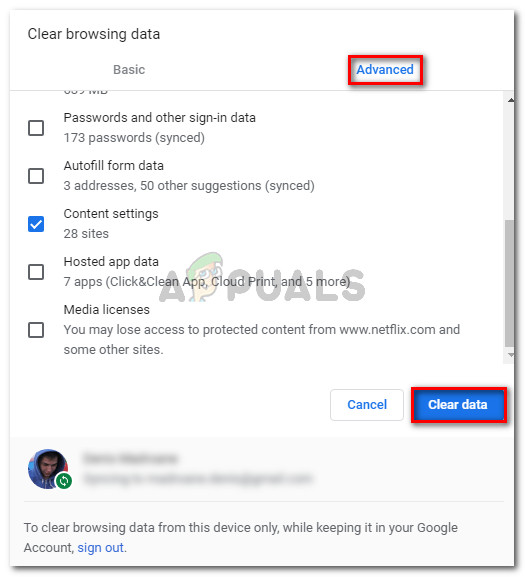
In the Clear browsing data menu, select the Advanced tab and set the Time range to All time. Then, check the boxes associated with Cookies and other site data, Cached images and files and Content settings. Once the settings are in order, press the Clear Data button.
Deleting cookies and other types of browsing data
Restart Chrome and re-open the website that was previously triggering the You Don’t have Authorization to View this Page error.
Discord is a pretty popular VOIP app, especially in the gaming communities. It allows users to do voice/video/text chats with other people. But Discord users are experiencing some problems with the Discord app. It seems like Discord app isn’t getting connected for a lot of users. Majority of the users are seeing the initial connecting screen forever and they never get past that screen. This obviously prevents them from using the app despite having a working internet connection.
Discord not connecting
What causes the Discord app to get stuck at the connecting screen?
There are a few things that can prevent Discord from connecting. Here is a list of the things that can cause be behind this issue.
Antivirus Application: Antivirus applications are known to cause issues with internet connectivity. Since antivirus applications try to protect you by blocking the connections, it’s not uncommon for these applications to flag a perfectly fine connection and, therefore, block the connection of a legitimate app. This might be happening with the Discord users.
Proxy Server: This issue can also be caused by the use of a proxy server. If you are (were) using a proxy server or your network is configured to use a proxy server then that might be causing this issue.
Method 1: Turn off Browsing Protection
A lot of antivirus applications comes with a feature named browsing protection and this feature can cause issues with the Discord. If you are using the F-Secure Safe, then the issue is highly likely related to the F-Secure Safe since it is known to cause this issue. Follow the steps given below and disable the Browsing Protection feature of F-Secure Safe
Open the F-Secure Safe
Click Browsing Protection from the bottom
F-Secure Safe Browsing Protection
Toggle off the Browsing Protection from the top right corner
Click Ok
Turn off F-Secure Safe Browsing Protection
This should fix the issue.
Note: If you are using some other antivirus application then try to turn off its browsing protection feature as well. Almost every antivirus application these days have this feature. Even if your antivirus application doesn’t have this feature, try to disable the antivirus application for a while to see if it is interfering with the connection. If the issue gets resolved after disabling the antivirus then either keep the program disabled or install another one.
Method 2: Change the Network Settings
Since the issue is with the internet connectivity, there’s a very high chance that it is caused by your internet or proxy settings. Changing the internet settings to not use the proxy servers has fixed the issue for a considerable amount of users. So we will try that now.
Hold Windows key and press I
Click Network & Internet
Windows Network Settings
Select Proxy from the left pane
Scroll down and toggle off the option Use a proxy server
Turn off Proxy Server
That’s it. This should rectify the issue.
Method 3: Update Discord
Discord gets updates on a pretty regular basis so it might just be the previous update that introduced this bug in the application. This should be the case if you started experiencing the issue after an update. If the methods mentioned above didn’t solve the issue then, unfortunately, there isn’t anything that we can do. These type of bugs are usually fixed in the next update so the best thing that you can do is to just wait for the Discord update. You don’t have to do anything though, the Discord app will automatically get the update. So just try to open the Discord every now and then to see if the issue is resolved.
The error 0xc190020e appears when you are downloading an update but don’t have the required space to install the contents of the update. The space required depends on the size of the update. Microsoft pushes out updates for Windows often which requires quite the space if you belong to the faction who updates their system the moment they hear about it. Nevertheless, updates are of paramount importance and you should update your system if the update contains a fix to a critical system flaw which they usually do – so don’t give up on updating your system.
The error, however, is not that critical and can be dealt with pretty easily. Intrinsically, you’ll just have to clear out some space for the update on your System drive, albeit, messing around or removing system files without having a proper idea about it should be avoided as it can cause critical issues and you might have to reinstall Windows.
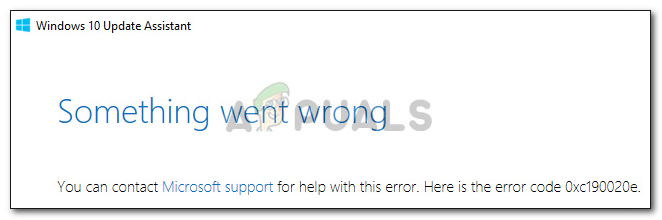
Update Assistant Error 0xc190020e
What causes the error 0xc190020e on Windows 10?
This error is not that big of a deal and is caused by —
Insufficient space. The error will pop up whenever you are trying to install an update for which you don’t have the required amount of free space.
You can follow the below-mentioned solutions to free up some space.
Solution 1: Increase Disk Space Usage
First and foremost, let us start off with checking how much space is available to us on the system drive. We’ll have to allocate more disk space usage for system protection. Here’s how to do it:
Go to your Desktop, right-click on ‘This PC’ and select Properties.
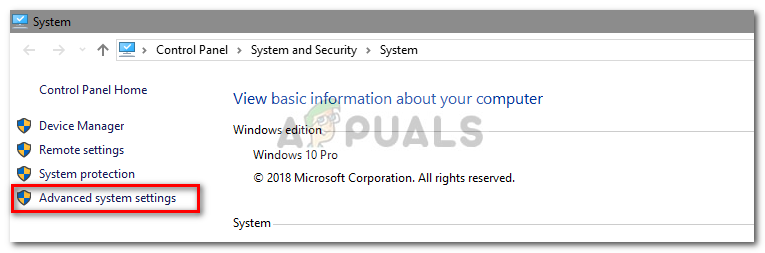
There, on the left-hand side, select ‘Advanced system settings’.
Click Advanced system settings
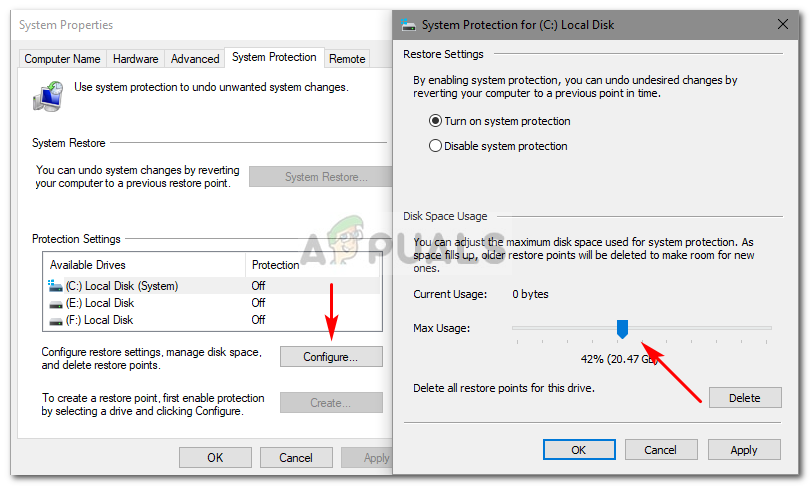
Navigate to the System Protection tab, and select your System volume.
Under Disk Space Usage, move the slider to increase the amount of space allocated to System Protection i.e System Restore.
Allocate More Space
Solution 2: Deleting $Windows.~BT
$Windows.~BT is a temporary folder that is created when you are updating your system with the responsibility of storing update logs, and the files required while updating your system. This folder is, by default, hidden so you won’t be able to see it. However, you can access it by typing in the path of the folder in Run. Here’s how to empty the folder:
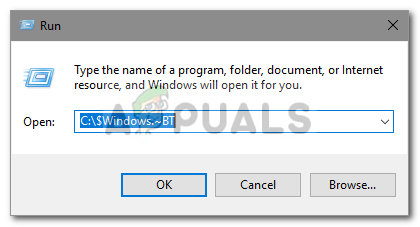
Press Winkey + R to open Run.
When Run loads up, type in the following path:
Enter the path
C:\$Windows.~BT
Change C if your system drive is different.
Once you’ve accessed the folder, empty the contents inside and try updating your system again.
Solution 3: Using Disk Cleanup
Disk Cleanup is a built-in utility that allows users to free up some space on their hard drive. What happens is, the utility first scans the hard drive for files that are no longer needed and then clears them up. To run Disk Cleanup, do the following:
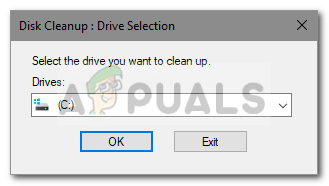
Go to Start Menu and type in Disk Cleanup.
Open up Disk Cleanup and choose your system drive.
Choose System Drive
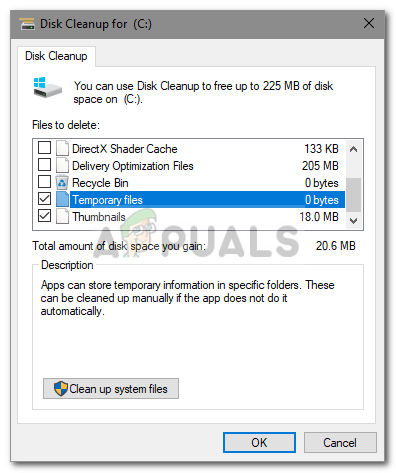
Select ‘Temporary Files‘ from the list.
Select OK
Click OK to start the utility.
Solution 4: Uninstalling Apps
Another way of freeing up some space on your system drive is to uninstall the apps that you previously installed and are no longer put to use. Here’s how to do it:
Go to Start Menu, type in Control Panel and open it up.
Under Programs, click ‘Uninstall a program’.
Locate Uninstall Programs in Control Panel
Go through the list of installed apps and double click on the apps you no longer use to free up some space.
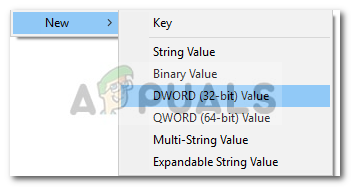
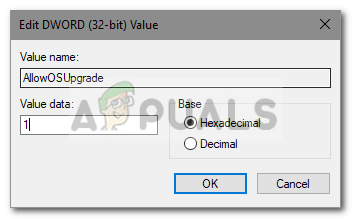
Solution 5: Adding New Entry in Windows Registry
Lastly, there’s one more thing you can do to install the update and that is to grant special permission to the update in your Windows registry. Here’s how to modify the registry:
Press Winkey + R to open Run.
Type in ‘regedit’.
Once the Windows Registry loads, paste the following path in the address bar:
Paste the Path in Registry Editor
This error was first spotted after a recent Windows 10 update and it’s related to the Trusted Platform Module. The error message appears in two different places. The first one is visible after navigating to Settings >> Update & Security >> Windows Security >> Device Security >> Security Processor >> Security Processor details.
Reset your security processor to fix functionality issues
The other place where you can find the error is in Windows Defender as a yellow warning triangle displaying that there is an error with the Security processor with the “Reset your security processor to fix functionality issues” text. Follow the solutions we have prepared in order to resolve the problem on your computer.
What Causes the “Reset your security processor to fix functionality issues” Error?
The list of things which cause this error is not so long and the problem is usually solved according to this list. The error message is not so self-explanatory so we recommend you double check the list below for the error:
An update for Windows Defender is available
Virtualization should be disabled in BIOS
Something is wrong with TMP and its settings should be cleared or you should take ownership of it
Solution 1: Install the Update for Windows Defender
This is often just a weird way of Windows Defender notifying you that there is an update available and that you should install it as soon as possible. Windows Defender updates are released like Windows Updates and they are often installed automatically. If that has changed for any reason, you can install it manually by following the steps below:
Visit the Microsoft support site in order to find out which is the latest released update for your version of Windows Defender. It should be located at the top of the list at the left part of the site with the current Windows 10 version at the top. Look for the update for Windows Defender.
Windows 10 Update History Section on Microsoft’s Website
Copy the KB (Knowledge Base) number together with “KB” letters as well (e.g. KB4040724) next to the latest released update for Windows Defender.
Open the Microsoft Update Catalog and perform a search by pasting the Knowledge Base number you copied and by clicking on the search button at the top right corner.
Searching for the latest update in Microsoft Update Catalog
Click on the Download button to the left and choose the correct architecture of your PC (32bit or 64bit). Make sure you know the architecture of your PC’s processor before choosing this option.
Run the file you downloaded and follow the instructions on the screen carefully in order to complete the updating process.
After the update has finished, make sure you restart your computer and the update will be installed on your computer. The problem shouldn’t occur anymore and you can check it either in Settings or by visiting Windows Defender.
Solution 2: Disable Virtualization in BIOS and Reset TMP Settings
CPU virtualization is a feature which allows a single processor to simulate multiple CPUs and efficiently use the CPU power. Sometimes this option can trigger problems with your system in general and plenty of users have reported that they have stopped seeing the error message at hand after disabling CPU virtualization in BIOS.
Another thing you can try while still in the BIOS environment is to try and reset the TMP settings from within BIOS to see if certain settings have malfunctioned. This has also helped plenty of users online.
Why don’t you try as well?
Restart your computer by going to the Start Menu >> Power Button >> Restart.
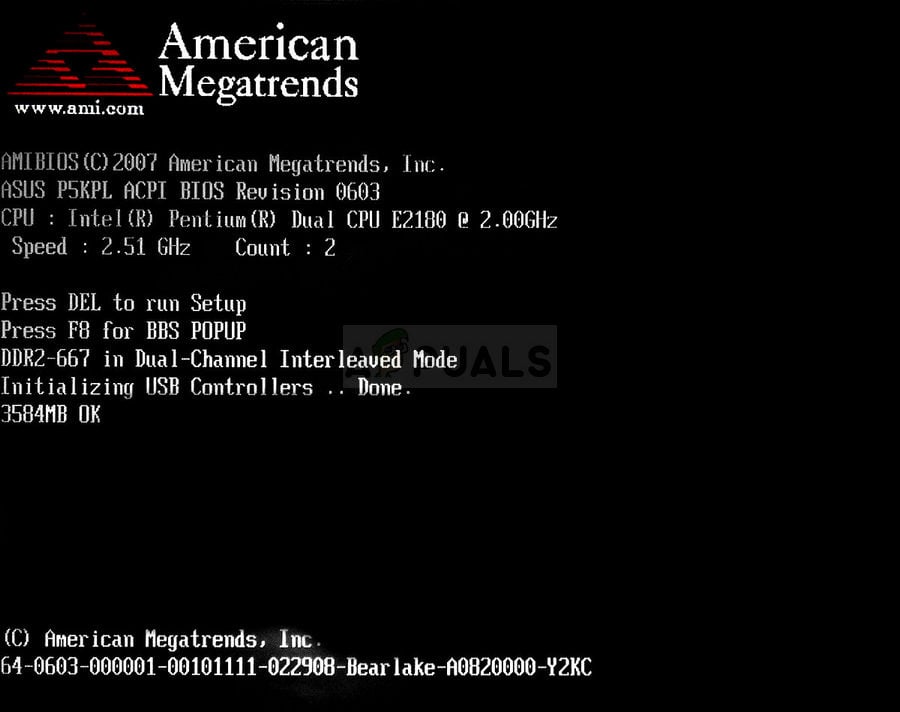
Try to enter BIOS settings on your computer by pressing the BIOS setup key while the system boots.
The BIOS key is typically displayed on the boot screen, saying “Press ___ to enter Setup.” There are other ways in which you may see the message but it will be quite self-explanatory. Common BIOS keys are F1, F2, Del, Esc, and F10 so make sure you click it fast enough or you will have to restart your computer again.
Entering BIOS on startup
The CPU Virtualization option which you will need to change is located under various tabs in the BIOS tools on different computers made by different manufacturers and there is no rule to where the setting should be located. Even the name differs and you can expect to see Virtualization Technology, AMD-V or similar.
It’s usually located under the Advanced tab or various Tweaker or Overclock tabs which may be available. No matter where it is, the name of the option is as mentioned above.
Once you locate the correct option, change it to Disabled or Off.
Locating the CPU Virtualization option in BIOS and setting it to Disabled
The second option you should tweak is called TMP (Trusted Platform Module). This option is also located in different places under various configurations but it’s often in the System Configuration tab.
Wherever you locate this option after browsing for a while, you should select it, scroll, and select the option to restore TMP to default settings. If you notice that TMP is turned off, you should Enable it as well.
Disabling TPM from BIOS
Navigate to the Exit section and choose to Exit Saving Changes. This will proceed with the boot. Make sure you check if the problem still appears on your computer.
Solution 3: Clear TPM or Claim Ownership
If you don’t actually use this module, then this is the right solution for you. Clearing the TMP from the Windows Defender Security Center is probably one of the easiest ways to resolve the problem and this has actually helped people who stopped receiving the error message.
Right-click on the shield icon on your taskbar and click on Open. If you don’t see the icon, you can open the Settings app by clicking the Start menu button and clicking the gear icon just above the Start menu button.
Click to select the Update & Security section and navigate to the Windows Security tab. From the top of the window, click the Open Windows Defender Security Center button.
Opening the Windows Defender Security Center from Settings
When Windows Defender Security Center opens, click on the Device security laptop icon from the main screen.
After the window switches to Device security, click on Security processor details under the Security processor section and you should see your error message.
Security processor details
There should be a Get started button below the Status screen and you should click on it immediately. Click the Clear TPM option and confirm the dialog prompt. Backup anything you may have created with this module and wait for your PC to restart to see if the problem is gone.
Another thing you may want to try is to take ownership of TPM.
Open the Run utility by using the Windows Key + R key combination on your keyboard (press these keys at the same time. Type “tpm.msc” in the newly opened box without the quotation marks and click OK in order to open the Trusted Platform Module (TPM) Management tool.
Running the TPM utility using the Run dialog box
Under the Actions section at the right part of the window, click the Prepare the TPM… button. Confirm any dialogs and your system should restart into a BIOS-like screen prompting you to enable and take ownership of TPM.
Prepare the TPM option in TPM Management
Hit F10 to accept this and Windows should restart normally. The error should be gone now!
Microsoft Excel is one of the most popular spreadsheet editor out there in the Microsoft Office suite. It allows users to edit excel worksheets and CSV files on the go. However, there have been several instances where Microsoft Excel doesn’t open at all.
Microsoft Excel
Excel might fail at opening an existing worksheet from a network location or from the local directory. In some cases, the worksheet might appear working when opened online or through Excel preview but it may fail to open properly in the application. This behavior is very common in Microsoft Excel and is usually solved with simple workarounds.
Why won’t my Excel Sheet open?
The reasons why your Excel worksheet doesn’t open are quite a few and diverse with respect to the main modules. Some of the causes why Excel fails to open are but not limited to:
Excel installation files: The Excel installation files (Microsoft Office installation files) might be corrupt or have several modules missing.
Hidden file: The file you are trying to access is hidden away and open by you.
Accessing file online: There are several bottlenecks when trying to access the file from some other location rather than your local directory.
Before we move on with the solutions, make sure that you are logged in as an administrator and have an active open internet connection.
Solution 1: Repairing Office
In the majority of the cases, the reason why users are not able to open their excel sheet is because the installation files of Microsoft Office are either corrupt or have missing modules. If the installation itself isn’t complete or in a working state, you won’t be able to use individual programs such as Excel. We will try to repair the application through the application manager.
Press Windows + R, type “appwiz.cpl” in the dialogue box and press Enter.
Once in the application manager, locate the entry of Microsoft Office. Right-click it and select Change. If there is an option of Repair here, you can click it directly.
Changing Office Installation to Repair Office from Programs and Features
Select the option of Repair from the following windows and press Continue.
Repairing Office installation
Now follow the on-screen instructions and when the process is complete, restart your computer and check if you can open the Excel file easily.
Solution 2: Un-hiding the Worksheet
If you are experiencing a problem where you are able to see the excel file in preview but cannot open it for editing, it probably means that your sheet is hidden from view. Microsoft Excel has a feature where users are able to hide their sheets, rows, or columns from the workspace and from View. You should follow the steps below to unhide your sheet.
Open your Workbook and stay on the blank page when it loads.
Now click View from the tab present at the top and click Unhide from the navigation bar.
Unhide Excel Worksheet
Your worksheet will now be unhidden and you can make changes and view it like any other worksheet. If you are hiding specific rows or columns from your sheet, you can click Format > Hide & Unhide > Unhide Rows/Columns
Unhiding Rows and Columns in Excel
Solution 3: Changing File Directory
There are quite some limitations if you are not opening/accessing the file from any location other than your local storage. These are put in place to manage the accessibility of the worksheets with other modules present. Here are issues because of which a lot of users face the issue of Excel not opening.
The file and path name is limited to 254 characters. If any of them exceed 254 characters, Excel will not be able to open the file.
If you are opening the file from the ‘Open’ tab in Excel, try opening the file through browsing. It seems that the paths listed there do not auto-update and keeps the old directory in their properties (if you have renamed or moved the file).
Because of these technicalities, it is recommended that you open the file from your local storage i.e. the file should be physically saved on your computer’s hard drive instead of network shares or on other modules.
Note: You can also try disabling the add-ins installed on your Excel. These are known to cause problems with launching sometimes.
Solution 4: Reinstalling Office Suite
If all the above methods don’t work, you can try reinstalling Microsoft Office suite completely. There are some loopholes which even the repair utility isn’t able to fix (as in Solution 1). Make sure that you have your product key at hand and your Microsoft account credentials as you will most probably be asked to enter them again later on.
Press Windows + R, type “appwiz.cpl” in the dialogue box and press Enter.
Once in the application manager, locate the entry of Microsoft Office. Right-click it and select Uninstall.
Uninstall Office
Now insert the CD (if you have one) or download the latest version available from Microsoft’s official website.
Note: You should also make sure that you have the latest version Office and Windows installed on your computer. Make sure that you install all the security updates of Office Suite released through Windows update.
The ‘Error 0x80190001’ error is caused while updating your Windows when the update files aren’t downloaded properly. Windows updates are often quick and you get the latest features without any issue, however, you shouldn’t take that for granted. There are times when you’ll be troubled before your system gets the update. Apparently, the errors often caused are due to the third-party software installed on your system that interferes with the update and hence an error pops up.
When you try to update your Windows, what you are doing is downloading the files required for the update from Microsoft’s servers, however, if you aren’t able to get the files on your system safely, you naturally won’t be able to complete the update. The Error 0x80190001 can be taken as an example.
Windows Update Error 0x80190001
What causes Windows Update Error 0x80190001?
The error is not generic and can be caused by a number of things such as —
Incomplete download. The error is usually caused if the files required for the update aren’t downloaded properly.
Third-party software. Most of us use third-party softwares which can interfere with the Windows update and cause the error to emerge.
Incorrect time and date. Whenever you try to update your Windows, make sure your Time and Date are set correctly. Incorrect time & date can potentially cause certain errors to pop up.
The error can be solved by the following solutions: –
Solution 1: Run Windows Update Troubleshooter
To begin with the basics, you should run Windows Update Troubleshooter to check what is causing the error to pop up. If it is something generic, the troubleshooter will take care of it and you’ll get your update in no time, hence, it’s worth a shot. To run the troubleshooter, do the following:
Press Winkey + I to open Settings.
Go to ‘Update and Security’.
Navigate to the ‘Troubleshoot’ tab.
Click on ‘Windows Update’ and then hit ‘Run troubleshooter’.
Run Windows Update Troubleshooter
Wait for it to complete and then try to update your system.
Solution 2: Update Time & Date
If Time and Date are set incorrectly on your system or you’ve chosen a wrong time zone, it may be the cause of the error. If your time or date is way too off, your request to download the update files may be rejected by Microsoft’s servers due to which you won’t be able to download the update. Therefore, make sure the time and date on your system are correct.
Once you’ve corrected your Time and date, it is time to synchronize with time.windows.com. Here’s how to do it:
Open Control Panel.
Navigate to ‘Clock and Region’.
Clock and Region (Settings)
Click on ‘Date and Time’.
Switch to Internet Time tab.
Click ‘Change settings’.
Hit ‘Update now’.
Synchronize Time and Date
Solution 3: Disconnect all External Hardware
If you’ve connected some external hardware to your system like USB, your smartphone etc. occasionally, the connected hardware like your USB or smartphone may interfere with the system and cause the error to pop up. Hence, to eliminate the possibility, make sure you’ve disconnected any external hardware and then try to update your system.
Solution 4: Empty the Software Distribution Folder
Software Distribution Folder is located in Windows directory which is tasked to store the files required by a Windows update temporarily. Make sure not to mess with this folder under normal conditions, however, you can delete the contents of the folder should you encounter an error that involves it. Do the following to empty the folder:
First and foremost, you’ll have to stop ‘wuauserv’ and ‘bits’ services. To do this, Press Winkey + X and select ‘Command Prompt (Admin)’.
Once the cmd loads, type the following commands:
Stopping Services using Command Prompt
net stop wuauserv

net stop bits
After that, navigate to the following path:
C:\Windows\SoftwareDistribution
Delete all the files and folders there.
After that’s done, you’ll have to start the services again. Enter the following commands in Command Prompt (Admin):
net start wuauserv

net start bits
Starting Services using Command Prompt
Solution 5: Perform a Clean Boot
Sometimes, the third-party software that you are using can be the ones altering with your Windows update due to which the update isn’t proceeding. In such a case, you’ll have to perform a Clean boot to check whether a third-party software is interfering with the update.
To perform a Clean Boot, please follow this article on our site.
After you’ve performed a Clean boot, try to update your Windows. If the update is installed without any issues, this means a third-party software was interfering with the update.
Solution 6: Use Windows Media Creation Tool
Finally, if the above-mentioned solutions don’t work for you, you’ll have to update your computer using Windows Media Creation Tool. Using Windows Media Creation Tool, you won’t lose your files and your Windows will be updated to the latest version. Here’s how:
Firstly, download the tool from Microsoft’s website; can be found here.
After the download has completed, open the file.
Accept the terms, then click Upgrade this PC.
Upgrading PC
Make sure to check ‘Keep Personal files’ to ensure that your files are safe.
Discord allows users to communicate with friends and other people. The main use of Discord is during the games so a seamless connection is essential for the complete gaming experience especially when it comes to multiplayer games. However, for the majority of users, the Discord app is crashing unexpectedly. You won’t see an error message when the app will crash. The app will just crash or restart without any warning. For some users, the app crashes randomly while others are experiencing the issue at a particular time e.g. at startup, during gaming, etc. As you can imagine, getting to the root of the problem can be really hard because of the lack of warning or error message.
Discord Crashing
What causes the Discord app to crash?
There are a couple of things that can cause this issue. They are listed below
Discord Update: A big chunk of the users started experiencing the issue after a Discord update. It is pretty common to see bugs introduced by an update so this can be one of those bugs. One of these bugs can be related to the audio/video modules of the app. This is highly likely if the issue is caused during voice/video communication.
Corrupt files: It’s not uncommon for files to get corrupt. Corrupted files can cause a program to misbehave and this might be one of those cases. The files in the AppData folder can cause this issue and clearing that folder along with some other files will fix the issue if it’s caused by that.
Method 1: Turn on Legacy Mode
Turning on the legacy mode has fixed the issue for a considerable number of Discord users. This mode can be turned on via the Discord app settings. If you are experiencing the issue during the usage of mic or other voice/video interactions then the issue is most likely to be fixed by the steps given below. Follow the steps given below to turn on the legacy mode to see if it resolves the issue for you.
Open Discord
Click on the User Settings (gear icon). This should be on the right side of your avatar.
Discord User Settings
Voice & Video from the left pane
Scroll down and select Legacy from the drop down menu under Audio Subsystem
Turn on Legacy Settings
Click Okay if the app asks you to confirm the action
Once done, the problem should go away.
Method 2: Delete AppData Discord Contents
Deleting the contents of AppData will fix the issue if the issue is caused by corrupt files or cache. Don’t worry though, the deleted files won’t cause any issue. These files will automatically be created on the next start of your Discord app.
Hold Windows key and press E
Type %AppData%\discord in the address bar of Windows Explorer and press Enter
Double click Cache folder
Now you need to delete all the files from this folder. Hold the CTRL key and press A (CTRL + A) and press Delete. Confirm any additional prompts
Delete AppData Discord Cache Contents
Go back to the Discord folder and Double click Local Storage folder
Now you need to delete all the files from this folder. Hold the CTRL key and press A (CTRL + A) and press Delete. Confirm any additional prompts
Delete AppData Discord Storage Folder Contents
Now close the Windows Explorer and start the Discord app. The app should work normally now.
Note: If this doesn’t solve the issue then follow the steps given below
Hold Windows key and press E
Type %AppData% in the address bar of Windows Explorer and press Enter
Locate the Discord folder. Right-click the Discord folder and select Delete. Confirm any additional prompts
Delete AppData Discord folder
Type %LocalAppData% in the address bar of Windows Explorer and press Enter
Locate the Discord folder. Right-click the Discord folder and select Delete. Confirm any additional prompts
Delete LocalAppData Discord folder
Hold Windows key and press R
Type appwiz.cpl and press enter
Run appwiz.cpl
Locate the Discord app from the list and select it.
Click Uninstall and follow the on-screen instructions
Uninstall Discord
Reboot
Reinstall the Discord app once the system is rebooted.
Several users are encountering the “HP accelerometer doesn’t work on this version of Windows” error at every Windows Startup. Some affected users reported that the Accelerometer was working normally until a Windows 10 update. As it turns out, the Windows 10 Fall Creators Update (RS3) is responsible for the error.
Hp accelerometer doesn’t work with this version of Windows. An updated app may be available.
What is causing the “Hp accelerometer doesn’t work with this version of Windows. An updated app may be available” error?
The Hewlett Packard’s HP accelerometer is designed to boost HDD protection. If it detects high-speed movement, it will instantly disengage the read head. This significantly reduces the change of your HDD is damaged.
We investigated this particular issue by looking at various user reports and the solutions that they used to get the issue resolved. Based on what we gathered, there are several fairly common scenarios that will trigger this particular error message:
Outdated version of HP 3D Driveguard – Based on HP’s official documentation, this issue might occur if the machine is using an outdated version of 3D DriveGuard. Several users encountering the same issue have reported that the issue was fixed once they installed the latest version available.
Windows 10 Update is interfering with the HP accelerometer – A particular Windows 10 update released at the end of 2017 is known to cause this particular error message. Users speculate that it’s somehow interfering with the HP accelerometer driver.
If you’re struggling to resolve this particular issue, this article will provide you with a collection of verified troubleshooting steps. Below you have a collection of methods that other users in a similar situation have used to get the issue resolved.
For the best results, follow the methods below in order until you encounter a fix that is effective in your particular scenario. Let’s begin!
Method 1: Applying HP’s SoftPaq fix
Since the issue is over one year old, HP has already addressed the issue by offering a fix. You can try to resolve the issue by installing HP’s SoftPaq update to repair the damage done by Windows 10 Fall Creators Update (RS3).
Several users finding themselves in a similar situation have reported that the issue was addressed after performing the steps below:
Visit this link (here) to download the SoftPaq update (the fix released by HP).
Open the update installer (sp88981.exe) and follow the on-screen prompts to install the fix.
Installing Hp SoftPaq
Once the fix has been installed, restart your computer and see if the issue has been addressed at the next startup.
If you’re still seeing the “HP accelerometer doesn’t work on this version of Windows” error, move down to the next method below.
Method 2: Installing the latest version of HP 3D Driveguard
The majority of users that have been encountering this issue have managed to fix it by updating HP 3D Driveguard to the latest version. Apparently, older versions of this software are known to trigger the “HP accelerometer doesn’t work on this version of Windows” error.
Most affected users have managed to resolve the error by uninstalling the current version of HP 3D DriveGuard and installing the latest version available. Here’s a quick guide on how to do this:
Press Windows key + R to open up a Run dialog box. Then, type “appwiz.cpl” and press Enter to open Programs and Features. Run appwiz.cpl
Inside Programs and Features, scroll down through the application list, right-click on HP 3D DriveGuard and click Uninstall. Then, follow the on-screen prompts to uninstall the software from your system.
Uninstalling HP 3D DriveGuard
Once HP 3D DriveGuard has been uninstalled, reboot your computer. The “HP accelerometer doesn’t work on this version of Windows” error should no longer occur at the next startup.
Visit this link (here) to download the latest version of HP 3D DriveGuard and install it to your system.
Several users have been reporting that they constantly receive the ‘The Adobe software you are using is not genuine’ pop up. This is Adobe’s way of discouraging privacy, but it turns out that it ends up affecting some users that are running legitimate copies of some Adobe products. The issue is encountered on both Windows and Mac.
The Adobe software you are using is not genuine
What is causing the ‘The Adobe software you are using is not genuine’ error?
We investigated this particular issue by looking at various user reports and the solutions that they personally used to get the issue resolved.
Although this problem is officially aimed at discouraging software piracy, a lot of users are reporting that the pop up is continuously appearing with legally-bought copies. Some users are speculating that this is just Adobe’s tactic to get more people to pay a subscription on Adobe’s Creative Cloud.
One could argue that this anti-piracy popup doesn’t actually prevent piracy – there are cracks capable of getting around this. The fact that this pop-ups also appears to legitimate Adobe customers that don’t pay a subscription for Adobe’s Creative Cloud achieves just the opposite
A lot of users that hold legitimate copies of Adobe products are searching for ways to crack their legal software in order to get rid of the annoying pop-up. Fortunately, there are a few ways to stop this pop-up from appearing anymore without having to crack a software that you paid for.
Down below you have several methods that other users in a similar situation have used to prevent the ‘The Adobe software you are using is not genuine’ pop up from appearing.
For the best results, follow the methods below in order until you come upon a fix that takes care of the problem for you. Let’s begin!
Method 1: Disabling Adobe Genuine Helper
Several users struggling to resolve the same error message have managed to get the issue fixed by killing the Adobe Genuine Helper process and deleting (renaming) Adobe Genuine Helper and Adobe Genuine Launcher.
This fix is confirmed to work by a lot of Windows 7 and Windows 8 users, but it can also be applied on Windows 10 after a minor modification.
Here’s what you need to do:
As soon as the pop-up occurs, press Ctrl + Shift + Esc to open up Task Manager.
Inside Task Manager, go to the Processes tab. Then, right-click on Adobe Genuine Helper (32 bit) and choose Open File Location.
Right click on Adobe Genuine Helper and choose Open File Location
Once the location is opened, return to Task Manager, select the Adobe Genuine Helper process and click End Process (End Task).
Ending the Adobe Genuine Helper process
Return to the location of the process and delete Adobe Genuine Helper and Adobe Genuine Launcher by right-clicking them and choosing Delete.
Deleting Adobe Genuine Helper and Adobe Genuine Launcher
Note: On Windows 10, some users are reporting that these two files will be recreated at the next startup, making the error to return. If you’re on Windows 10, rename the two files to a slightly different name instead of deleting them.
Restart your computer and see if the ‘The Adobe software you are using is not genuine’ pop up has been resolved.
If you’re still encountering the error, move down to the next method below.
Method 2: Using the Autoruns utility to prevent the alerts from occurring
As several affected users have reported, you can take care of this integrity pop-up by preventing the AcroTray.exe process from being invoked. In order to do this, you’ll have to start by disabling all related programs from running at startup.
But even after you do this, AcroTray.exe can still be started by other programs if there’s a dependency involved. To stop this from happening, we are going to use Autoruns.
Here’s a quick guide on how to prevent the Adobe Genuine Software Integrity Service pop-ups from occurring:
Press Windows key + R to open up a Run dialog box. Then, type “services.msc” and press Enter to open the Services screen. When prompted by the UAC (User Account Control), click Yes to grant administrative privileges.
Run dialog: services.msc
In the Services screen, move over to the right pane and locate the Adobe Genuine Software Integrity Service. Once you see it, right-click on it and choose Properties or simply double-click it.
Opening the Properties window of Adobe Genuine Software Integrity
In the Properties screen of Adobe Genuine Software Integrity Services, go to the General tab and set the Startup type to Manual using the drop-down menu.
Go to General and set Startup type to Manual
Repeat step 2 and step 3 with the Adobe Genuine Monitor Service and Adobe Acrobat Update Service until all three of them are set to Manual.
Press Ctrl + Shift + Esc to open up Task Manager. Once you get there, click the Startup tab and disable every item that belongs to Adobe Systems Incorporated by selecting it and clicking Disable.
Disabling all Adobe-related startup items from Task Manager
Next, visit this link (here) and download the Autoruns utility by clicking on the Download Autoruns and Autorunsc hyperlink.
Downloading Autoruns
Extract the .zip file and double-click on the Autoruns executable to open up the utility.
Opening the Autoruns executable
Once Autoruns is opened, wait until the Everything list is populated, then proceed to disable the following services by right-clicking them and choosing Delete: Adobe Updater Startup Utility Acrobat Assistant Adobe Acrobat Synchronizer
Adobe Update ServiceDeleting Adobe-related startup items using Autoruns
Once every process has been taken care of, visit this link (here), scroll down to the bottom of this page and download the best version of ShellExView according to your preferences and OS architecture.
Downloading ShellExView
Open the shexview.exe executable and wait until the initial list is fully populated. Once it is, go to Options (using the ribbon bar at the top) and make sure that Show 32-bit Shell Extensions is checked.
Deselect Show 32-bit Shell extensions
Next, proceed to disable the following items if you see that they popped up in the initial search: Adobe Acrobat Create PDF from Selection Adobe Acrobat Create PDF Helper Adobe Acrobat Create PDF Toolbar Adobe Elements Context Menu Right-click on targeted extension and click on Disable Selected Items
Note: You can disable the above-specified extensions by right-clicking on each one and choosing Disable selected Items.
Press Ctrl + Shift + Esc to open Task Manager again and close AcroTray.exe one more time. After AcroTray.exe is closed, Sign out and then Sign in again to see if the method was successful.
Signing out & in to test the success of this method
If you followed the instructions to the letter, you should no longer be encountering the ‘The Adobe software you are using is not genuine’ error pop up.
Several users have been encountering the ‘Can’t delete a partition without the force protected parameter set’ when trying to use DiskPart to remove the recovery partition. The issue is not specific to a certain Windows version as it’s reported to occur with Windows 7, Windows 8.1 and Windows 10.
Virtual Disk Service error: Cannot delete a protected partition without the force protected parameter set
What is causing the ‘Cannot delete a protected partition without the force protected parameter set’ error?
We investigated this particular issue by looking at various user reports and the solutions that they used to take care of the issue.
Most likely, the error message gets thrown by DiskPart because you are trying to delete a hidden or system protected partition using the “delete volume” command.
Doing this will likely trigger the ‘Cannot delete a protected partition without the force protected parameter set‘ error because the DiskPart utility requires a different parameter in order to remove hidden or system protected partitions.
If you’re struggling to resolve the same error message, the method below will allow you to resolve the issue by using a different parameter that will signal Windows that you know what you’re doing.
Resolving the Error Using the override parameter
Most likely, you are seeing this error as a warning that you need to be extra sure that you wish to delete the recovery partition. It’s somewhat confusing because the parameter is not indicated in the Help Delete Partition section of DiskPart.
Keep in mind that normally, Diskpart will only enable you to delete known data partitions. To delete any known data partition (including recovery partitions), you’ll need to use the override parameter.
But setting the documentation aside, you will be able to resolve the issue by using the override parameter. Here’s a quick guide on how to do this:
Press Windows key + R to open up a Run dialog box. Then, type “diskpart” and press Enter to open the DiskPart utility. When prompted by the UAC (User Account Control), click Yes to grant administrative privileges.
Run dialog: diskpart
Identify the disk that you want to work with by typing the following command:
list disk
Select the list that you want to wipe or reformat by using the following command:
select disk X
Note: X is only a placeholder for the actual number of the disk that you’re trying to handle. Please replace the placeholder with the correct number.
Once the proper disk is selected, type the following command to see all the partitions that the selected drive is using:
list partition
From the list of partitions, identify the one that you wish to delete and use the following command to select it:
select partition X
Note: X is only a partition for the number of the partition that you wish to delete. it will get displayed after you run the command at step 4.
With the targeted partition selected, use the following command do signal Windows that you’re sure about the step that you’re about to perform (by using the override parameter):
delete partition override
Once the process completes successfully, type the following command to exit Diskpart:
SearchUI.exe suspended is often caused by your third-party antivirus software which usually interferes with your background processes. Search User Interface or SearchUI is a component of the Microsoft’s search assistant called Cortana. If your searchUI.exe process is suspended, this means you won’t be able to use Cortana. Evidently, some people like to make use of Microsoft’s search assistant by giving it commands through their microphone. Though, there are certain things or apps that’ll stop you from utilizing it.
This doesn’t pop up as an error dialog notifying you that the searchUI.exe file has been suspended but rather it can be found when you open your Task Manager and go through the processes listed there. This issue is not critical and can be solved via some easy and potent solutions. However, before we get into that, let’s have a look at the causes.
SearchUI Suspended Windows 10
What causes SearchUI.exe suspended on Windows 10?
Well, the suspension of searchui.exe can be caused by numerous factor such as –
Third-party antivirus. If you are using a third-party antivirus, you are most likely to see the file suspended because your antivirus is trying to stop it.
Outdated windows. If you haven’t updated your Windows for quite some time, then this could potentially be the factor of the file being suspended. The UI is not perfect and it needs constant updating.
Corrupt package folder. Occasionally, the reason the file is being suspended is corrupt Cortana package folder which means you’ll have to delete it.
Now, it is time to get into the solutions:
Solution 1: Update your Windows
As we mentioned earlier, an outdated Windows could be the cause of this. The User Interface has not been perfected yet and it requires constant updates from its manufacturer which it’ll only get if you update your Windows. Therefore, starting off with the easy task, try updating your Windows if you haven’t. To check for updates, do the following:
Press Winkey + I to open Settings.
Click on ‘Update and Security’.
Hit ‘Check for updates’.
Check for Windows Update
If it prompts you with an update, do update your system.
Solution 2: Fixing Cortana’s Package Folder
A corrupt package folder might be stopping the file from running. In such a case, you’ll have to delete the folder in Safe Boot. Please follow this article to learn how to boot your system in Safe Boot. Once you’ve booted up your system, do the following:
Press Winkey + X and select ‘Command prompt (Admin)’ or ‘Windows Powershell (Admin)’.
Once that loads up, enter the following command (replace {USERNAME} with your system’s username).
Reset Cortana’s Package Folder through PowerShell
Some users have reported that their third-party antivirus was interfering with the process due to which it was listed as suspended. This was mostly caused by Avast antivirus — so if you are using an Avast antivirus or any other, please turn off your antivirus and then reboot your system to see if the file is still listed as suspended or not.
Solution 4: Delete Roaming User Profile
If you are using a Roaming User profile on your system then the problem might be occurring because of your user profile as it can generate certain issues with SearchUI.exe file. If this is the case for you, you’ll just have to delete the Roaming User Profile. Here’s how to do it:
Go to your Desktop, right click ‘This PC’ and select ‘Properties’.
On the left-hand side, click ‘Advanced system settings’.
A window will pop up, there click ‘Settings’ under User Profiles.
Click Settings and delete roaming profile
Locate your Roaming profile and delete it.
Solution 5: Reinstall iCloud
Lastly, another reason can be your iCloud installation. Your iCloud process might be interfering with the SearchUI.exe process in which case you’ll have to reinstall iCloud. Therefore, please refer to thisarticle already published on our site where you’ll find several methods of removing iCloud from your Windows 10.
If you’ve recently factory reset your Sprint AQT100, and forgot to disable the screen lock security first, your device will become FRP (factory reset protection) locked – which requires you to add the original Google account first setup with this device. In some cases, you may have forgotten, or no longer have access to that particular Google account. Which means you’re permanently locked out of the device!
Fortunately, there is an easy workaround for FRP lock on the Sprint AQT100. In this Appuals guide, we will show you how to add a new Google account to an FRP-locked Sprint AQT100, so you can complete the Android Setup Wizard after a factory reset.
Start by shutting down the device and removing the SIM card.
Power it on again and follow the Android set-up wizard prompts, until it asks to connect to WiFi.
Turn off the screen, wait a few seconds for the lock to kick in, and turn it on again.
Your lock screen should have a camera icon on the bottom of the screen – tap it.
It should launch the camera app despite the screen being locked, so take a photo in the camera app.
Now tap the “Share” icon and share it to the Maps app.
When the Maps app launches, accept the dialog boxes – you may need to repeat the previous step a couple times for the Maps app to fully launch.
When the Maps app asks for you to add an account, hit the Cancel button, then tap the Back button to go to the main menu of the Maps app.
Now tap the Settings button in the Maps app, and open the “Terms and Privacy” menu, and tap the Terms button.
Now scroll down the Terms and highlight some of the text, like you will copy it. After copying some of the text, tap the “Web Search” button.
When the Web Search menu opens, erase the text you copied from Terms, and type ‘Settings’. This will give you a link to your phone’s Android Settings, so open it.
Once you’re in Settings, go to Security and enable ‘Unknown Sources’.
Now go back to Settings > Apps > Chrome, you should see a “Launch” button, tap it to launch Chrome.
Now download the Google Account Manager and QuickShortCutMaker apps, and install them directly from the downloaded APKs.
Launch the “QuickShortcutMaker” app from within Settings > Apps.
Access Google Account Manager from QuickShortcutMaker
Inside QuickShortcutMaker, search “Google Account Manager”. Then choose the option for “Type email and password”.
This will launch a browser directly to Google log-in page (via the Google Account Manager app), so enter any Gmail account you use – even a new one that was not previously on your device before FRP lock.
Now restart your device, and you should no longer be FRP locked!