Quantcast
Channel: How To's | Everything Tech - Appuals.com
Viewing all 4542 articles
Browse latest View live

BEST FIX: Restore an Item Removed by Windows Defender

$
0
0

Windows Defender is the resident antivirus and threat identification and removal program to the latest and greatest version of the Windows Operating System – Windows 10. As of Windows 10, Windows Defender has completely replaced Microsoft Security Essentials as the default system protection program. Among the many duties that Windows Defender carries out on a regular basis for the average Windows 10 user is searching for and identifying any applications, files, folders or other elements that may pose a threat to their computer and then getting rid of them before they can actually do any damage.

However, Windows Defender is, like all other computer programs, prone to making mistakes. Since that is the case, Windows Defender may sometimes identify files that are actually harmless and/or are critical to the operation of an application or program as threats to your computer. Fortunately for you, once Windows Defender identifies an element as a threat, it does not outright delete it entirely. Instead, Windows Defender quarantines the element pending review by you – the user – where you get to decide whether the element should be completely removed or has been identified as a threat by mistake and should be restored.

Once an element has been quarantined by Windows Defender, it poses no harm to your computer even though it has not been removed entirely. If Windows Defender has wrongly identified a file or other element that you don’t want removed from your system, fear not as restoring the item is a fairly simple ordeal. To restore an item that has been identified as a threat by Windows Defender and has been removed and placed in quarantine, you need to:

Open Windows Defender.

Click on Tools.

Click on Quarantined items.

Review all of the items on the list, determine what items you want to restore and then, one by one, click on each of them and click on the Restore button found at the bottom right of the window.

windows-defender-quarantined-items1 (1)

The post BEST FIX: Restore an Item Removed by Windows Defender appeared first on Appuals.com.


BEST FIX: MACHINE_CHECK_EXCEPTION on Windows 10

$
0
0

Upgrading to Windows 10 has caused a wide variety of different problems for Windows users all over the world. One of the most significant and most frustrating problems that a Windows 10 upgrade may bring with it is the MACHINE_CHECK_EXCEPTION error. The MACHINE_CHECK_EXCEPTION error is an error that causes a Windows 10 computer to freeze somewhere between the first Windows screen with the spinning dots and the login screen. Since the computer freezes, it needs to be rebooted, and the MACHINE_CHECK_EXCEPTION error shows itself as soon as the computer powers up, along with an error message that states “Your PC ran into a problem and needs to restart. We’re just collecting some error info and then we’ll restart for you.”

However, all Windows 10 users who have been affected by the MACHINE_CHECK_EXCEPTION error have reported that their computers did not automatically restart and, instead, froze once again at various points during the error info collection state. In order for them to get their computers to work again, affected users had to manually reboot them. In such cases, the MACHINE_CHECK_EXCEPTION error, which can be caused by anything from corrupted system files to the installation of hardware or software that doesn’t agree with the system, almost always showed up when users tried to boot their computers up.

The MACHINE_CHECK_EXCEPTION error can either be caused by a software problem or a hardware problem, and depending on what the cause of this error for your system is, you will have to go through different procedures in order to try and fix it.

Scenario 1: The error is caused by a software problem

If you are suffering from the MACHINE_CHECK_EXCEPTION error and believe that the root of the problem is software-related in nature, the following are the two most effective methods that you can use to try and fix the issue:

Method 1: Remove the cause of the problem from your computer in Safe Mode

As soon as you reach the first Windows screen with the spinning dots, force shutdown your computer. If you’re on a laptop, pull out its battery. If you’re using a computer, simply press and hold down its Power button for 5-10 seconds, and it will power off. You can also unplug your computer from its power supply to force it to shut down.

Boot your computer up. If you reach the first Windows screen with the spinning dots and the screen does not have the text Preparing Automatic Repair under the spinning dots, repeat Step 1 until you do see the text.

Once you see the Preparing Automatic Repair text underneath the spinning dots, wait for a while and the screen will go black and then display a similar screen but with Preparing Automatic Repair replaced with Diagnosing your PC. At this point, wait for your PC to be diagnosed. This can take a while.

When you see a screen titled Automatic Repair, click on advanced options.

Click on Troubleshoot.

troubleshoot

Click on Advanced options.

2015-11-20_050126

Click on Startup settings.

2015-11-20_050221

Click on Restart. When your computer restarts, you will be faced with a blue screen similar to the one in Startup settings. When on this screen, press the number that corresponds to the Enable Safe Mode In most cases, this is the number 4.

2015-11-20_050344

When your computer boots up into Safe Mode, uninstall any and all programs, drivers and/or updates that you installed right before your computer fell into the clutches of the MACHINE_CHECK_EXCEPTION error. This should eliminate whatever gave birth to the MACHINE_CHECK_EXCEPTION error on your computer in the first place.

Method 2: Restore your Windows 10 computer to an earlier point in time

Before a new program, update or driver is installed onto a Windows 10 computer, the system creates a restore point so that if anything goes wrong, the user can restore their computer to a point in time when the program, update or driver was not installed. If a program, driver or update that doesn’t agree with your system is what is causing your computer to be affected by the MACHINE_CHECK_EXCEPTION error, performing a System Restore on your Windows 10 computer should do the trick. It should be noted that a System Restore will only remove any and all updates, drivers and programs installed after the Restore Point you choose was created and that all of your personal files and data will remain unharmed.

Right-click on the Start Menu button to open the WinX Menu. In the WinX Menu, click on Control Panel to open it.

control panel win x

Search the Control Panel for Recovery. Open Recovery.

2015-11-20_100437

Click on Open System Restore.

Click on Next. Choose the System Restore Point you want to roll back to.

Click on Next. Click on Finish on the next page.

Once the System Restore goes through, your computer will no longer be affected by the MACHINE_CHECK_EXCEPTION error.

Scenario 2: The error is caused by a hardware problem

The MACHINE_CHECK_EXCEPTION error can also be born of out causes that are hardware-related in nature. For example, if your computer starts spewing out the error after you install new system hardware such as a new computer cooler, removing the cooler, checking it, cleaning it and then re-pasting or reseating it should do the trick. On the other hand, if you start to see the error after your computer stats becoming exceptionally hot while running, the cause of the problem may be manual over-clocking of the processor or poorly-fitted cooling fans or heatsink. This error can also be caused by an overloaded internal or external power supply, in which case the solution to the problem would be to upgrade the power supply that is being overloaded.

If specific computer hardware such as the RAM, the hard drive of the processor is at fault for giving birth to the MACHINE_CHECK_EXCEPTION error, it would be wise for you to run a hardware diagnostics test on your computer as soon as it boots up in order to determine the exact root of the issue.

The procedures for running hardware diagnostics tests on a computer that cannot access its Operating System vary from one computer to the other, but the one thing that they all have in common is that the user needs to press a specific key as soon as their computer begins its boot-up process to enter a menu from which they can then run a hardware diagnostics test. Running a hardware diagnostics test will reveal what system hardware is causing the MACHINE_CHECK_EXCEPTION error and if system hardware even is the culprit behind the issue – information which you can then use to decide on a course of action to fix the problem.

The post BEST FIX: MACHINE_CHECK_EXCEPTION on Windows 10 appeared first on Appuals.com.

BEST FIX: Print Spooler Error 0x800706b9

$
0
0

Back when Windows 8.1 first started rolling out, countless Windows users who upgraded to the then latest version of Windows started complaining about their computers not being able to communicate with their printers and their computers’ Print Spoolers not starting. The Print Spooler is a Windows program that enables your Windows computer to communicate with your printer and order and initiate prints, scans, faxes and photocopies. The latest and greatest version of Windows, at this time, is Windows 10, and quite a large number of users who have upgraded to Windows 10 have also complained about their computers not being able to communicate with their printers and their computers’ Print Spoolers not opening up.

According to reports, in such cases when the Print Spooler fails to open, the user is greeted with error code 0x800706b9 and an error message that, in most cases, states that the computer does not have enough resources to start the Print Spooler service. The cause behind the Print Spooler error 0x800706b9 can be anything from a corrupted registry key or value as a result of the Windows 10 upgrade to a third-party antivirus or firewall program blocking the launch of the Print Spooler and anything in between. Fortunately for you, the following are some of the most effective solutions to error 0x800706b9 that have proven to work for a substantially large amount of Windows 10 users who have had first-hand experience with this issue:

Solution 1: Turn the Print Spooler service’s startup type to Automatic

The reason why your computer’s Print Spooler isn’t starting may be because it isn’t configured to start automatically. If that is the case, reconfiguring your Printer Spooler to start automatically should get the job done.

Press the Windows Logo key + R.

When a Run dialog opens, type services.msc into it and press Enter.

servicesmsc

Locate the Print Spooler service and right-click on it. Click on Properties.

print spooler

Open the drop down menu in front of Startup type and click on Automatic. Click on Apply. Click on OK.

services - 4

If the Print Spooler service is not already running, right-click on it and click on Start.

Restart your computer, and the Print Spooler should start seamlessly once your computer boots up.

Solution 2: Fix the issue by editing your computer’s registry

Press the Windows Logo key + R.

When a Run dialog opens, type regedit into it and press Enter.

regedit - 1

If you are prompted by a User Access Control message, click on Yes or, if asked to do so, provide your password.

In the left pane of the Registry Editor, navigate to HKEY_LOCAL_MACHINE\SYSTEM\CurrentControlSet\Services\Spooler.

Click on the Spooler key to display its contents in the right pane.

Locate a value named DependOnService and double-click on it to be able to modify it.

The Value data field will contain the term RPCSS, followed by http in the next line. Delete the http part, leaving behind only the term RPCSS as the value’s data.

Click on OK to save the changes.

2015-11-20_032025

Close the Registry Editor and restart your computer, and there will no trace of error 0x800706b9 and your Print Spooler will be able to function correctly once your computer boots up.

Solution 3: Uninstall any and all third-party system protection programs

Many Windows 10 users who have suffered from error 0x800706b9 and overcame it reported that the culprit behind the issue was a third-party system protection program (a Kaspersky program, in most cases). So if you are suffering from this problem and have any third-party antivirus, anti-malware or firewall programs on your computer – especially if you have any Kaspersky programs installed – this solution has significant chances of being the right fit for you.

If a third-party system protection program is what is causing your computer’s Print Spooler service to not start, simply navigate to the Add/Remove programs part of the Control Panel and uninstall every single third-party system protection program on your computer. Restart your computer and check to see if the Print Spooler starts up successfully after your computer boots up. If the Print Spooler starts up successfully, the third-party system protection programs were, in fact, the cause. Once your Print Spooler starts working appropriately, you can go ahead and install all the third-party system protection programs you could possibly need, keeping in mind not to reinstall the same programs that gave birth to error 0x800706b9 in the first place.

Solution 4: Refresh your Windows 10 computer

If none of the solutions above work, the only option you will have left is to refresh your Windows 10 computer. The system refresh is a new feature that Microsoft has introduced with Windows 10 – a feature that deletes all of the applications and programs on your computer that didn’t come with it but keeps all your files and data. To perform a system refresh, you need to:

Open the Start Menu. Click on Settings.  Click on Update & Security. Click on Recovery.

Click on the Get started button located under the Reset this PC.

reset this pc windows 10

Click on Keep my files and allow your computer to be refreshed. Once your computer boots up after the refresh, error 0x800706b9 should be no more and your computer’s Print Spooler should start successfully.

The post BEST FIX: Print Spooler Error 0x800706b9 appeared first on Appuals.com.

BEST FIX: Windows 8 Stuck on Failure Configuring Windows Updates

$
0
0

Windows 8 certainly wasn’t the best and most stable of all the iterations of the Windows Operating System that have been created to date. Among the most gruesome of all the issues that Windows 8 may bring to your computer are issues pertaining to Windows Updates. All versions of the Windows Operating System constantly receive updates Over the Air – updates meant to change computers for the better. However, on a disturbingly large number of Windows 8 computers across the globe, downloading and installing updates mostly leads to the process failing and the user getting en error message stating “Failure configuring Windows updates. Reverting changes. Do not turn off your computer” upon reboot.

What happens in such cases is that after the installation of the downloaded Windows updates fails, the Operating System reboots the computer and attempts to undo the changes in order to preserve the computer. However, almost every person who has suffered from this problem has found that their computer pretty much gets stuck on the “Failure configuring Windows updates. Reverting changes. Do not turn off your computer” screen and they are greeted by the same screen if they force their computer to shut down and then boot it up again.

Fortunately, this is not an issue that has no solution whatsoever. The “failure configuring Windows updates” problem can indeed be fixed, allowing the Windows updates that failed to be downloaded and installed successfully. However, before you can apply a solution for this problem to your computer, you actually need to get your computer out of the “Failure configuring Windows updates. Reverting changes. Do not turn off your computer” screen loop. To do so, you can either wait it out or perform a factory reset on your computer.

Wait it out

Even if you think your computer is stuck on the “failure configuring Windows updates” screen, it actually isn’t. Eventually, Windows will manage to undo the changes that the failed updates made, allowing you to access your computer like you normally would. Now this may take anywhere between one and, if your computer is terribly slow, ten hours, so you better get your waiting hat on if you plan on waiting it out.

Perform a Factory Reset

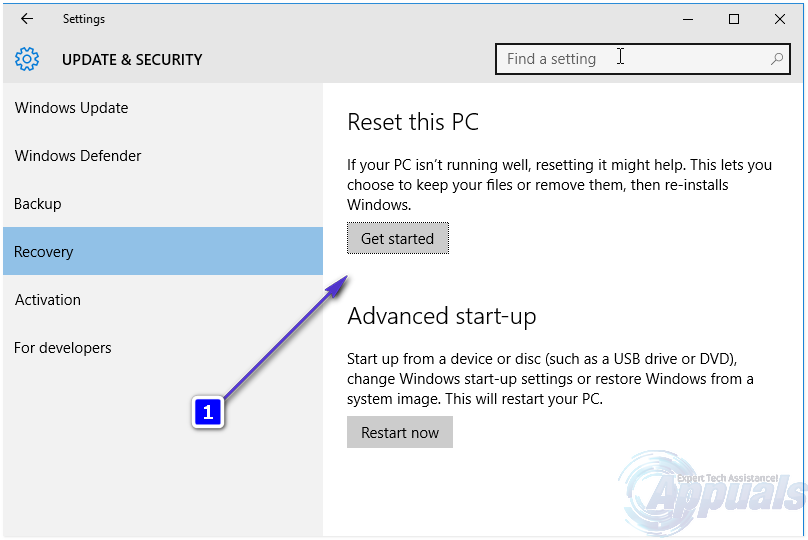
If your computer has been trying to undo the changes made by the updates for an excruciatingly long period of time or if you simply don’t want to wait until you regain access to your computer naturally, you can perform a factory reset on your computer.

It should be noted that you can only perform a factory reset on your computer if it actually came with Windows 8 out of the box (if it didn’t, the factory reset will cause the computer to go back to the version of Windows it came with) and if you haven’t deleted the Recovery partition of your computer’s hard drive. The Recovery partition is a part of your computer’s hard drive that contains all the data you need to restore it to factory settings and condition. The process for factory resetting a computer using the Recovery partition varies from one computer manufacturer to the other. For example, if you want to factory reset an Asus computer using the Recovery partition, you will have to:

Turn the computer off.

Power the computer on.

Press F9 during the early stages of the computer’s boot up process.

Press Enter to select the Windows Setup (EMS Enabled)

Follow the onscreen instructions and click on Next in the two windows that follow.

Select the Recover Windows to first partition only option and click on Next. Choosing this option will ensure that only drive C is formatted and the data on all the other drives is left untouched.

Follow the onscreen instructions to go through with the factory reset process.

Once you have gotten your computer to start working again, you can use any one of the following three methods to fix the “failure configuring Windows updates” issue. All three of the methods listed below have worked for countless Windows 8 users who have had first-hand experience with the “failure configuring Windows updates” problem, which means that at least one of these three methods is bound to fix the issue for you.

Method 1: Use a utility created specifically to fix Windows Update issues

Go here and click on Run now to download the Windows Update Diagnostic

Install the utility onto your computer.

Run the utility by opening it.

Follow the onscreen instructions to get the Windows Update Diagnostic utility to scan your computer for problems.

If the utility detects any problems, it will fix them.

If the Windows Update Diagnostic utility actually does find and fix any issues, it means that this solution was the right fit for you. Once the utility has fixed your computer’s issues, you can download and install Windows updates to your heart’s content, and all of them should go through seamlessly.

Method 2: Break the updates up into small batches and then install them

Go to Control Panel > Windows Update > Troubleshoot. Let the Windows Update troubleshooter scan your computer for issues and fix any issues that it finds.

Right-click on the Start Manu button to open the WinX Menu. Click on Command Prompt (Admin) in the WinX Menu. Type sfc /scannow into the elevated Command Prompt and press Enter to execute the command. Let the System File Checker scan your computer for issues and fix any problems that it comes across.

Go to Control Panel > Windows Updates > Check for updates. Wait for your computer to display all available updates.

Out of all the available updates, only select 5-6 updates of the same kind – the Windows 8 updates, for example – and download and install them.

Once the updates you selected have been installed, restart your computer.

Check for available updates again, and this time, download and install another batch of 5-6 similar updates – Windows 8 Security updates or media codec updates, for example. Restart your computer once again.

Keep on repeating this same process again and again until you have downloaded and installed all available updates for your computer, making sure to restart your computer between batches and to download and install the DotNet updates last.

Method 3: Turn off Secure Boot and then install all of the updates

More often than not, the “failure configuring Windows updates” problem is born when the UEFI chip in a computer causes updates that pertain to UEFI certificate revocation to fail, and if these updates are a part of a larger batch of updates, all of the updates in the batch fail. This is especially the case with computers that come with Windows 8 out of the box as they always have UEFI chips in them. Fortunately, if your computer’s UEFI chip is creating the “failure configuring Windows updates” problem for you, getting rid of the issue is a pretty straightforward and simple process.

Turn your computer off.

Power your computer on and, in the early stages of its boot-up process press whatever key is necessary to get you into your computer’s BIOS. Depending on your computer’s manufacturer and model, this key can be F1, F2, Delete or anything else. If you do not know what key to press, look for a message stating Press (name of key) to Enter Setup anywhere along your computer’s boot-up process.

Once you are in your computer’s BIOS, look for an option titled Secure Boot or UEFI Boot in the Security or Boot tab of the BIOS. You are bound to find the option in one of these two tabs, but if you don’t, look for the option in other tabs of the BIOS.

Once you have found the Secure Boot or UEFI Boot option, disable it by highlighting it, pressing Enter, pressing the Down Arrow key and pressing Enter once again.

Save your changes, exist the BIOS and reboot your computer.

Go to Control Panel > Windows Update > Troubleshoot. Let the Windows Update troubleshooter scan your computer for issues and fix any issues that it finds.

Go to Control Panel > Windows Update > Check for updates. Download and install all of the updates available for your computer. Fortunately for you, this method is not as time-consuming as Method 2 as this method does not require you to break the updates available for your computer into small batches of 5-6; you can just go ahead and download and install all of them at once.

Secure Boot – or UEFI Boot, in some cases – actually has a purpose and plays a part in protecting your computer, so be sure to Enable it once you are done downloading and installing updates.

The post BEST FIX: Windows 8 Stuck on Failure Configuring Windows Updates appeared first on Appuals.com.

BEST FIX: Windows 10 Restarts Instead of Shutting Down

$
0
0

Countless Windows 10 have complained of their computers experiencing shutdown problems immediately after they have been upgraded to Windows 10. The most common of the shutdown problems that Windows 10 may bring to any computer that is updated to it is the computer restarting instead of shutting down whenever the user shuts it down.

In such cases, your computer will restart 5-10 seconds after it powers down regardless of whether you turn it off by clicking on the Shut down button or by ordering the computer to shut down using a Command Prompt. In addition, putting your computer to sleep by clicking on the Sleep button also results in it waking up after 5-10 seconds. Even if your computer goes into Sleep mode if it is left idle, its screen will turn back on in a couple of minutes. The only way for Windows 10 users suffering from this problem to actually turn their computers off is to unplug them from their power supplies, remove their batteries (for laptops) or hold down their power buttons for 3-10 seconds (for desktop computers).

The cause of this issue has now been revealed as the fast startup feature that Microsoft has introduced with Windows 10 – a feature that is actually meant to allow Windows 10 computers to boot up faster when they are coming out of a shutdown. The following are the two solutions that have proven to be highly effective against this issue:

Solution 1: Disable fast startup in Power Options

For almost 85% of the people who have been affected by this restart instead of shutdown issue, disabling fast startup in Power Options took care of the problem. To disable fast startup in Power Options, you need to:

Open Control Panel.

Switch to Icons View.

Click on Power Options.

Click on Choose what the power buttons do in the left pane.

restart loop - 1

In the System Settings dialog, click on the blue colored Change settings that are currently unavailable option.

restart loop - 2

Confirm the action if prompted to do so by UAC.

In the Shutdown settings section, uncheck the checkbox beside the Turn on fast startup (recommended) Click on save changes. This will disable fast startup on your computer, and the next time you shut your computer down, it will actually shut down for good and not restart on its own.

restart loop - 3

Solution 2: Uninstall the ON/OFF by Gigabyte application

If Solution 1 didn’t work for you, a scenario which is quite unlikely, the fact of the matter may be that fast startup is not the culprit behind your computer restarting itself instead of shutting down. In the case of a select few computers that were affected by this issue – computers that were manufactured by Gigabyte Technology Co., Ltd. – the root of this issue was a Gigabyte application named ON/OFF. If your computer does have the On/OFF by Gigabyte application, it may very well be the cause of this problem in your cause, and all you need to do to get rid of this issue is uninstall this application.

Navigate to Apps/Programs.

Scroll down, locate and click on ON/OFF by Gigabyte.

Click on Uninstall and wait for the program to be removed.

As soon as the program has been uninstalled, your computer will start shutting down as it should.

The post BEST FIX: Windows 10 Restarts Instead of Shutting Down appeared first on Appuals.com.

BEST FIX: Operating System Not Found Windows 10

$
0
0

Quite a few Windows users found that after they reset or refreshed their Windows 10 computer, it froze in the middle of the process and they forced it to reboot, they were greeted by a blue screen that displayed an error message stating “An operating system wasn’t found. Try disconnecting any drives that don’t contain an operating system. Press ctrl+alt+del to restart.” This is quite shocking as resetting or refreshing a Windows 10 computer does not delete its Operating System, which means that this blue screen should not be displayed at all. In such cases, the computer keeps displaying this blue screen regardless of how many times the user reboots. Many users have also experiencing this same issue after downloading and installing updates for their Windows 10 computer.

The most probable culprit behind this problem is the corruption of system files critical to the proper functioning of Windows. If anything damages your computer’s system files, you may find yourself looking at a blue screen that says your computer has not Operating System whatsoever after you reboot. The following are the two methods that you can use to fix this problem:

Method 1: Try performing a factory reset on your computer

Most computers come with a Recovery partition on their hard drives out of the box – this is a factory-fitted hard drive partition that contains all the data you could possibly need to reset your computer to its factory condition without requiring any additional material such as a recovery disk. Factory resetting your computer has good chances of being able to get rid of the blue screen that says your computer doesn’t have an Operating System. However, it should be noted that factory resetting your computer will delete all of the data stored on your computer’s C drive and that you can only factory reset your computer if you haven’t already deleted its Recovery partition.

The process for factory resetting a computer which you cannot logon to using its Recovery partition varies from one computer to the other, so you might have to do some research on how your specific brand and model of computer can be factory reset. For example, if you want to factory reset an ASUS computer using its Recovery partition, you need to:

Turn the computer off.

Power the computer on.

Repeatedly press F9 as soon as the computer starts booting up.

Press Enter to select the Windows Setup (EMS Enabled)

Follow the onscreen instructions and click on Next in the two windows that follow.

Select the Recover Windows to first partition only option and click on Next. Choosing this option will ensure that only drive C of your computer is formatted and the data on all the other drives is left untouched.

Follow the onscreen instructions to go through with the factory reset process.

Method 2: Perform a clean install of Windows 10

If factory resetting your computer doesn’t work or you can’t factory reset your computer using its Recovery partition for some reason, your only remaining option is to perform a clean install of Windows 10. You should understand that a clean installation of Windows 10 on your computer will get rid of all the applications, data and settings on your computer, but you should not have a problem with that in this case as the alternative is to have a computer that doesn’t have an Operating System on it. To perform a clean install of Windows 10, you need to:

On another Windows computer, go here and download the media creation tool by clicking on Download tool now.

windows 10-1

Install the media creation tool.

Open the media creation tool.

Select For another PC.

Follow all the onscreen instructions (such as selecting your preferred language and the system architecture – 32-bit or 64-bit – of the computer that you are downloading the Windows 10 setup to) and then download an ISO file for Windows 10 that you can not only use to install Windows 10 but can also burn to a USB or DVD.

Burn the ISO file to a USB.

Boot up the computer that is suffering from the blue screen that says it does not have an Operating System, access its BIOS settings or UEFI settings and change its boot order so that it boots from a USB. Save the changes, exist the BIOS, insert the USB that contains the Windows 10 setup and then shut your computer down.

Power your computer up. It will boot from the USB that you inserted, so press any key to get the computer to start installing Windows 10.

Enter your language and other preferences, click on Install Windows, enter your product code or click on Skip in the next window if the copy of Windows 10 you were using before was already registered, agree to the license terms, choose to have a Custom installation, select the partition that you want to install Windows 10 on and format it, click on Next and then follow the rest of the installer’s instructions to successfully perform a clean install of Windows 10 on your computer. After a fresh install of Windows 10, you will no longer see a blue screen stating that your computer does not have an Operating System every time you restart it.

Also see how to create a Bootable ISO using Rufus.

The post BEST FIX: Operating System Not Found Windows 10 appeared first on Appuals.com.

BEST FIX: Windows 10 Upgrade Freezes at Quick Check Phase

$
0
0

Ever since Windows 10 has been released to the public, all computers eligible for an upgrade to Windows 10 – basically all computers running on Windows 7, 8 or 8.1 – now have a Windows 10 Upgrade app that can be used to schedule and perform a Windows 10 upgrade right from the Desktop. This Windows 10 Update app continuously reminds the user to upgrade their computer to Windows 10. While using this app to upgrade your computer to Windows 10 may be able to save you some time, it is not the best way you can use to upgrade to Windows 10. Why is that so? Well, many of the users who have tried upgrading their computers to Windows 10 have been affected by a highly frustrating problem: the Windows 10 upgrade process getting stuck at the “Doing a quick check before you can schedule upgrade” stage.

In such cases, users were unable to upgrade to Windows 10 using their computer’s Upgrade app regardless of how many times they tried and the update froze at the quick check stage every single time. However, if you are suffering from this problem, fear not as this issue can, indeed be fixed. The solution to this issue is to simply upgrade to Windows 10 using the Windows 10 media creation tool. To upgrade your computer to Windows 10 using the media creation tool instead of the Upgrade app, you need to follow the steps listed here: Create Windows 10 ISO media.

Once done, Go to Control Panel > Uninstall a program and uninstall any and all third-party security programs – from antivirus and anti-malware programs to firewall programs and everything in between – that you have on your computer. This will increase the chances of the Windows 10 upgrade being successful.

To go to Control Panel -> Hold the Windows Key and Press R. In the run dialog, type appwiz.cpl and Click OK

2015-11-20_102300

Navigate to the directory where you downloaded the Windows 10 setup using the media creation tool.

Right-click on the Windows 10 setup and click on Run as administrator. Confirm the action if prompted by UAC.

From beyond this point, follow all the onscreen instructions to successfully upgrade your computer to Windows 10.

The post BEST FIX: Windows 10 Upgrade Freezes at Quick Check Phase appeared first on Appuals.com.

Gelöst: Fehlermeldung ERR_CONNECTION_RESET

$
0
0

Zur Fehlermeldung ERR_CONNECTION_RESET kommt es gewöhnlich, wenn die Webseite, die man versucht
aufzurufen, keine Verbindung herstellen kann [z. B. gesicherte Seiten (https)]. Andere Seiten funktionieren
möglicherweise, aber einige Seiten tun das nicht.
Es gibt mehrere Ursachen, auf die das zurück zu führen ist. Deshalb sollte man jede Methode anwenden bis
man das Problem gelöst hat.

Erfahrungsgemäß kommt es zu der Fehlermeldung infolge Änderungen an der Registry-Datei, beim TCP/IP an
anderen Netzwerk-Einstellungen. Das kann im Hintergrund ohne eigenes Wissen erfolgt sein,
gewöhnlicherweise durch Veränderungen von anderen Programmen (Third Pary Programs), häufig bei PCOptimierungs-Software. Aber das kann auch durch ein Antivirus-Programm oder Third-Party-Firewalls
verursacht worden sein.

Methode 1: Zeitliche Aufhebung des Antivirenschutzes

Heben Sie den Firewall-Schutz und den Echtzeit-Datenschutz Ihres Antivirenprogrammes auf. Das kann durch
Rechtsklick auf den Antivirus-Icon durchgeführt werden, der sich rechts unten nahe der Windows-Uhrzeit
befindet. Danach laden Sie Ihren Browser erneut und führen einen Test mit der Webseite durch, die sich nicht laden
ließ. Sollten die Seite dann geladen werden können, deinstallieren Sie Ihr Antivirenprogramm und installieren
Sie es erneut.

Methode 2: MTU-Setup (Maximum Transmission Unit)

Hierauf wird normalerweise nicht geachtet. Aber solange man nicht weiß, ob das MTU falsch eingestellt ist,
kann der Fehler weiter bestehen. Um den richtigen Wert einzustellen, benötigen wir zunächst den Namen
unseres Netzwerkadapters. Das geht am schnellsten in dem die Windowstaste zusammen mit dem Buchstaben »R« [Win+R] gedrückt und der Befehl »ncpa.cpl« eingegeben wird (Abb. 1), gefolgt von »ENTER«.

Es werden dann die bestehenden Netzwerk-Verbindungen (Abb. 2) angezeigt. In diesem Fall ist es nur eine.
Der Netzwerkname, den wir gleich noch benötigen, ist hier gelb markiert. Als Adminstrator werden danach erneut die Tasten [Win+R] gedrückt, der Befehl »cmd« eingegeben, gefolgt von einem entschlossenen »ENTER«

Capture1

Capture2

In die dann angezeigte Combobox (Abb. 3) wird dann folgender Befehl eingegeben: netsh interface ipv4 set subinterface “Name Ihres Netzwerkadapters” mtu=1472 store=persistent In diesem Beispiel lautet der Name des Netzwerkadapters: »LAN-Verbindung FRITZ!Box«.

This article has been translated by Peter Kindel.

The post Gelöst: Fehlermeldung ERR_CONNECTION_RESET appeared first on Appuals.com.


BEST FIX: Directory Name is Invalid

$
0
0

One of the many problems and issues that a clean install of Windows 10 may bring to your computer is your DVD drive malfunctioning and displaying an error message that says “Directory name is invalid” every time you put a CD or DVD into it and load it up. Many Windows 10 users reported of having experienced this issue after performing a clean install of Windows 10. The directory name is invalid problem can be caused by anything from the DVD drive being plugged into a dusty and choked SATA port to problems with the DVD drive’s installation on the computer. Regardless of what the case may be, the following are the three most effective methods that you can use to fix this issue on a Windows 10 computer:

Solution 1: Unplug your DVD drive and plug it into a different SATA port

If your directory name is invalid error stems from some kind of problem pertaining to the SATA port that your DVD drive is plugged into, plugging it into a different port will do the trick and get rid of the issue for you. To change the SATA port that your DVD drive is plugged into, open your computer’s casing, remove the DVD drive from its port and plug it into a different port. For example, if your DVD drive was plugged into SATA port 1, plug it into SATA port 2 or SATA port 3. This should be enough to fix this problem.

Solution 2: Disable and then enable the DVD drive’s driver

Right-click on the Start Menu button to open the WinX Menu.

In the WinX Menu, click on Device manager to open it.

winx-devmgr

Expand the DVD/CD-ROM drives section and double-click on your DVD drive to open its properties. Switch to the Driver. Click on Disable. Once the driver has been disabled, click on Enable to re-enable it.

2015-11-23_194726

Restart your computer. Your problem should be fixed as soon as your computer boots up.

Solution 3: Uninstall the DVD drive and reinstall

If the two solutions listed and described above did not work for you then there is quite a significant chance that this solution will. Rest assured as no harm will come to your computer from uninstalling your DVD drive – the computer will just reinstall the DVD drive upon the next reboot.

Right-click on the Start Menu button to open the WinX Menu. In the WinX Menu, click on Device manager to open it. expand the DVD/CD-ROM drives section, right-click on your DVD drive and click on Uninstall. Confirm the action in the window that pops up.

2015-11-23_195143

Restart your computer. Your DVD drive will be recognized by the computer as soon as you reboot and they will then be reinstalled. The reinstallation of the two drives is bound to fix this issue.

The post BEST FIX: Directory Name is Invalid appeared first on Appuals.com.

BEST FIX: OneNote Error 0xE0000797

$
0
0

According to Microsoft, the OneNote app that comes pre-installed on all devices running Windows 10 is built for the user’s convenience. However, the only thing the OneNote app was causing users early this September was inconvenience as, following a couple of rotten updates, the app had become one of the most unstable Windows 10 apps in existence. In most cases, the OneNote app would simply spew out error 0xE0000797 along with an error message almost immediately after being launched as it attempted to connect to the user’s OneDrive account. Once the program displayed error 0xE0000797, it would fail to start completely, and even if the user somehow managed to get the app to work, they would be unable to save anything to their OneDrive account.

This problem rendered OneNote entirely unusable for quite a significant percentage of Windows 10 users, which is why this matter was of the utmost urgency. Thankfully, Microsoft and its developers got wind of the issue quite swiftly and immediately started working on a fix, a fix that was delivered to consumers with the OneNote update that followed. However, some users’ OneNote applications did not get fixed even after the update and continued exhibiting this behavior and displaying error 0xE0000797. If the OneNote app on your computer still displays error 0xE0000797 upon launch, all you need to do to fix the problem is to uninstall it and then reinstall it using Windows PowerShell. To do so, you need to:

Open the Start Menu.

error 0xe0000797-1

Type powershell into the Search bar.

error 0xe0000797-2

Right-click on the program named Windows PowerShell that appears. Click on Run as Administrator.

error 0xe0000797-3

Type the following line of code into the Windows PowerShell dialog and press Enter:

Get-AppxPackage *onenote* | Remove-AppxPackage

As soon as you press Enter, Windows PowerShell will begin uninstalling the OneNote app. Wait for the app to be completely uninstalled.

2015-11-23_200053

To reinstall the OneNote app, type the following command into Windows PowerShell and press Enter:

Get-AppxPackage -AllUsers| Foreach {Add-AppxPackage -DisableDevelopmentMode -Register “$($_.InstallLocation)\AppXManifest.xml”}

As soon as you press Enter, your computer will be instructed to reinstall all missing default apps. Wait for this process to be completed, and you will have the OneNote app back in your Start Menu once it’s done all the way.

error 0xe0000797-4

The post BEST FIX: OneNote Error 0xE0000797 appeared first on Appuals.com.

BEST FIX: Media Creation Tool Error 0x80070005 – 0x90002

$
0
0

The Media Creation Tool is a pretty neat utility that Microsoft has created to allow any consumer to easily upgrade their computer to Windows 10 or create a medium such as a USB or DVD that they can use to upgrade a different computer to Windows 10. However, the Media Creation Tool is not entirely flawless as many users have been greeted with error code 0x80070005 – 0x90002 when trying to upgrade to Windows 10 using the Media Creation Tool or when trying to create upgrade media. Error code 0x80070005 – 0x90002 usually shows up when almost the entire setup for Windows 10 has been downloaded, flushing all the time that the user waited for the download to complete down the toilet.

The culprit behind error code 0x80070005 – 0x90002 when trying to upgrade to Windows 10 using the Media Creation Tool or create new installation media can vary from one computer to the other. Fortunately, the following are three methods that have proven to be successfully at getting rid of error code 0x80070005 – 0x90002 for various Windows users who have been affected by it.

Method 1: Uninstall any and all third-party system security programs

It is a pretty well-known fact that third-party system security programs such as firewall, antivirus and anti-malware programs can interfere with the processes that need to take place in order to execute and complete a Windows system upgrade, giving birth to problems such as error 0x80070005 – 0x90002. If third-party system security programs are behind error 0x80070005 – 0x90002 in your computer’s case, simply going to Control Panel > Uninstall a program and uninstalling all of the third-party security programs on your computer will allow your Windows 10 upgrade through the media creation tool to go through seamlessly.

Method 2: Stop and then restart all services associated with Windows Update

Open the Start Menu. Search for cmd. Right-click on the program named cmd and click on Run as administrator.

Error 0x80070005 - 0x90002 - 1

Type the following commands one by one into the elevated Command Prompt to stop services associated with Windows Update, pressing Enter after typing each one of them:

net stop bits

net stop wuauserv

net stop appidsvc

net stop cryptsvc

Error 0x80070005 - 0x90002 - 2

Type the following commands one by one into the elevated Command Prompt to rename the software distribution folders backup copies, pressing Enter after typing each one of them:

Ren %systemroot%\SoftwareDistribution SoftwareDistribution.bak

Ren %systemroot%\system32\catroot2 catroot2.bak

Error 0x80070005 - 0x90002 - 3

Type the following commands one by one into the elevated Command Prompt to restart all of the services you stopped before, pressing Enter after typing each one of them:

net start bits

net start wuauserv

net start appidsvc

net start cryptsvc

Error 0x80070005 - 0x90002 - 4

Restart your computer, and you should have no trouble using the media creation tool to upgrade to Windows 10 once your computer boots up.

Method 3: Upgrade using Windows Update instead

The only reason why any Windows user would resort to upgrading to Windows 10 using the media creation tool is because they are unable to upgrade their computer through Windows Update. However, if trying to upgrade to Windows 10 through the media creation tool results in error 0x80070005 – 0x90002 and the two methods listed above haven’t helped you, you can simply upgrade your computer to Windows 10 using Windows Update instead. If the Windows 10 update does not show up in your computer’s Windows Update app, you need to:

Open the Start Menu. Search for regedit. Open the Registry Editor by clicking on regedit.

Error 0x80070005 - 0x90002 - 5

Navigate to

Computer\HKEY_LOCAL_MACHINE\SOFTWARE\Microsoft\Windows\CurrentVersion\WindowsUpdate\OSUpgrade

in the left pane. Click on OSUpgrade to display its contents in the right pane. Right-click on an empty space in the right pane, hover over New and click on DWORD (32-bit) value.

Error 0x80070005 - 0x90002 - 6

Name the new DWORD value AllowOSUpgrade.


Double-click on the AllowOSUpgrade value and change its value data to 1. Click on OK on your way out.

Error 0x80070005 - 0x90002 - 7Restart your computer, and when you open Windows Update after your computer boots up, an update to Windows 10 should pop up and you can then download it.

The post BEST FIX: Media Creation Tool Error 0x80070005 – 0x90002 appeared first on Appuals.com.

BEST FIX: Windows 10 Buzzing Sound

$
0
0

Windows 10 has become quite well-known for all the problems and issues that it has brought to computers upon them upgrading to the latest and greatest version of the Windows Operating System. While most of the problems that Windows 10 is known to bring pertain to software, there are a few issues that are hardware-related. One of the most common – and also extremely aggravating – hardware issues that a computer may be affected by upon upgrading to Windows 10 is loud buzzing noises.

Many Windows 10 users have reported that their computers started making weird, loud buzzing noises right after they upgraded to Windows 10. All of the Windows 10 users who have been affected by this problem in the past have clarified that the problem did not exist on the version of Windows that they upgraded to Windows 10 from. In such cases, affected computers’ speakers either started making loud buzzing noises upon startup and would only stop making those noises if an audio setting such as volume was changed or simply made loud buzzing noises when the audio was being played, making the audio extremely garbled and, in some cases, completely inaudible.

The culprit behind a computer that has recently been updated to Windows 10 making loud buzzing noises can be anything from corrupted or incorrect audio drivers to incorrect audio settings or anything in between. Thankfully, as long as the cause of this problem in the case of your computer is not related to the hardware (the computer’s speakers), you should be able to fix the issue on your own. The following are some of the most effective solutions that can be used to fix a Windows 10 computer that makes loud buzzing noises:

Solution 1: Update your audio driver

Right-click on the Start Menu button to open the WinX Menu. In the WinX Menu, click on Device Manager to open it. In the Device Manager, double-click on the Sound, video and game controllers section to expand it. Double-click on your audio device (Realtek High Definition Audio, for example).  Navigate to the Driver. Click on Update Driver…

2015-11-23_200435

Click on Search automatically for updated driver software. Allow your computer to search the internet for the latest version of your audio driver and, if one is available, install it.

2015-11-23_200637

Solution 2: Uninstall your audio device

If updating your audio driver does not fix this issue, you should certainly try uninstalling your audio device altogether. Do not fear, as uninstalling your audio device will not be permanent – your audio device will be detected by your computer and then reinstalled as soon as you restart your computer. To uninstall your audio device, you need to:

Right-click on the Start Menu button to open the WinX Menu. In the WinX Menu, click on Device Manager to open it. In the Device Manager, double-click on the Sound, video and game controllers section to expand it. Right-click on your audio device (Realtek High Definition Audio, for example). Click on Uninstall. Confirm the action. This will completely uninstall your computer’s audio device.

2015-11-23_200739

Restart your computer. As soon as your computer reboots, it should detect and then reinstall your audio device, and this should consequently get rid of the loud and agitating buzzing noises that your computer has been making.

Solution 3: Switch to the generic Windows audio driver

All computers that run on the Windows Operating System come with two audio drivers – the default audio driver from the manufacturer that the computer usually uses, and a generic audio driver from Microsoft. If you face any kinds of problems with the manufacturer’s audio driver, you can easily switch to the generic Windows audio driver. To do so, you will need to:

Right-click on the Start Menu button to open the WinX Menu. In the WinX Menu, click on Device Manager to open it. In the Device Manager, double-click on the Sound, video and game controllers section to expand it. Right-click on your audio device (Realtek High Definition Audio, for example) and click on Update Driver Software .

2015-11-23_201557

Click on Browse my computer for driver software. Click on Let me pick from a list of device drivers on my computer. Select High Definition Audio Device and click on Next.

2015-11-23_201701

Follow the onscreen instructions to replace their computer’s default audio driver with the general Windows High Definition Audio Device.

Solution 4: Disable any and all audio enhancements

Windows offers a wide range of different audio enhancements that can be turned on in order to improve the quality of the audio that your computer treats you to. However, if your computer’s speakers are not compatible to or don’t agree with the audio enhancements that you turn on, the result may be your computer making loud buzzing noises while playing audio. If your Windows 10 computer only makes buzzing noises when you play audio on it, this solution is definitely worth trying out. To disable audio enhancements for your computer’s speakers, you need to:

Open the Start Menu. Type Sound into the Search. Click on the search result titled Sound that appears under Control Panel. In the Playback tab, right-click on the playback device that you are using (your computer’s speakers, for example) and click on Properties.

2015-11-23_202042

Navigate to the Enhancements. Check the Disable all enhancements check box by clicking on it. This will effectively disable any and all audio enhancements that have been applied to your computer’s speakers. Click on Apply. Click on OK.

2015-11-23_201917

No try and play some audio, and there should no longer be any loud buzzing noises.

The post BEST FIX: Windows 10 Buzzing Sound appeared first on Appuals.com.

BEST FIX: Windows Live Mail Stuck at Starting Screen

$
0
0

Windows Live Mail is arguably one of the best email clients to have ever graced the screen of a computer running on the Windows Operating System. However, that does not mean that the LiveMail application does not have any flaws or problems. Users of the LiveMail application have suffered from a wide variety of different problems, issues and errors over the years, with one of the most common ones being LiveMail getting stuck on the “Windows LiveMail starting” screen following the user entering their username and password into the program.

In all such cases, the LiveMail app would not progress through the “Windows LiveMail starting” screen regardless of how much time it computer would be left idle for. Windows LiveMail simply does not go any further than the “Windows LiveMail starting” screen and does not even display any error messages or codes that can be used to shed some light on the problem. Fortunately for anyone suffering from this problem, the issue can indeed be fixed. Of all things, this issue can be fixed by simply deleting the Calendars folder located in a certain AppData directory.  As bizarre as it may sound, deleting the Calendars folder is the best solution available for this problem at this time. You should not have any reservations about deleting the Calendars folder as LiveMail will automatically create a new Calendars folder as soon as you fire it up. To fix this problem, you need to:

Open Windows Explorer.

Click on Organize in the top-left corner and click on Folder and search options.

Navigate to the View

Enable the Show hidden files, folders and drives option, click on Apply and then click on OK.

This will unhide hidden folders such as AppData.

Navigate to the following directory:

C:\Users\<Username>\AppData\Local\Microsoft\Windows Live Mail\

Locate a folder named Calendars, right-click on it and click on Delete.

2015-11-24_191744

Launch the LiveMail This LiveMail app should now launch successfully and go all the way through the “Windows LiveMail starting” screen. In addition, once the program starts successfully, it will create a new Calendars folder, so no functionality will be compromised.

The post BEST FIX: Windows Live Mail Stuck at Starting Screen appeared first on Appuals.com.

BEST FIX: Error 0x80004001 When Backing Up Data

$
0
0

The most effective way to make sure that your data remains safe at all times is to back it up. While the Windows Operating System now provides a variety of different ways that can be used to back the data on a computer up, there is nothing quite like physically backing up all valuable data to an external hard drive. People quite commonly back the data they value up to external hard drives, but this process sometimes does not go their way. One such instance is when the user is faced with error 0x80004001 while trying to back data up to an external hard drive.

Error 0x80004001 is accompanied by an error message that states there is not enough free space on the external hard drive to back the data up. In most instances in which this error appears, that really is the case and the only solution the user has is to either get another external hard drive which they can back their data up to or free up storage space on the same external hard drive. However, in the event that you are completely certain that the external hard drive has enough free storage space but are still greeted with error 0x80004001, the culprit behind the error may be file system issue. If that is the case, all you need to do to get rid of the issue is to run the CHKDSK utility on your external hard drive, and this utility will search for any system file errors and fix any that are found. To do so, you need to:

Open the Start Menu.

Search for cmd.

Right-click on the search result titled cmd and click on Run as administrator.

0x80004001 - 1

Type chkdsk /f E: into the elevated Command Prompt, replacing E with the alphabetical letter designated to your external hard drive by your computer (F – for example). Press the Enter key to execute the command.

0x80004001 - 2

Wait for the CHKDSK utility to successfully find and fix any and all system file errors on your external hard drive. Once the utility has worked its magic, you should no longer get error 0x80004001 when trying to back data up to your external hard disk.

0x80004001 - 3

The post BEST FIX: Error 0x80004001 When Backing Up Data appeared first on Appuals.com.

BEST FIX: Can’t Open Photo Library Using This Version of iPhoto

$
0
0

Up until this year when it was replaced by the Photos app, iPhoto was Apple’s resident digital photo manipulation program. Mac users could utilize the photo management and manipulation prowess that iPhoto had to offer to organize, sort through, share and even edit the photographs stored on their Mac device. In addition to all that, iPhoto could also be used to turn ordinary photographs into mesmerizing and memorable slideshows. However, the iPhoto app has its own unique flaws, one of which was the “You can’t open your current photo library using this version of iPhoto” error.

To be more specific, this error stated “You can’t open your current photo library using this version of iPhoto.  You have made changes to your photo library using a newer version of iPhoto. Please quit and use the latest version of iPhoto.” This error would show up regardless of what version of iPhoto was on the affected Mac – even if it was the latest version – and would render the iPhoto app completely unusable, which is what made this a big problem to begin with. The cause of this problem has something to do with your photo library being damaged or completely destroyed, so the solution is to simply rebuild your photo library. The following are the two methods that you can use to rebuild your photo library and fix this problem:

Method 1: Rebuild your photo library from automatic backup

Hold down both the Command and Option/Alt keys, and while doing so, launch iPhoto. In the dialog that opens up, choose to rebuild your iPhoto library. Select Repair the iPhoto Library Database and then open the repair options again and choose Rebuild iPhoto library database from automatic backup. Then TEST, if it still won’t work then proceed to Method 2.

Method 2: Download iPhoto Library Manager and use its rebuild feature

iPhoto Library Manager is a nifty app for the Apple Mac that, among many other things, can be used to rebuild your iPhoto library. To do so, you need to:

Go here and download iPhoto Library Manager.

Navigate to and use its Rebuild

The Rebuild feature of the app will create an entirely new iPhoto library using the data in the xml file. Once the app is done rebuilding your iPhoto library, you might not get elements such as your slideshows, books or calendars, but you will certainly get your albums and keywords back.

This method, as opposed to the method listed above, is completely non-destructive and non-intrusive as it creates an entirely new library based off the automatic backup data, leaving your old iPhoto library completely untouched. If something goes wrong or if you don’t like your new library, you can simply revert to your old one.

If the method in this guide doesn’t work, then check this guide out. The title says Yosemite, but it does work on most versions.

The post BEST FIX: Can’t Open Photo Library Using This Version of iPhoto appeared first on Appuals.com.


BEST FIX: Windows 10 Installation Error 0x800700D

$
0
0

Since quite a significant percentage of the Windows users who chose to upgrade their computers to Windows 10 from previous versions of the Operating System were encountering a variety of different problems, many (more computer-savvy) consumers decided to perform clean installs of Windows 10 instead. A clean install is when an Operating System is installed onto a computer that does not already have an Operating System on it.

However, it is not as though there is absolutely no chance of you running into any walls when performing a clean install of Windows 10. One of the most common walls that you might run into when performing a clean install of Windows 10 – a wall that is quite tall – is error 0x800700D. Error 0x800700D appears after your computer boots from the installation media and runs the Windows 10 setup, you choose the language, and a message stating “Setup is starting” appears. After the computer displays error 0x800700D, the installation fails.

Error 0x800700D basically means that a file that is absolutely critical to the installation of Windows 10 is either damaged or completely missing from the installation media. Since that is the case, as long as you use the same installation media with the damaged or missing file, you will get the same result (error 0x800700D) regardless of how many times you try to perform a clean install of Windows 10. The only solution to this problem is to create an entirely new installation media using a completely new medium or by wiping the medium that you were using before clean and then reusing it. To do so, you need to:

First and foremost, get your hands on another computer that can download the Windows 10 ISO (basically any computer that has an internet connection).

If you have the Windows 10 ISO File then either use Rufus (see steps here) or Download the Media Creation Tool from here. With the media creation tool, you can download the ISO for Windows 10 if you don’t have one. Run the downloaded program and follow the setup dialogs to download and burn the Windows 10 Media to USB. (see media creation tool steps here)

Once you’ve got the working ISO on a USB. Boot your PC / Laptop from it to install Windows 10.

The post BEST FIX: Windows 10 Installation Error 0x800700D appeared first on Appuals.com.

BEST FIX: Sounds Playback Menu Pops UP on Windows 10

$
0
0

A few Windows 10 users from around the globe have reported of an issue where the Sound playback and recording device menu pops up every single time they login. This problem can be quite irritating as no one wants an unnecessary menu to open up every time they log into their computer. This issue, in almost all cases, is caused by a service or startup item that is configured to start as soon as you log in. As soon as the culprit service or startup item starts, the sound playback and recording device menu pops up.

Fortunately for you, this issue can be fixed by putting your Windows 10 computer through a clean boot for quite a significant number of times to find the culprit and then disable it, although fixing this issue may require a substantial amount of effort on your part. To fix this problem, you need to first determine whether the cause of this problem is a service or a startup item and then determine what service or startup item is causing the problem so that you can disable it.

To determine if the cause of the problem is a service:

Open the Start Menu, search for msconfig and then open the search result titled msconfig.

2015-11-25_024348

Navigate to the Startup tab, click on Open Task Manager. In the Task Manager window, navigate to the Startup tab, individually click on all of the items in the list and then click on Disable. Once done, close the Task Manager

sound playback menu-3 sound playback menu-2

Click on OK in the System Configuration window and restart your computer. If the Sound playback and recording device menu pops up when you log into your account after your computer boots up, the culprit behind the problem is not a startup item but a service that starts running on system startup.

sound playback menu-4

To determine if the cause of the problem is a startup item:

Open the Start Menu, search for msconfig and then open the search result titled msconfig.

Navigate to the Services tab, make sure that the Hide all Microsoft services option is enabled and has a checkmark beside it and click on disable all.

sound playback menu-5

Click on OK and restart your computer when prompted to do so.

sound playback menu-6

When your computer boots up, log into your user account to see if the Sound playback and recording device menu pops up. If the menu pops up, the culprit is not a service that runs on startup and is a startup item instead.

If you have determined that the cause of the problem is a service:

Open the Start Menu, search for msconfig and then open the search result titled msconfig.

Navigate to the Services tab, make sure that the Hide all Microsoft services option is enabled and has a checkmark beside it and click on disable all.

sound playback menu-7

Enable any one service of your choice, click on OK and then restart your computer.

sound playback menu-8

If the Sound menu does not pop up when you login after your computer boots up, the service you enabled is not the culprit behind the problem.

Keep on repeating Steps 2 and 3, each time disabling all the services and then enabling a different one than the one you enabled before.

Keep on doing so until you finally restart your computer with the culprit service enabled – the service that, after you restart your computer, causes the Sound menu to pop up upon sign-in.

If you have determined that the cause of the problem is a startup item:

Open the Start Menu, search for msconfig and then open the search result titled msconfig.

Navigate to the Startup tab and click on Open Task Manager. In the Task Manager window, navigate to the Startup tab, individually click on all of the items in the list and then click on Disable.

sound playback menu-9

sound playback menu-10

Enable any one item on the list and then close the Task Manager. In the System Configuration window, click on OK and then restart your computer.

If the Sound menu does not pop up when you login after your computer boots up, the startup item you enabled is not what is causing the problem.

Keep on repeating Steps 2, 3 and 4, each time disabling all the startup items on the list and then enabling a different one than the one you enabled before.

Keep on doing so until you finally restart your computer with the culprit startup item enabled – the startup that, after you restart your computer, causes the Sound menu to pop up upon sign-in.

Once you have determined which startup item or service is causing the Sound menu to pop up upon login, all you have to is enable all disabled services/startup items except for the culprit, click on Apply, click on OK, and then restart your computer. Since the culprit service or startup item will no longer start when you log in, you will no longer see the Sound menu upon signing in.

The post BEST FIX: Sounds Playback Menu Pops UP on Windows 10 appeared first on Appuals.com.

BEST FIX: Account has been disabled. Please see your System Administrator

$
0
0

One of the most terrifying problems that any Windows 10 user has ever faced is the “Account has been disabled” problem. The “Account has been disabled” error message (or the “Account has been disabled. Please see your System Administrator” message – to be more specific) basically says that a user account has, for some reason, been disabled.

The “Account has been disabled” problem can appear either after something goes wrong and you are locked out of your user account for some reason or your computer shuts down inappropriately while you are in the process of creating a user account after a fresh Windows 10 installation or upgrade. If this problem appears after your computer shuts down inappropriately while you are in the middle of creating a user account after a fresh Windows 10 installation or upgrade, you will be greeted with a user account named defaultuser0 when you boot the computer up, and any attempts to login to this user account will be greeted by the “Account has been disabled” problem.

The “Account has been disabled” issue completely locks the user out of their user accounts, and that can be a pretty big problem for the average Windows 10 user as any Windows 10 user would be furious if they are simply locked out of their computer for no apparent reason. Well, the following are the two solutions that you can use to fix the “Account has been disabled” issue by yourself:

Solution 1: Create a new account with administrative privileges in Safe Mode

The folks at Microsoft know just how much of a goof the average Windows 10 user can be, which is why all copies of Windows 10 have a hidden account named Administrator that has administrative privileges. In the event that something happens to your primary Windows 10 account, you can lean on this hidden Administrator account and create a new account with administrative privileges for yourself using this account. The hidden Administrator account is only accessible when a computer is in safe mode.

At the sign-in screen, hold down the Shift key on your keyboard and click on the Power button located at the bottom of the screen. From the menu that pops up, click on Restart, all while holding down the Shift.

2015-11-25_035632

Only let go of the Shift key when the Advanced Recovery Options menu appears.

In the Advanced Recovery Options menu, click on Troubleshoot > Advanced options > Startup settings > Restart. When your computer restarts and you are greeted with a blue screen with a horde of different options, press the numerical key on your keyboard that corresponds with the Enable Safe Mode with Command Prompt

2015-11-25_035843

When your computer boots up, you will be able to see the hidden Administrator Log into it.

Open the Start Menu, type cmd into the Search bar and click on the search result titled cmd to open a Command Prompt.

One by one, type the following commands into the Command Prompt, making sure that you press Enter after typing in each one:

net user /add <name of the user account you want to create>

net localgroup administrators <name of the user account you want to create> /add

2015-11-25_040156

Once both commands have been executed, a new user account with administrative privileges will have been created. Restart your computer, type shutdown /r in the same prompt, and you will be able to login to your new account once your computer boots up.

Solution 2: Perform a System Image Restore

The second method that you can use to fix the “Account has been disabled” problem is to perform a System Image Restore. Performing a System Image Restore will restore your computer to a previous point in time, a point at which the “Account has been disabled” problem did not exist. Performing a System Image Restore will not result in a loss of personal files or data but can result in the deletion of apps or updates that were downloaded and installed after the point in time to which you are restoring your computer. And best of all, you can perform a System Image Restore without having to login to your user account.

At the sign-in screen, hold down the Shit key on your keyboard and click on the Power button located at the bottom of the screen.

From the menu that pops up, click on Restart, all while holding down the Shift

Only let go of the Shift key when the Advanced Recovery Options menu appears.

In the Advanced Recovery Options menu, click on Troubleshooting > System image restore.

When provided with system restore points to choose from, choose a point at which the “Account has been disabled” issue did not exist and begin the restoration process.

When (or if) prompted to select an account, click on the account titled Administrator.

Wait for the System Image Restore to be completed. Once the process has been completed, you will be prompted to restart your computer, and there will be no trace of the “Account has been disabled” problem once your computer boots up.

The post BEST FIX: Account has been disabled. Please see your System Administrator appeared first on Appuals.com.

BEST FIX: Microphone Not Working After Windows 10 Upgrade

$
0
0

Audio issues and problems have been pretty abundant on Windows 10, especially on its earlier builds. One of the most frustrating and common audio issues that Windows 10 users have faced and stand to face is one that causes a computer’s microphone to stop functioning following a Windows 10 upgrade. In most cases, the cause of this problem has something to do with the audio driver on the computer. This problem also happens to be fixable. In fact, there are quite a lot of possible fixes for this problem. The following are the four most effective solutions that you can use to fix this problem and get your computer’s microphone to start working again:

Solution 1: Uninstall your audio driver

Uninstalling your audio driver has pretty good chances of getting your microphone to start working again. Don’t worry about uninstalling your audio driver as your computer will automatically reinstall it once you reboot.

Right-click on the Start Menu button to open the WinX Menu. Click on Device Manager in the WinX menu.

winx-devmgr

Double-click on Sound, video and game controllers to expand that section. Locate your audio driver (Realtek High Definition Audio – for example) and right-click on it. Click on UninstallRestart your computer.

2015-11-23_200739

Once your computer boots up, your audio driver will be detected and reinstalled automatically, and your microphone should start working again after that happens.

Solution 2: Make sure that your microphone has been enabled

Right-click on the Volume icon in the system tray and click on Recording devices.

2015-11-25_034828

Right-click on an empty space in the window and make sure that both the Show disconnected devices and Show disabled devices options have check marks beside them. If one or both of them don’t have check marks, click on them and they will be enabled and check marks will be placed beside them.

2015-11-25_035027

Right-click on Microphone and click on Properties.

2015-11-25_035139

Make sure that the dropdown menu in front of Device usage is set to Use this device (enable). If it is set to don’t use this device (disable), click on the dropdown menu to open it and click on Use this device (enable). Click on Apply and then on OK on your way out. Now check to see if your microphone has started working.

2015-11-25_035317

Solution 3: Disable any and all audio enhancements

If you have any audio enhancements enabled on your computer, they may be messing around with your computer’s microphone and causing it to not work. If that is the case, you can go here and perform Solution 4 to disable any and all audio enhancements that have been turned on, effectively fixing the issue.

Solution 4: Switch to Windows’ generic audio driver

If none of the solutions listed and described above work for you, there is a pretty good chance that switching to Windows’ generic audio driver – an audio driver that all computers running on the Windows OS come with by default – will get your microphone to start working again. To stop using your computer’s audio driver and start using the generic Windows audio driver, go here and perform Solution 3.

The post BEST FIX: Microphone Not Working After Windows 10 Upgrade appeared first on Appuals.com.

BEST FIX: Camera App Error Code 0xA00F4246 / 0xC00D36B6 on Lumia

$
0
0

The Windows 10 Mobile Insider Preview is just that – an unfinished, possibly unstable preview of the latest iteration of Windows 10 Mobile. The Windows 10 Mobile Insider Preview is not meant to be a complete and final version of the firmware that is represents, which is why Windows Insiders may face one or more of a plethora of different issues when they decide to join the Insider Program and upgrade to the Insider Preview. One of the problems that a Windows Insider stands to suffer from is error code 0xA00F4246 (0xC00D36B6) – an error code that shows up when they try to open any application that has to do with their camera, an application such as the default Camera app or Windows Camera, and causes the app to crash.

Not being able to use their camera can be quite unsettling and agitating for the average Windows Insider, especially if the phone that they upgraded to the Windows 10 Mobile Insider Preview is their primary phone. Well, if you are suffering from error code 0xA00F4246 (0xC00D36B6) and are not able to use your camera through applications such as Windows Camera, the following are the three solutions that you can try and use to fix the issue:

Solution 1: Perform a Hard Reset

Hold down the Volume Down button, and while doing so, quickly press and release the Power This will make the device vibrate.

Release the Volume Down button when an exclamation mark appears on the screen.

Press the following hardware buttons one at a time in the exact same order they are listed in:

Volume Up > Volume Down > Power > Volume Down

The device will then vibrate, reboot, show the Nokia flash screen and then go to the spinning gears install screen. Once the spinning gears process completes, the device will be reset and you should now be able to use your device’s camera through the default Camera app (or any other camera app, for that matter).

Solution 2: Roll back to a version of Windows Mobile that the camera worked on

If a Hard Reset does not fix error code 0xA00F4246 (0xC00D36B6) on your device, your only remaining option is to roll back to a previous version of Windows Mobile – a version on which the camera worked on all applications, including Windows Camera. Rolling back to a previous version of Windows Mobile may wipe some or all of your personal files and data, so be sure to backup anything that is of value. To do so, you need a Windows computer and a USB cable which can be used to connect your phone to your computer, and you need to:

Go here to download the Windows Phone Recovery Tool (designed for Lumia phones running on Windows 8 or higher). If you have an older Lumia device or other Nokia phone, you will have to go here to download the Lumia Software Recovery Tool.

Install the recovery tool on your computer.

Open the recovery tool.

Connect your phone to the computer via the USB cable. Wait for your phone to be detected automatically. If your phone is not automatically detected, click on the “My phone was not detected” button and follow the onscreen instructions.

Once your phone has been detected, select your phone’s model in the Recovery Tool window.

The next screen will contain all of the available Operating System versions for your phone. Select the version that you want to roll back to (the one on which your phone’s camera worked perfectly) and click on Reinstall software.

0xa00f4246

Click on Continue on the next screen.

The files required for the installation of your selected firmware will definitely be larger than 1 Gigabyte, so you will have to patiently wait for the firmware to be downloaded and then installed on your phone, making sure that the USB connection between your computer and phone stays secure throughout the process.

Once the installation of your selected firmware has been completed, you will receive a success message stating “Operation successfully completed”. You are free to restart your device after this message appears.

Solution 3: Wait for a new firmware update

If you upgraded to a specific version of the Windows 10 Mobile Insider Preview and are unable to use your camera due to error code 0xA00F4246 (0xC00D36B6), chances are that you are not alone and that Windows is already aware of the issue. Since that may be the case, if you can bear with the idea of not being able to use your device’s camera for a couple of weeks or so, you can choose to simply stay on the Windows 10 Mobile Insider Preview and wait for the next firmware update to the Insider Preview. Hopefully, the next firmware update will fix the issues you are facing with your device’s camera and error code 0xA00F4246 (0xC00D36B6) on the Windows 10 Mobile Insider Preview.

The post BEST FIX: Camera App Error Code 0xA00F4246 / 0xC00D36B6 on Lumia appeared first on Appuals.com.

Viewing all 4542 articles
Browse latest View live